Get a Quote

Tag: Orange County

  • How to Clean Before Home Sale Without Overdoing It

    How to Clean Before Home Sale Without Overdoing It

    A buyer may not remember every fixture in a home, but they will notice sticky cabinet handles, dusty ceiling fans, water spots on glass, and a kitchen that feels less than fresh. To clean before home sale is not about making your house look lived in by no one. It is about helping buyers see a well-cared-for property and imagine their own life there.

    For sellers juggling repairs, paperwork, moving plans, and showings, cleaning can quickly become one more source of pressure. A focused approach makes a real difference. Put your effort into the areas buyers see first, touch most often, and use to judge the overall condition of the home.

    Why a Clean Home Changes the Showing Experience

    Cleanliness affects more than appearance. It changes how a space feels. Bright counters, clear floors, and fresh bathrooms make rooms seem more open and easier to maintain. Buyers can pay attention to the layout, storage, natural light, and finishes instead of wondering what has been neglected.

    That matters in a competitive market such as Orange County, where online photos and early showings can shape a buyer’s interest quickly. A clean home supports better listing photos and helps each room feel ready from the first walk-through.

    There is also a practical reason to clean thoroughly before listing. Dirt can hide small issues that deserve attention, such as a leak under a sink, grime around a shower door, or scuffs that need a quick touch-up. Cleaning gives you a closer look at the home before buyers and inspectors do.

    Start With the Spaces That Carry the Most Weight

    You do not need to scrub every hidden corner before the first showing. Start with the rooms that create the strongest impression: the entry, kitchen, bathrooms, main living areas, and primary bedroom. These are the places where buyers tend to pause, open drawers, look closely, and picture their routines.

    Make the entry feel simple and welcoming

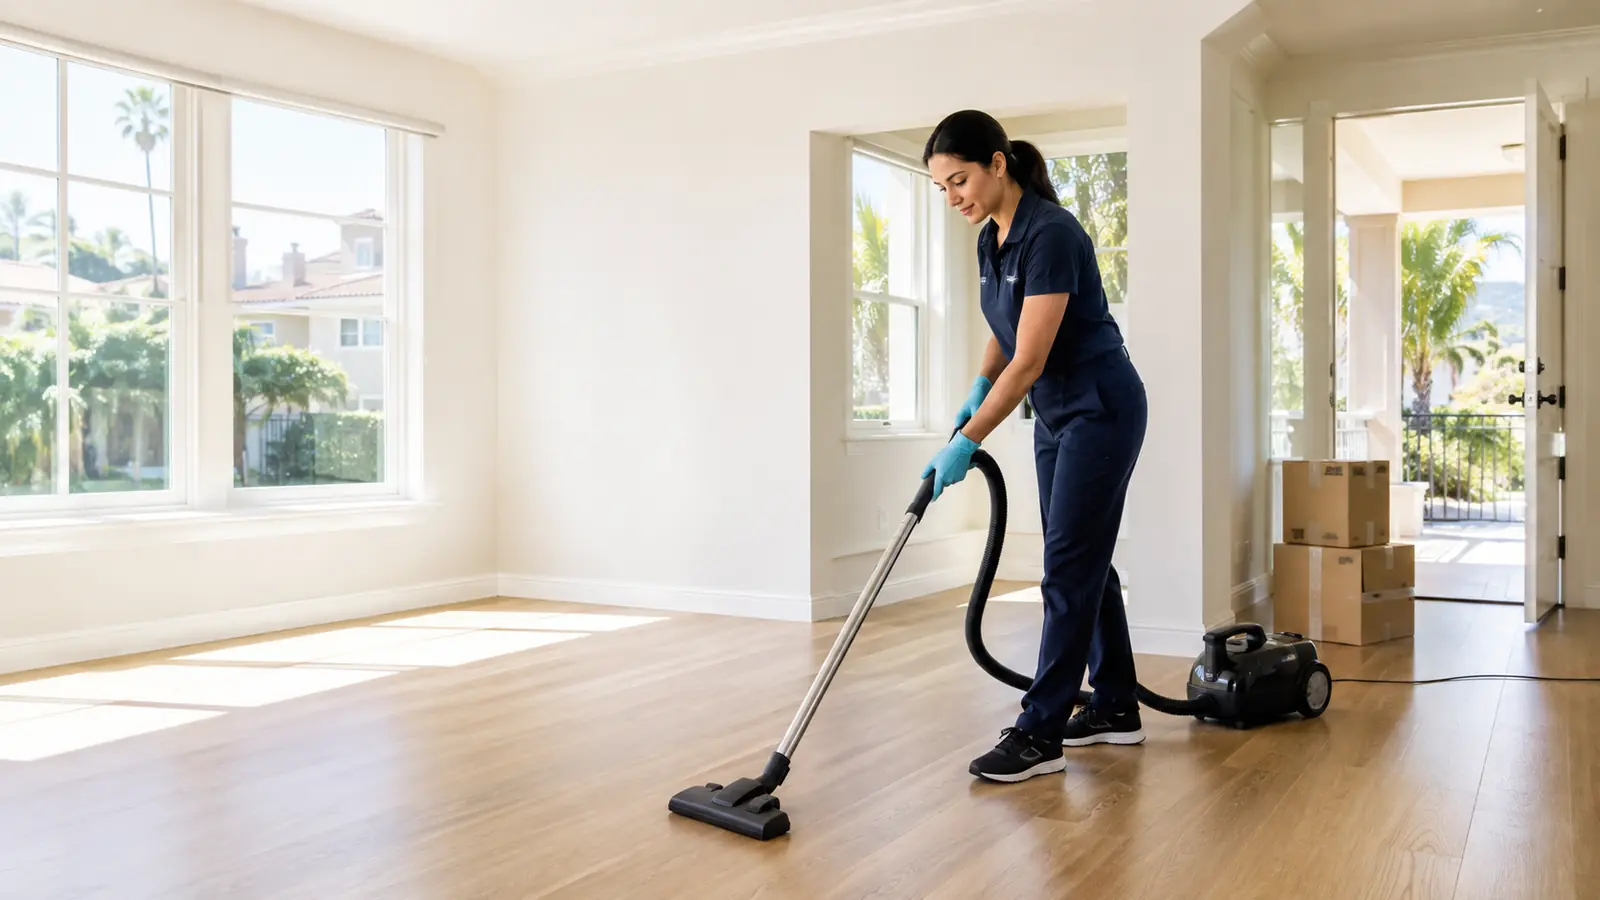
    The entry sets expectations for the rest of the home. Sweep or vacuum thoroughly, remove shoes and extra decor, wipe the front door and hardware, and clean the glass if there is one. A clean doormat and an uncluttered path are small details, but they signal care before anyone steps inside.

    Outside, clear cobwebs near the door, pick up leaves, and wipe down visible patio furniture. Curb appeal is not only about landscaping. It is also about making the property feel maintained from the sidewalk to the threshold.

    Give the kitchen a true reset

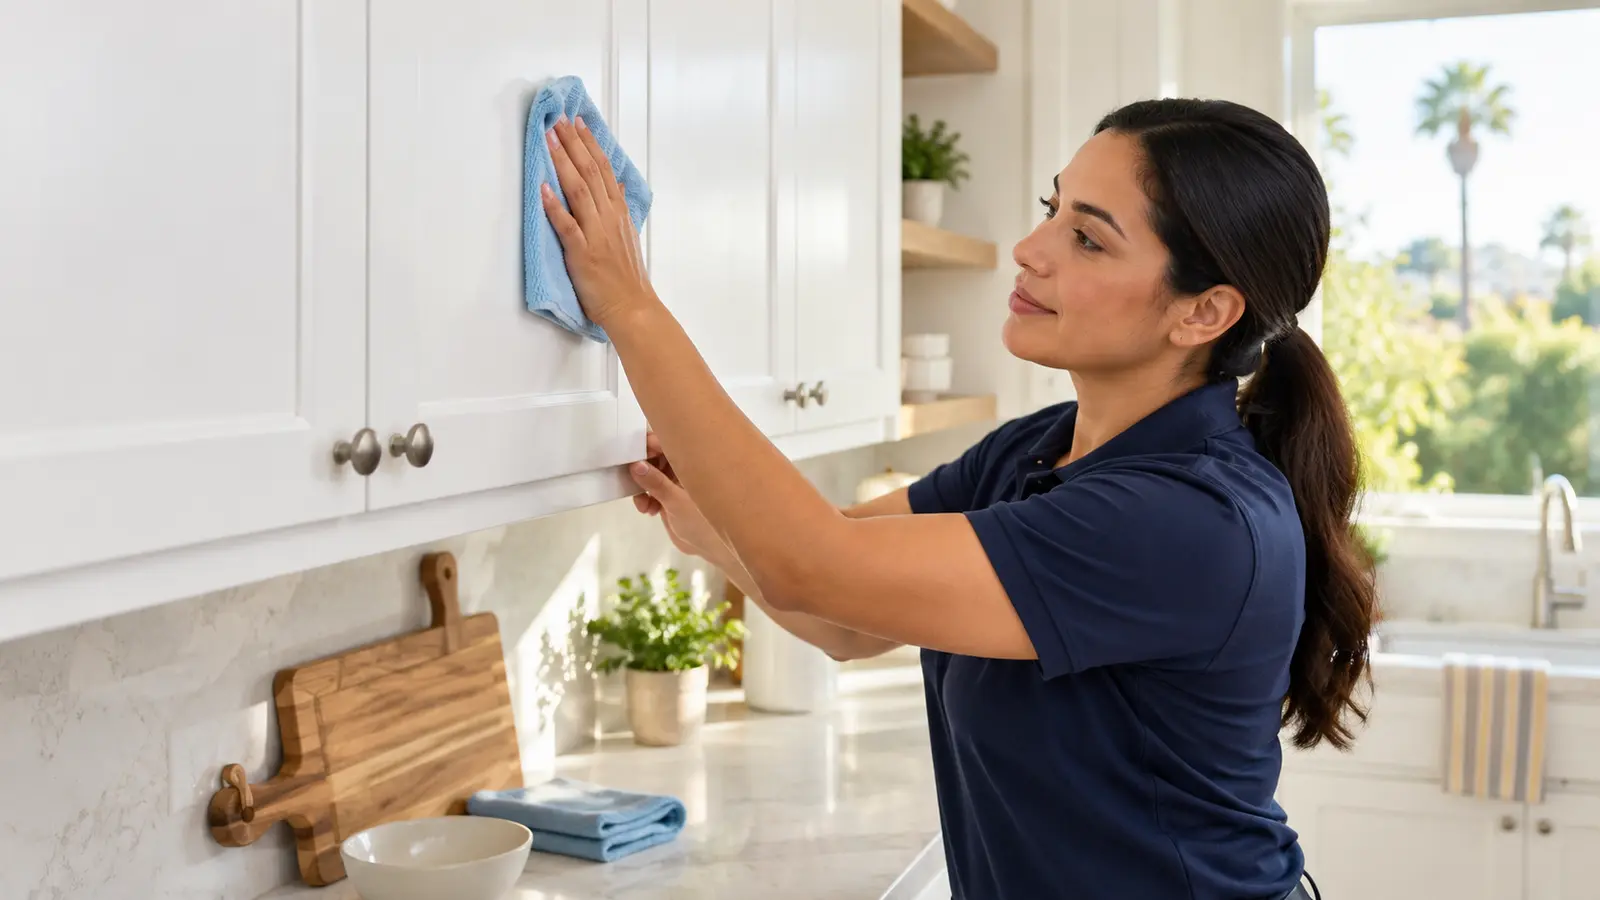
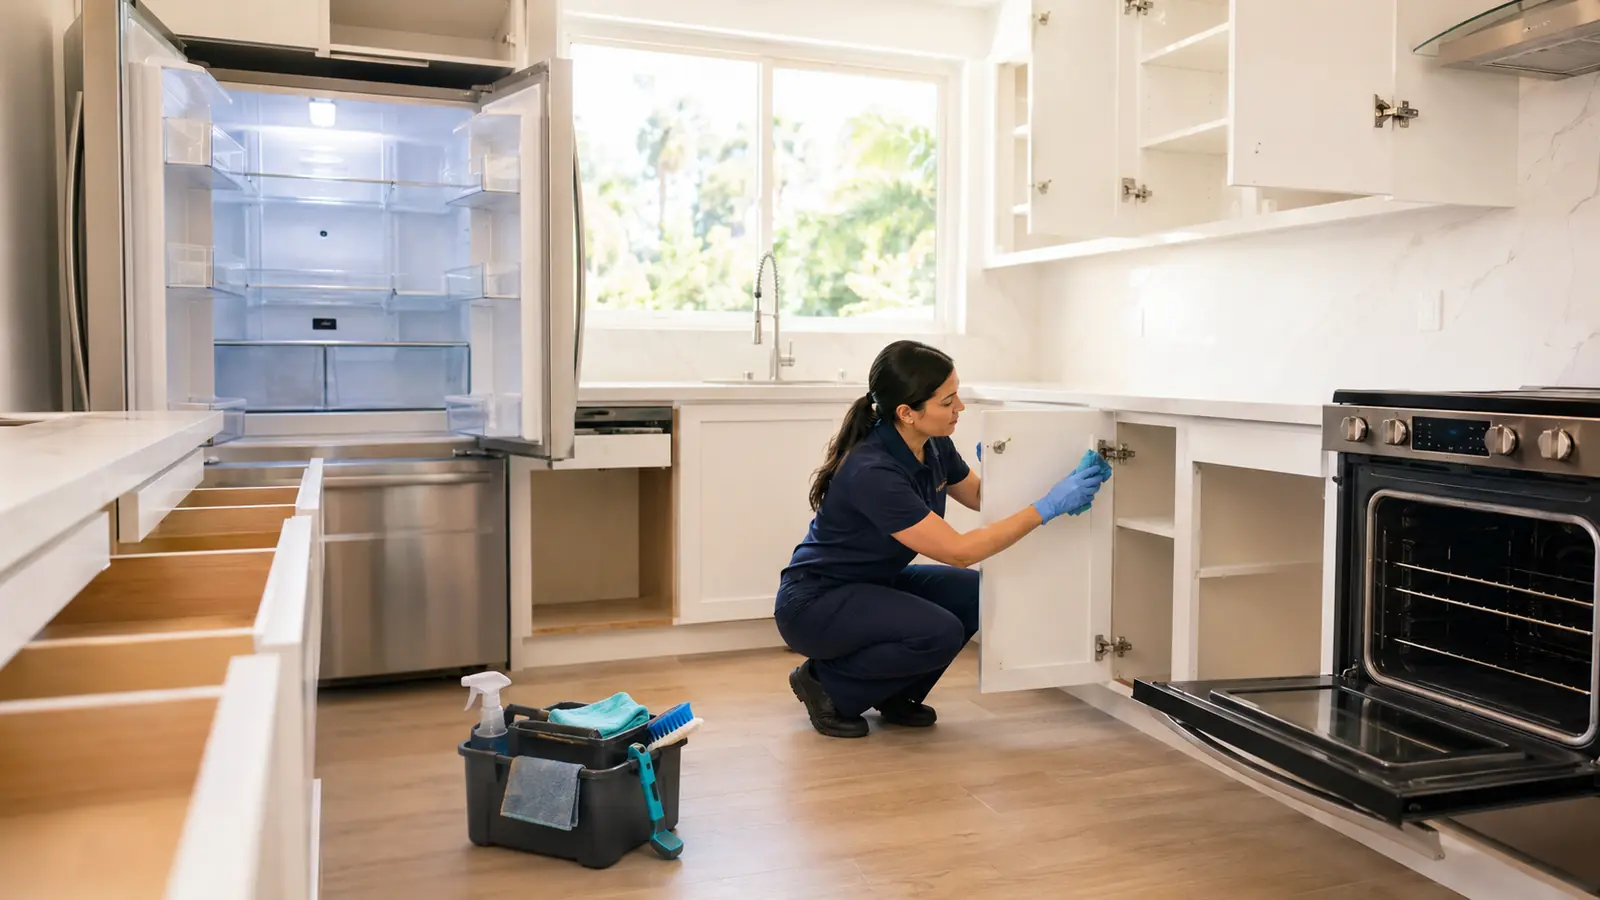
    Kitchens receive close attention because buyers know they are high-use spaces. Clear countertops as much as possible, then clean the surfaces underneath. Degrease the stovetop, clean the microwave inside and out, wipe cabinet fronts, and polish the sink and faucet until they look cared for.

    Do not overlook the refrigerator exterior, dishwasher door, pantry shelves, or the floor along cabinet edges. If your refrigerator is staying with the home, clean the inside as well. A nearly empty, clean refrigerator looks much better than one filled with old containers and magnets.

    Let bathrooms look fresh, not merely picked up

    Bathrooms should feel clean enough that a buyer would be comfortable using them immediately. Remove personal products from counters, clean mirrors without streaks, scrub the toilet, and give extra attention to the shower, tub, grout, and fixtures. Replace worn towels with fresh, neutral ones if they will remain during showings.

    A bathroom does not need to look like a hotel bathroom. It should simply look clean, dry, and easy to care for. If mildew, heavy soap buildup, or stained grout will not lift with routine cleaning, consider whether a repair or restoration step makes more sense before listing.

    Clean What Buyers Touch and Look At Closely

    After the main rooms are addressed, work through the high-contact and high-visibility details. These tasks are often what make a home feel polished rather than rushed.

    Focus on these areas before photos and showings:

    • Light switches, door handles, cabinet pulls, and railings
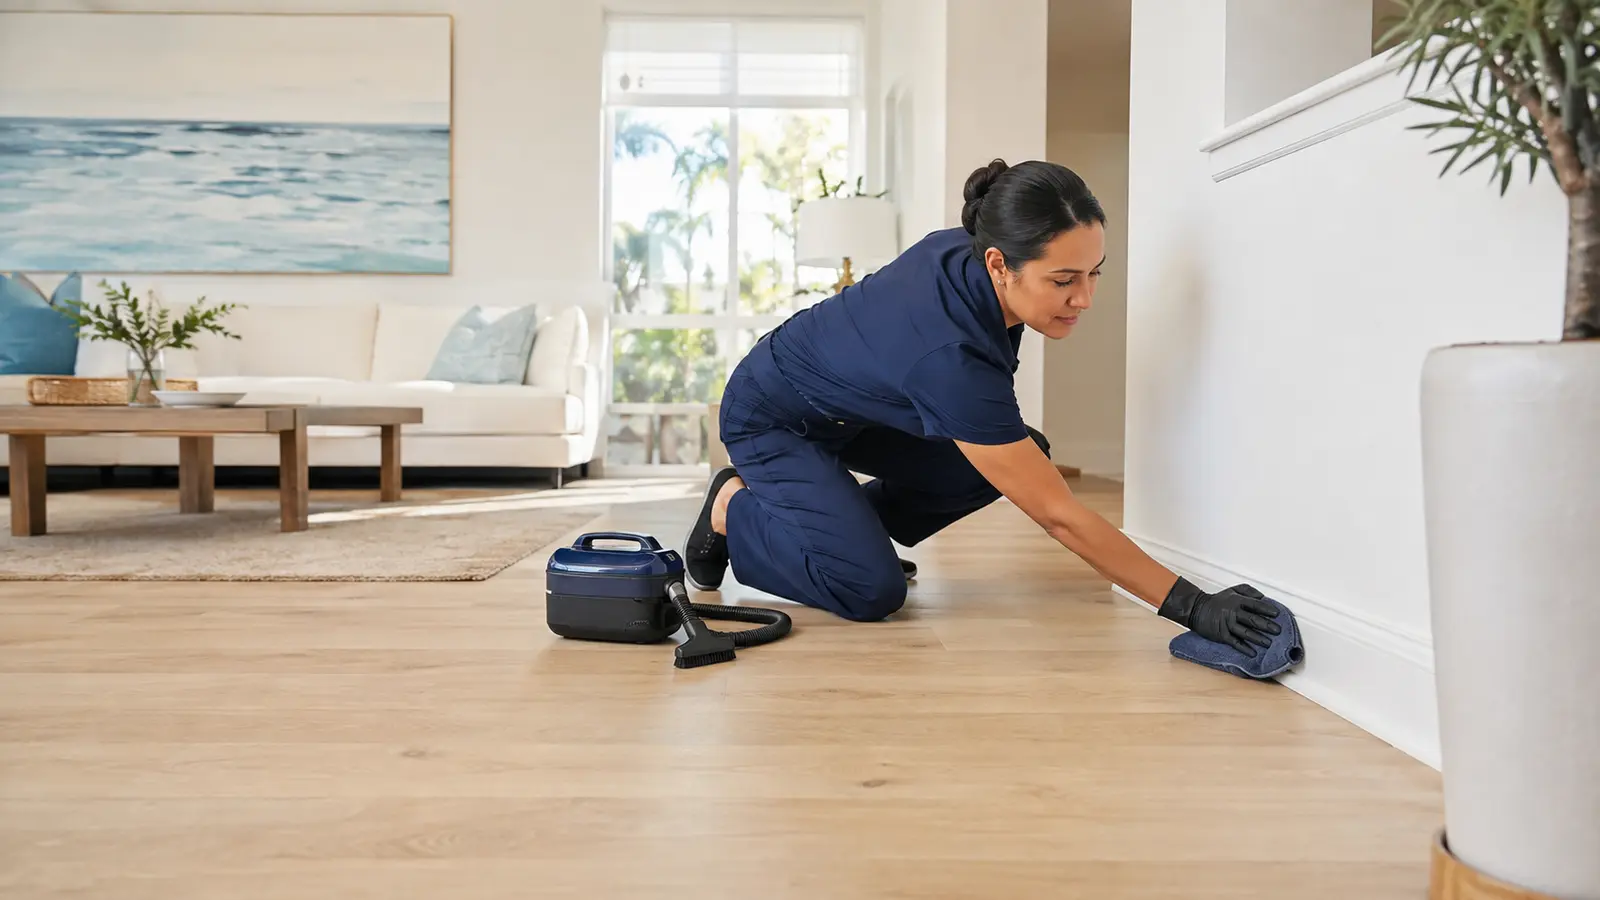
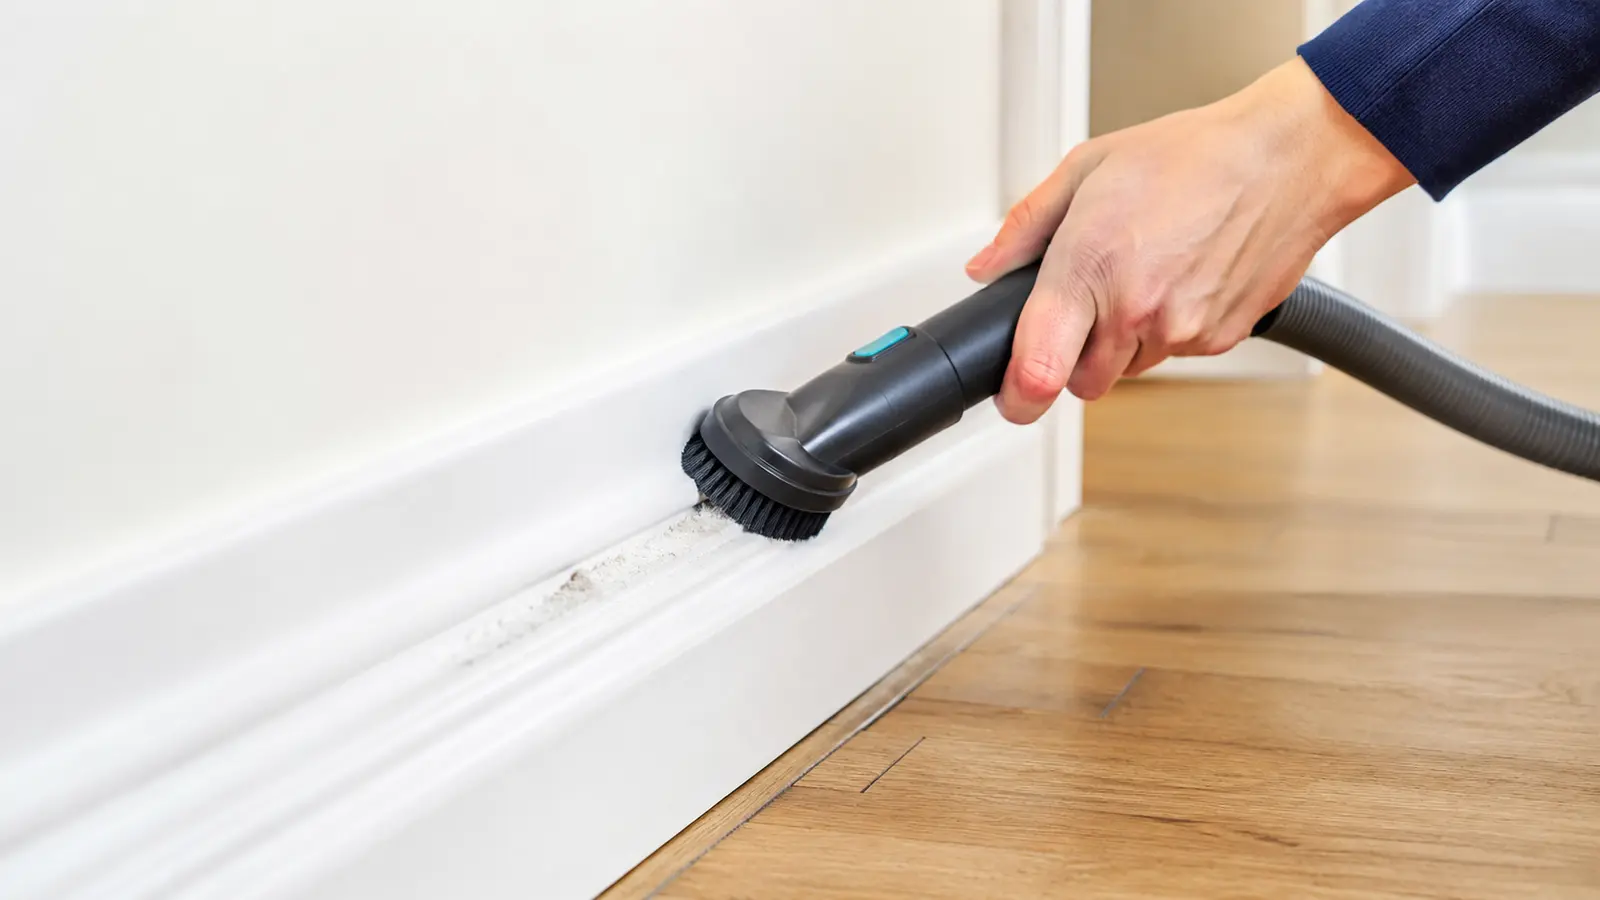
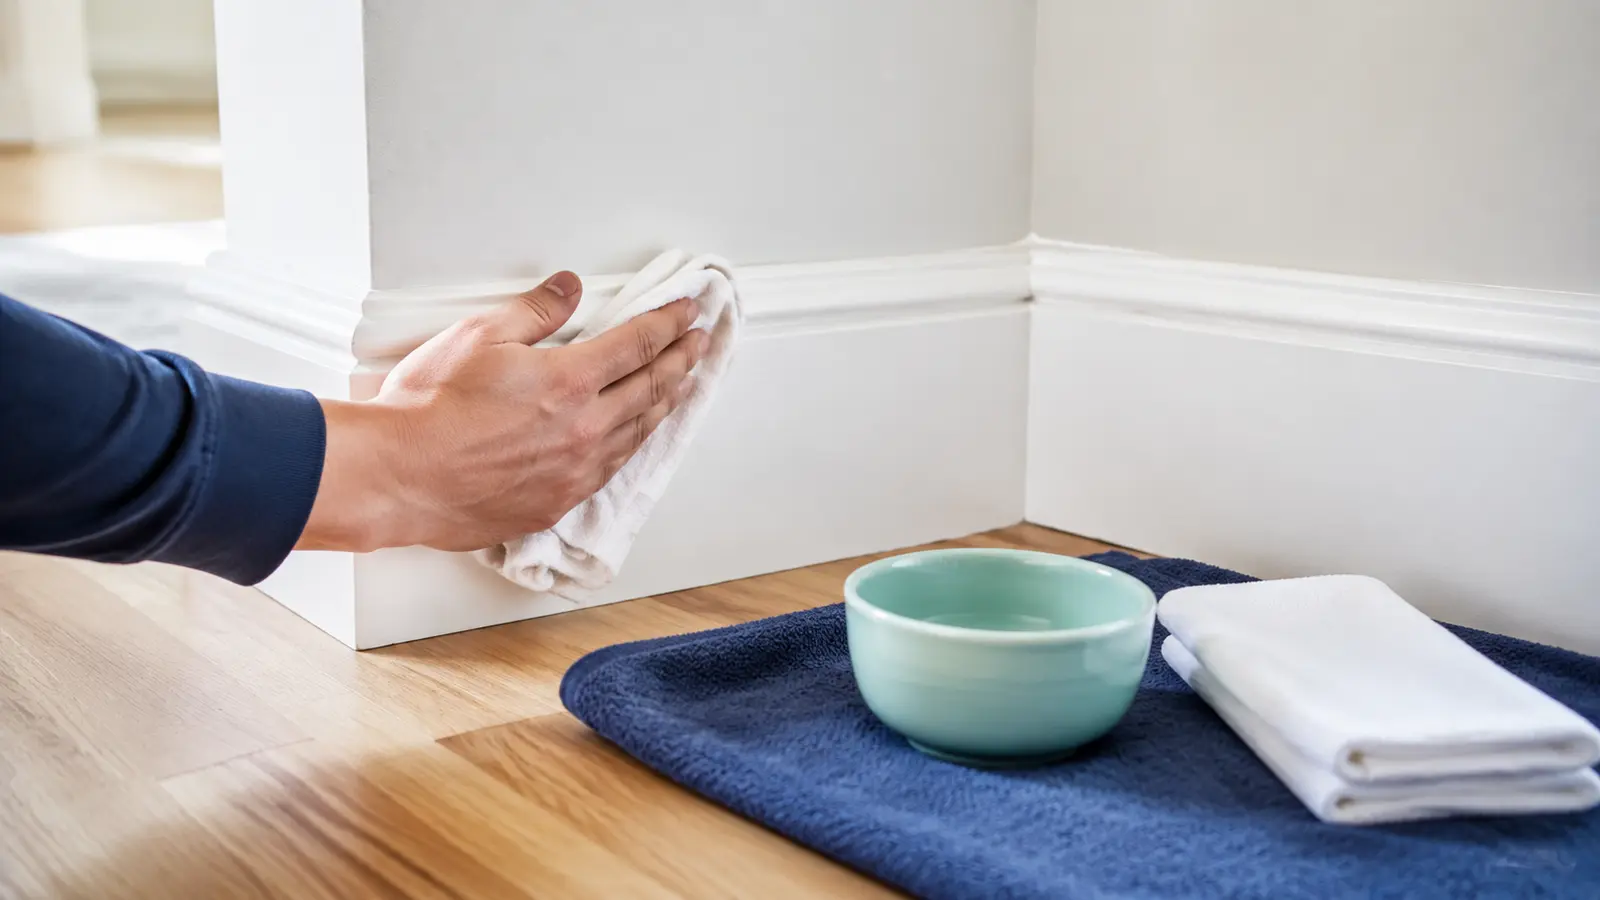
    • Baseboards, vents, ceiling fans, and window sills
    • Interior windows, mirrors, and sliding glass doors
    • Floors under furniture and along edges
    • Laundry areas, closet floors, and shelves
    • Pet areas, litter boxes, and any lingering odors

    Odor deserves special attention. Heavy fragrance may seem like a quick fix, but it can make buyers wonder what it is covering. Instead, remove trash, wash fabrics, air out the home, clean drains, and address the actual source. For homes with pets, a deep clean of upholstery, rugs, floors, and pet spaces can be especially worthwhile.

    Decluttering Is Part of Cleaning

    A spotless room can still feel crowded when every surface is full. Before selling, think of decluttering as visual cleaning. It allows the features of the home to stand out and makes storage areas look more useful.

    Pack away off-season clothes, excess countertop appliances, personal collections, and bulky furniture that interrupts the flow of a room. Closets and cabinets do not need to be empty, but they should not appear overfilled. Buyers often open them to assess storage, so leaving some breathing room helps.

    Personal photos are a judgment call. A few are fine in a lived-in home, but a large display can make it harder for a buyer to picture the space as their own. The goal is not to remove every sign of life. It is to create a calm, neutral setting where the home takes center stage.

    Know When a Standard Clean Is Not Enough

    Routine cleaning is often enough for a well-maintained home that is already fairly tidy. A deeper clean may be the better choice when the property has been occupied for years, there are pets or smokers, the home has been vacant, or the seller is preparing for professional photography on a tight schedule.

    Deep cleaning is also useful after repairs, painting, or staging work. Construction dust settles in places that are easy to miss, including vents, window tracks, baseboards, and cabinet interiors. Cleaning after the work is complete gives the home a finished appearance.

    There are trade-offs. If your budget is limited, prioritize a detailed cleaning of the kitchen, bathrooms, floors, glass, and main living areas over lower-impact projects. On the other hand, if the home has strong finishes, beautiful views, or a premium listing position, a thorough whole-home clean can protect the presentation you have worked hard to create.

    For sellers who need reliable help before a listing goes live, a professional cleaning team can handle the time-consuming details while you focus on the move. SRS Cleaning provides detail-oriented home cleaning for Orange County clients who want a property to feel fresh, orderly, and ready for its next chapter.

    Keep It Show-Ready After the Deep Clean

    The challenge is not always the initial cleaning. It is maintaining the result when showings begin. Keep a small, simple routine for each day the home may be viewed: make beds, put away dishes, wipe counters, empty trash, and do a quick check of bathrooms and floors.

    Store a basket or bin for last-minute items such as chargers, mail, pet supplies, and toiletries. Before leaving for a showing, place those items in the bin and take it with you or tuck it into the car. This is much faster than trying to find a permanent home for everything with ten minutes’ notice.

    If you have children or pets, plan for the reality of daily life rather than aiming for perfection. Keep cleaning supplies accessible, use washable throws to protect furniture, and schedule a more thorough refresh if the listing period extends. A practical plan is easier to maintain than an unrealistic one.

    A clean home will not replace accurate pricing, thoughtful repairs, or strong marketing. It can, however, remove distractions and help buyers focus on what your property offers. Give yourself enough time before photos and showings, and choose the level of cleaning that lets you hand over the keys feeling confident and at ease.
  • Office Kitchen Cleaning Checklist for Cleaner Shared Spaces

    Office Kitchen Cleaning Checklist for Cleaner Shared Spaces

    An effective office kitchen cleaning checklist separates quick daily resets from weekly detail work and monthly maintenance. Clean visible soil first, give the sink, counters, appliance handles, tables, and floor consistent attention, and assign responsibility so small messes do not become shared frustrations.

    A shared kitchen can look fine at the start of the day and feel neglected by lunchtime. Coffee drips collect under the machine, crumbs settle around the toaster, fingerprints build up on appliance handles, and someone leaves a mystery container in the refrigerator. The problem is rarely one dramatic mess. It is usually a series of small tasks that no one clearly owns.

    This guide turns those tasks into a practical daily, weekly, and monthly routine. Use it to clarify what staff can reset after use, what belongs in a regular office cleaning service, and what requires appliance-specific instructions or facilities support.

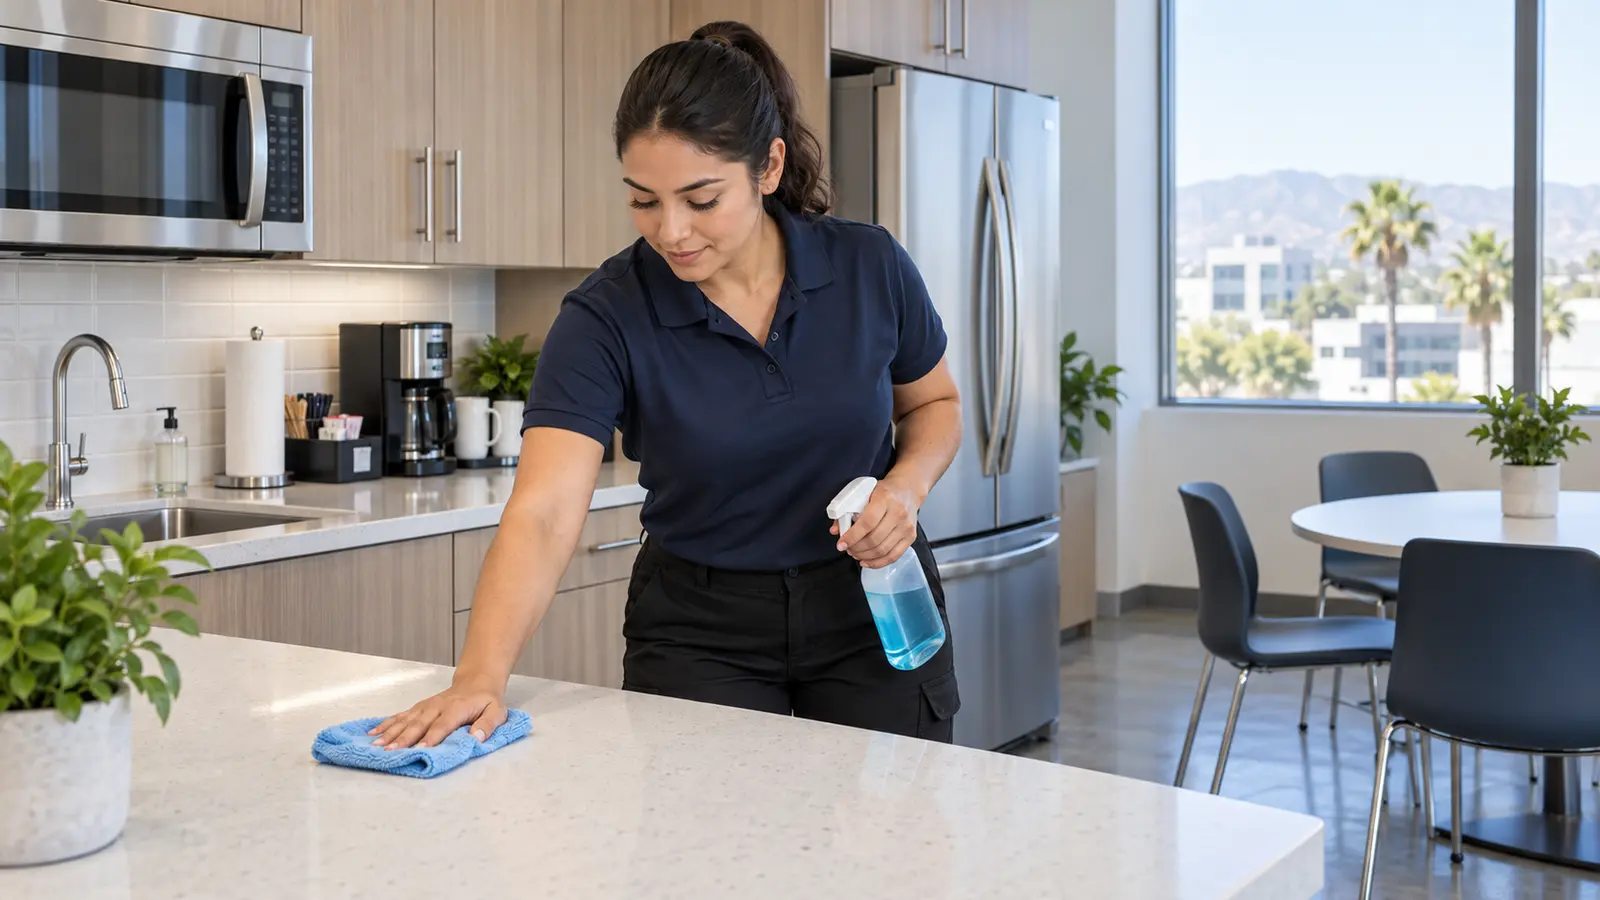
    Professional cleaner wiping a countertop in a bright shared office kitchen

    What supplies belong in an office kitchen cleaning kit?

    Keep the routine simple enough that the right tool is easy to find. A basic shared-kitchen kit may include:

    • Clean microfiber cloths separated by task or area
    • Paper towels for food spills when laundering is not practical
    • A nonabrasive sponge approved for the surface
    • Mild dish detergent
    • Surface cleaners approved by the counter and appliance manufacturers
    • Trash and recycling liners
    • A broom, dustpan, and damp-mopping supplies
    • Gloves or other protective equipment required by product labels
    • A refrigerator thermometer
    • A clearly labeled container for supplies, stored away from food

    Do not transfer chemicals into food or drink containers. Keep every product in its original labeled container, follow its directions, and never mix cleaning products. If a disinfectant is used, the EPA recommends reading the label, checking that the product is appropriate for the surface, observing the listed contact time, and using the required protective equipment.

    How should the shared kitchen be prepared?

    1. Post a short notice when the room needs to close temporarily. This prevents people from walking through a wet floor or placing food on a counter that is being cleaned.
    2. Remove dishes, food, and loose items. Return personal items according to the workplace policy rather than guessing whether something should be discarded.
    3. Check appliance instructions. Turn off or unplug small appliances when the manufacturer requires it, and allow hot surfaces to cool.
    4. Start with dry debris. Pick up crumbs and loose soil before introducing moisture.
    5. Work from cleaner areas toward dirtier areas. Use separate cloths for the sink, food-preparation surfaces, appliance exteriors, and floor-level tasks.
    6. Place a wet-floor sign when needed. Keep walkways clear until the floor is dry.

    What should be cleaned every workday?

    The daily reset should focus on visible mess, food residue, shared touchpoints, and anything that could create odors or attract pests. The CDC distinguishes cleaning from disinfecting: cleaning removes dirt and most germs, while disinfecting is a separate step used when appropriate. Clean a surface before disinfecting it, and use only products suitable for that material.

    • Clear crumbs and spills from counters and tables.
    • Wash or load shared dishes according to office policy.
    • Wipe the sink basin, faucet, and surrounding splash area.
    • Clean the refrigerator, microwave, dishwasher, and cabinet handles.
    • Wipe the coffee station, including drips under the machine and around dispensers.
    • Remove food residue from the microwave interior as soon as practical.
    • Empty trash, recycling, and compost before odors or overflow develop.
    • Replace liners and wipe visibly soiled bin lids or touchpoints.
    • Sweep crumbs from corners, under table edges, and around appliances.
    • Damp-mop visible spills and leave the floor dry and safe.
    • Restock soap, paper products, and shared supplies.
    • Report leaks, pests, broken seals, or appliance problems instead of cleaning around them indefinitely.

    What belongs on the weekly checklist?

    Weekly work catches buildup that a fast daily reset may miss. Adjust the frequency to actual use: a kitchen serving a large team or several shifts may need these tasks more often.

    • Clean the microwave interior, turntable, vents, handle, and exterior.
    • Wipe refrigerator shelves, drawer fronts, handles, and door gaskets where the manufacturer permits.
    • Clean cabinet and drawer fronts, especially around pulls.
    • Move countertop appliances where safe and clean beneath them.
    • Wipe backsplash areas behind the sink and coffee station.
    • Clean chairs, table bases, and the undersides of table edges.
    • Wash waste-bin interiors if residue or odor is present.
    • Detail floor edges, baseboards, and the area beneath movable furniture.
    • Inspect supply dates and remove empty containers from the cleaning kit.
    • Check the refrigerator thermometer and report an unsafe reading.

    What should be checked monthly?

    Monthly attention is less about making the room look shiny and more about preventing hidden buildup and neglected maintenance.

    • Schedule a policy-based refrigerator clear-out with advance notice.
    • Clean removable refrigerator shelves and drawers according to the appliance manual.
    • Inspect under and behind movable appliances for crumbs, leaks, or pest activity.
    • Dust accessible vent covers and the tops of cabinets and appliances.
    • Clean wall spots, doors, and switch plates with material-appropriate methods.
    • Review whether daily and weekly frequencies match current occupancy.
    • Confirm that cleaning chemicals remain labeled, closed, and stored away from food.
    • Document repairs that need facilities or appliance service.
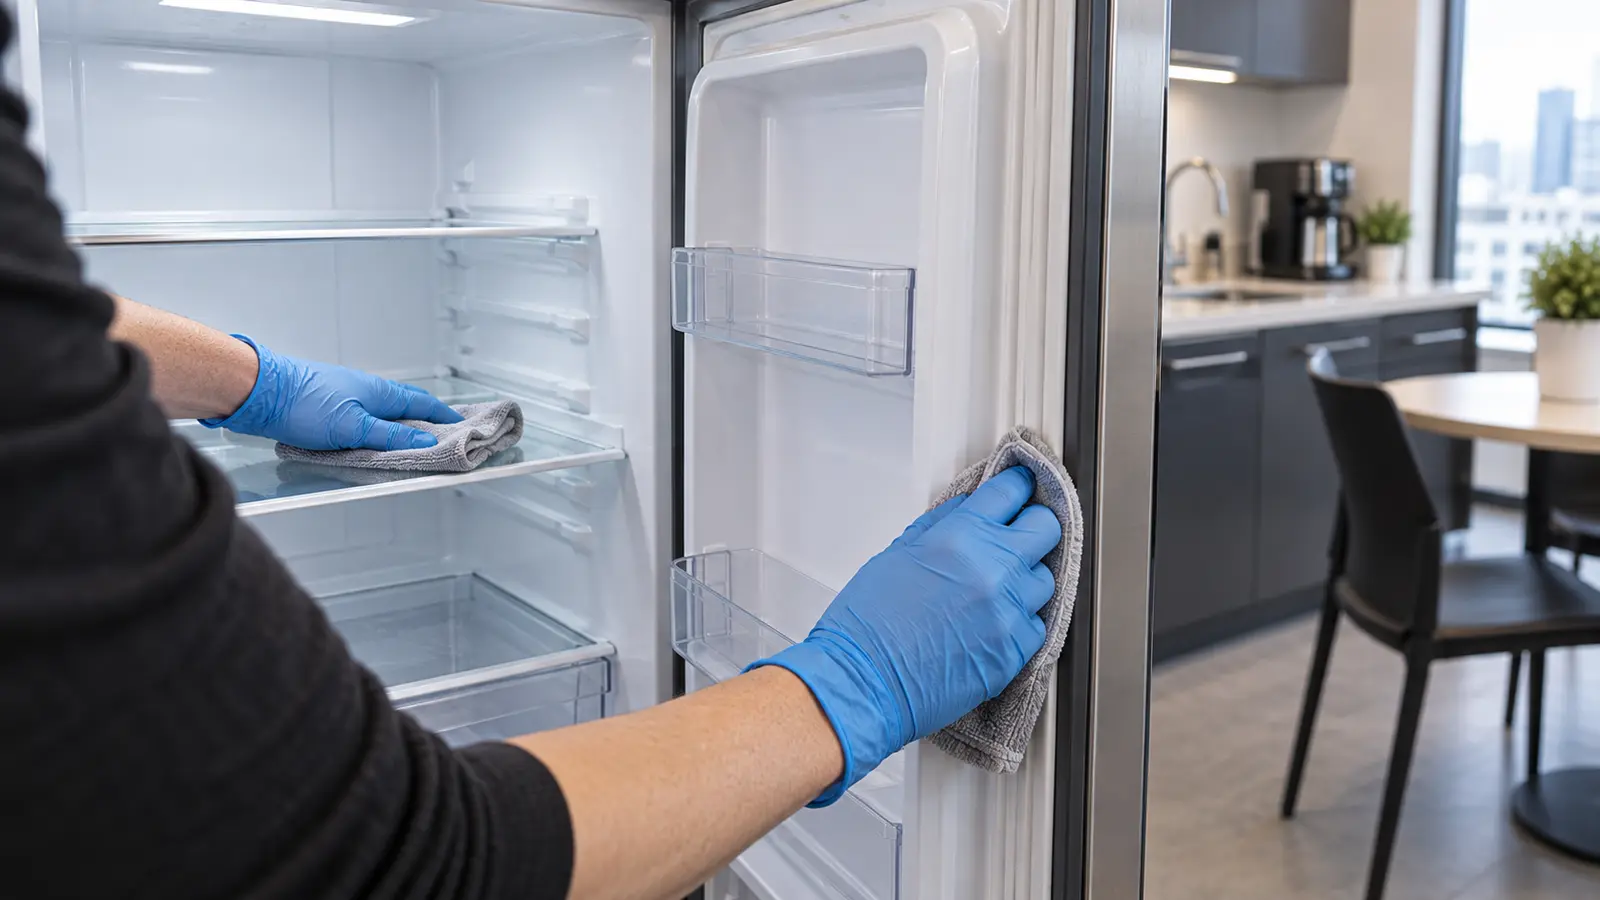
    Gloved hands wiping a shelf and door seal inside an emptied shared office refrigerator

    How should a shared refrigerator be cleaned?

    A shared refrigerator needs both a cleaning procedure and a clear food policy. Cleaning staff should not have to decide who owns an unlabeled lunch or whether it can be discarded.

    1. Announce the cleanout date and labeling rules in advance.
    2. Move food to safe cold storage if the refrigerator must be emptied for more than a brief wipe-down.
    3. Follow the owner’s manual before removing shelves, drawers, or power.
    4. Let cold glass components warm gradually before washing to reduce the chance of thermal shock.
    5. Clean interior walls, shelves, drawers, and gaskets using the appliance maker’s approved method.
    6. Dry components fully before reassembly.
    7. Return only items allowed by the workplace policy.
    8. Confirm the refrigerator returns to a safe temperature.

    The FDA advises keeping refrigerators at or below 40°F, wiping spills promptly, keeping food covered, and storing cleaning products away from food. If food has been held at an unsafe temperature or its safety is uncertain, use the workplace’s food-safety policy rather than relying only on appearance or smell.

    For appliance materials, defer to the exact model manual. For example, Whirlpool’s refrigerator-care guidance recommends checking the manual, washing removable components with appropriate mild methods, drying them completely, and avoiding products that can harm interior materials.

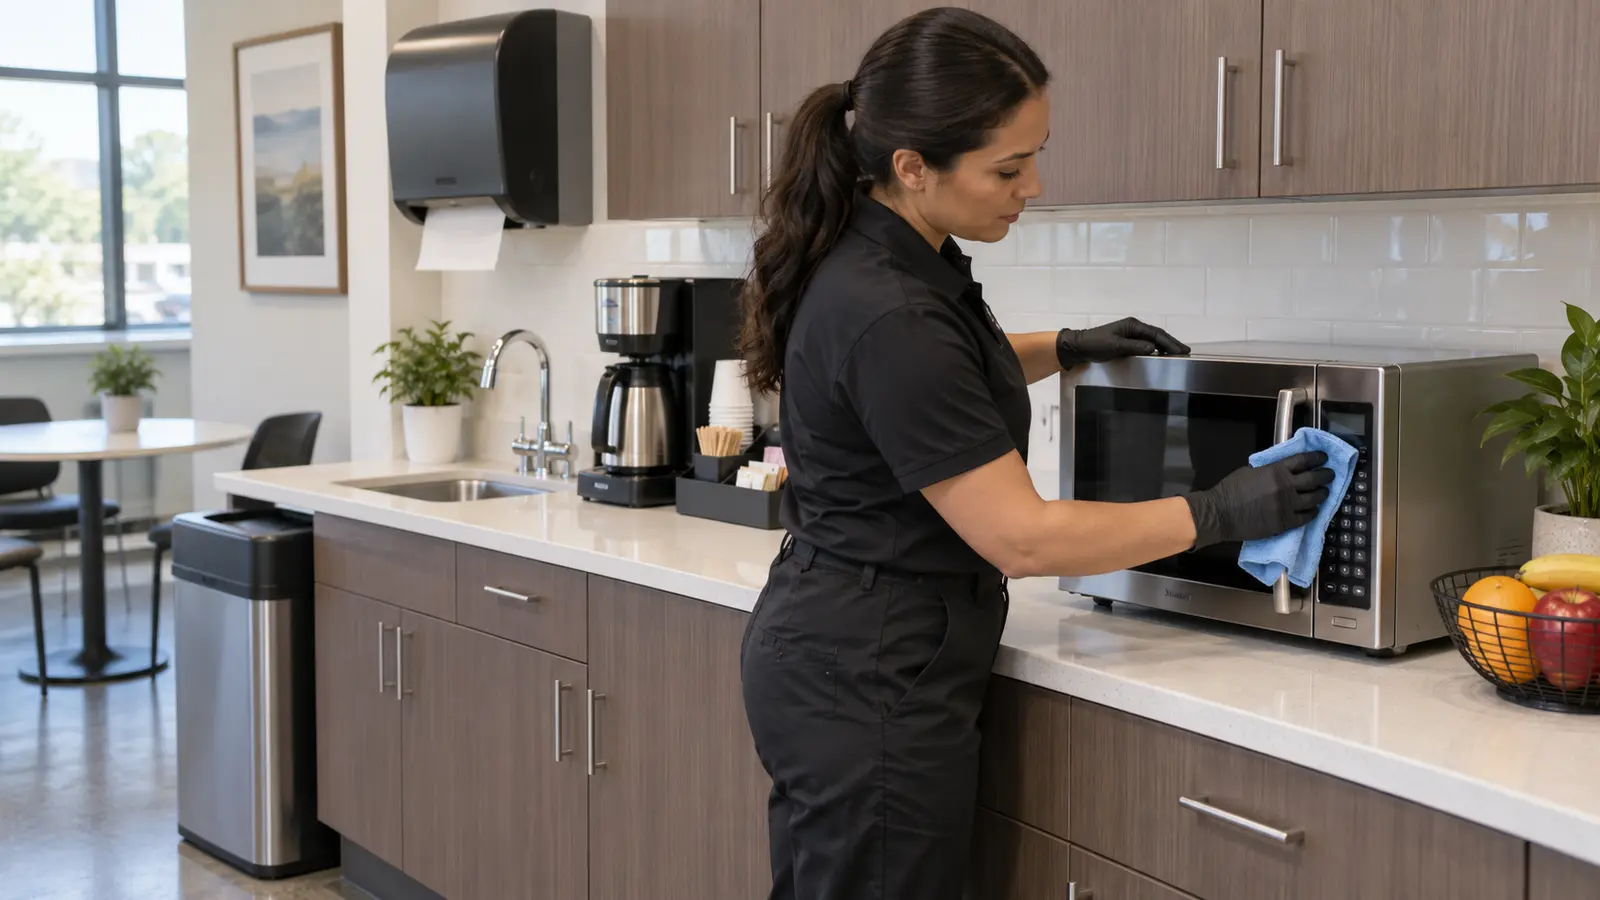
    Professional cleaner wiping the handle and controls of a microwave beside an office coffee station

    How do you clean the microwave and coffee station?

    Microwave

    Allow the appliance to cool, unplug it if the manual directs, and remove loose crumbs. Wash the turntable and removable parts only as instructed by the manufacturer. Wipe interior food residue with a soft cloth and an approved cleaner, keeping excess liquid away from vents and controls. Finish with the handle and keypad, then dry the appliance before returning it to use.

    Coffee station

    Remove disposable cups, used filters, and visible grounds. Wipe the counter, machine exterior, handles, drip area, dispensers, and cabinet pulls. Empty and wash removable trays according to the machine instructions. Descaling, water-filter replacement, and internal maintenance should follow the specific equipment schedule rather than a generic recipe.

    Which surfaces and materials need extra care?

    • Natural stone: Acidic or abrasive cleaners can damage some stone and sealers. Use a product approved for the installed material.
    • Stainless steel: Follow the grain and the appliance instructions; avoid harsh pads that can scratch the finish. The SRS guide to cleaning stainless steel without streaks explains the finish-specific approach.
    • Laminate and cabinet edges: Avoid soaking seams, hinges, and exposed substrate.
    • Electronics and controls: Apply product to the cloth when permitted instead of spraying directly into buttons, vents, or screens.
    • Wood tables and cabinets: Use minimal moisture and follow the finish maker’s instructions.
    • Food-contact surfaces: Use only products and procedures appropriate for that use, including any label-required rinse.

    What mistakes make office kitchens harder to maintain?

    • One vague instruction: “Clean the kitchen” does not define who empties the refrigerator, restocks soap, or handles appliance interiors.
    • Cleaning only what is visible: Crumbs beneath appliances and residue inside bins continue creating odor even when the counter looks clean.
    • Using one cloth everywhere: Separate cloths by area and replace them when soiled.
    • Spraying controls directly: Liquid can enter switches, vents, and electronic panels.
    • Skipping dwell time: Wiping a disinfectant away immediately may not follow its label.
    • Mixing products: Never combine cleaners or disinfectants.
    • Discarding personal food without a policy: Set rules and provide notice so cleaning does not become a workplace dispute.
    • Ignoring leaks or pests: Cleaning can remove evidence temporarily, but facilities or pest-control support must address the source.

    How can recurring office-kitchen problems be solved?

    The room smells clean, but the odor returns

    Check bin interiors, refrigerator drip or gasket areas, food hidden behind appliances, sink drains, damp cloth storage, and floor edges. Masking the odor does not remove its source.

    Counters feel sticky after wiping

    Too much product, an incompatible cleaner, or a dirty cloth may leave residue. Return to the surface manufacturer’s directions, use a fresh cloth, and avoid adding more product until the cause is clear.

    The checklist is completed, but standards vary

    Define observable results instead of relying only on task names. “Wipe counters” can become “no visible crumbs, spills, or sticky residue; items returned neatly; surface left dry.” A broader office cleaning checklist can connect the kitchen routine with restrooms, work areas, entrances, and floors.

    When does professional cleaning make sense?

    Professional support can help when the kitchen serves many people, daily responsibilities are inconsistent, grease or floor buildup keeps returning, odors persist after the source is addressed, or the room needs to fit into a larger workplace cleaning scope. It is also useful when facilities teams want one written standard across kitchens, restrooms, work areas, and common spaces.

    Before comparing proposals, confirm which tasks are daily, weekly, or periodic; whether refrigerator and microwave interiors are included; who handles dishes and personal food; and how supply restocking is managed. The commercial cleaning checklist offers a practical starting point for reviewing the full workplace scope.

    Office kitchen cleaning FAQs

    How often should an office kitchen be cleaned?

    Reset high-use surfaces, spills, waste, and floors every workday. Schedule detail work weekly and deeper refrigerator, edge, vent, and storage checks periodically. Increase frequency when occupancy, multiple shifts, food preparation, or visible soil requires it.

    Should an office kitchen be disinfected every day?

    Routine cleaning is the foundation. Disinfection should be based on the workplace’s needs and product directions, not used as a substitute for removing food residue and soil. When disinfecting, clean first, verify surface compatibility, follow the label’s contact time, ventilate as directed, and never mix products.

    Who should remove food from the shared refrigerator?

    The workplace should define ownership, labeling, notice, and disposal rules. Cleaning staff can follow that policy, but should not be expected to invent it during each cleanout.

    Can the same cleaner handle the kitchen and restroom?

    Yes, when the cleaning plan uses proper task order, hand hygiene, glove changes, and separate color-coded or clearly assigned tools and cloths. Restroom tools should never be used in food or break areas.

    What should an office-kitchen cleaning quote include?

    Look for written frequencies, included surfaces, appliance-interior limits, waste handling, supply responsibilities, floor care, refrigerator-cleanout rules, and the process for reporting leaks or damage. Clear scope makes the service easier to evaluate and maintain.

    If the shared kitchen keeps falling back into the same cycle, the answer may be a clearer routine rather than more reminders. SRS Cleaning Services can help build the kitchen into a practical Orange County office cleaning scope. Review the service and request a quote when you are ready to discuss the space.

  • How to Clean Ceiling Fans Without Spreading Dust

    How to Clean Ceiling Fans Without Spreading Dust

    To clean ceiling fans without spreading dust, switch the fan off, place an old pillowcase over one blade at a time, and gently pull the fabric toward the tip so the dust stays inside. Follow with a lightly damp microfiber cloth only when residue remains, then dry the blade before moving on.

    That simple sequence keeps most debris off the bed, sofa, floor, and nearby surfaces. It also avoids the frantic back-and-forth motion that sends dust into the room. The full method below covers safe setup, different blade finishes, sticky buildup, light fixtures, common mistakes, and what to do if the fan wobbles afterward.

    Cleaner using a pillowcase to trap dust while cleaning a switched-off ceiling fan

    What supplies do you need?

    You do not need a complicated product lineup. Gather the items before climbing so you are not reaching down for supplies while elevated.

    • An old pillowcase large enough to cover a blade
    • Two clean microfiber cloths—one for wiping and one for drying
    • A sturdy step ladder of the right height, or an extendable microfiber duster
    • A vacuum with a soft brush attachment
    • A sheet or washable cover for furniture below the fan
    • Warm water and a small amount of mild dish soap, only if the fan’s care instructions permit damp cleaning
    • A small container for removable glass shades, if applicable
    Pillowcase, microfiber cloths, water and handheld vacuum prepared beneath a ceiling fan

    Check the owner’s manual before using moisture. Some blades are solid wood, some have veneer or laminate finishes, and others are painted or made from composite material. A method that is harmless on one finish may swell, discolor, or dull another.

    How should you prepare the room and fan?

    Start by turning the fan and light off. Wait until the blades have fully stopped and the bulbs or light cover are cool. If another person could enter and flip the switch, let them know you are working or use the fan’s wall-switch lockout feature when available.

    Move small objects from below the fan and cover upholstered furniture or a bed with a washable sheet. This backup layer catches anything the pillowcase misses. Keep pets and children away from the ladder and work area.

    Choose access based on the fan’s height. An extendable duster may be enough for light maintenance. If you need a ladder, inspect it and place it fully open on a stable, level surface. Do not raise it with boxes or furniture. OSHA’s portable-ladder safety guidance also advises facing the ladder while climbing and keeping your body centered rather than overreaching.

    How do you clean ceiling fans without spreading dust?

    The least-messy approach is to capture the loose layer before introducing moisture. Work slowly and clean one blade at a time.

    1. Position yourself comfortably. You should be able to reach the blade without leaning sideways. Reposition the ladder instead of stretching.
    2. Slide the pillowcase over the blade. Enclose the top, bottom, and both edges.
    3. Use gentle pressure. Hold the fabric against the blade and pull slowly toward the outer tip. The dust should collect inside the pillowcase.
    4. Support delicate blades. Keep one hand beneath the blade if the design allows, but do not push, twist, or pull it downward.
    5. Repeat with each blade. Turn the fan only by gently moving a blade by hand when the power is off. Avoid spinning it rapidly.
    6. Vacuum captured debris. Take the pillowcase outside to empty it, or carefully vacuum the dust from inside before laundering it.
    7. Finish the room from high to low. Dust nearby upper surfaces, then vacuum the floor and clean hard flooring last. If needed, the SRS guides to cleaning baseboards and cleaning laminate floors can help you complete the room without redoing work.

    Hunter Fan recommends the pillowcase method with light pressure because force can damage a blade or affect its balance. The manufacturer also recommends applying any cleaner to a cloth rather than spraying the fan directly. See Hunter’s current ceiling-fan cleaning guidance for the full model-neutral instructions.

    How should you clean sticky fan blades?

    Dry dust can cling to cooking residue, smoke film, or accumulated grime. Remove as much loose debris as possible first. Wetting a thick dust layer immediately can turn it into a streaky paste that takes longer to remove.

    1. Confirm that the blade finish permits damp cleaning.
    2. Dampen—not soak—a microfiber cloth with the approved solution. For many fans, Hunter suggests warm water with a small amount of mild dish soap, but the manual for your model should control.
    3. Wipe in the direction of the blade, using minimal pressure and keeping liquid away from the motor and electrical parts.
    4. Immediately dry the surface with a second clean cloth.
    5. Stop if color transfers to the cloth, the finish becomes tacky, or the blade edge begins to swell.
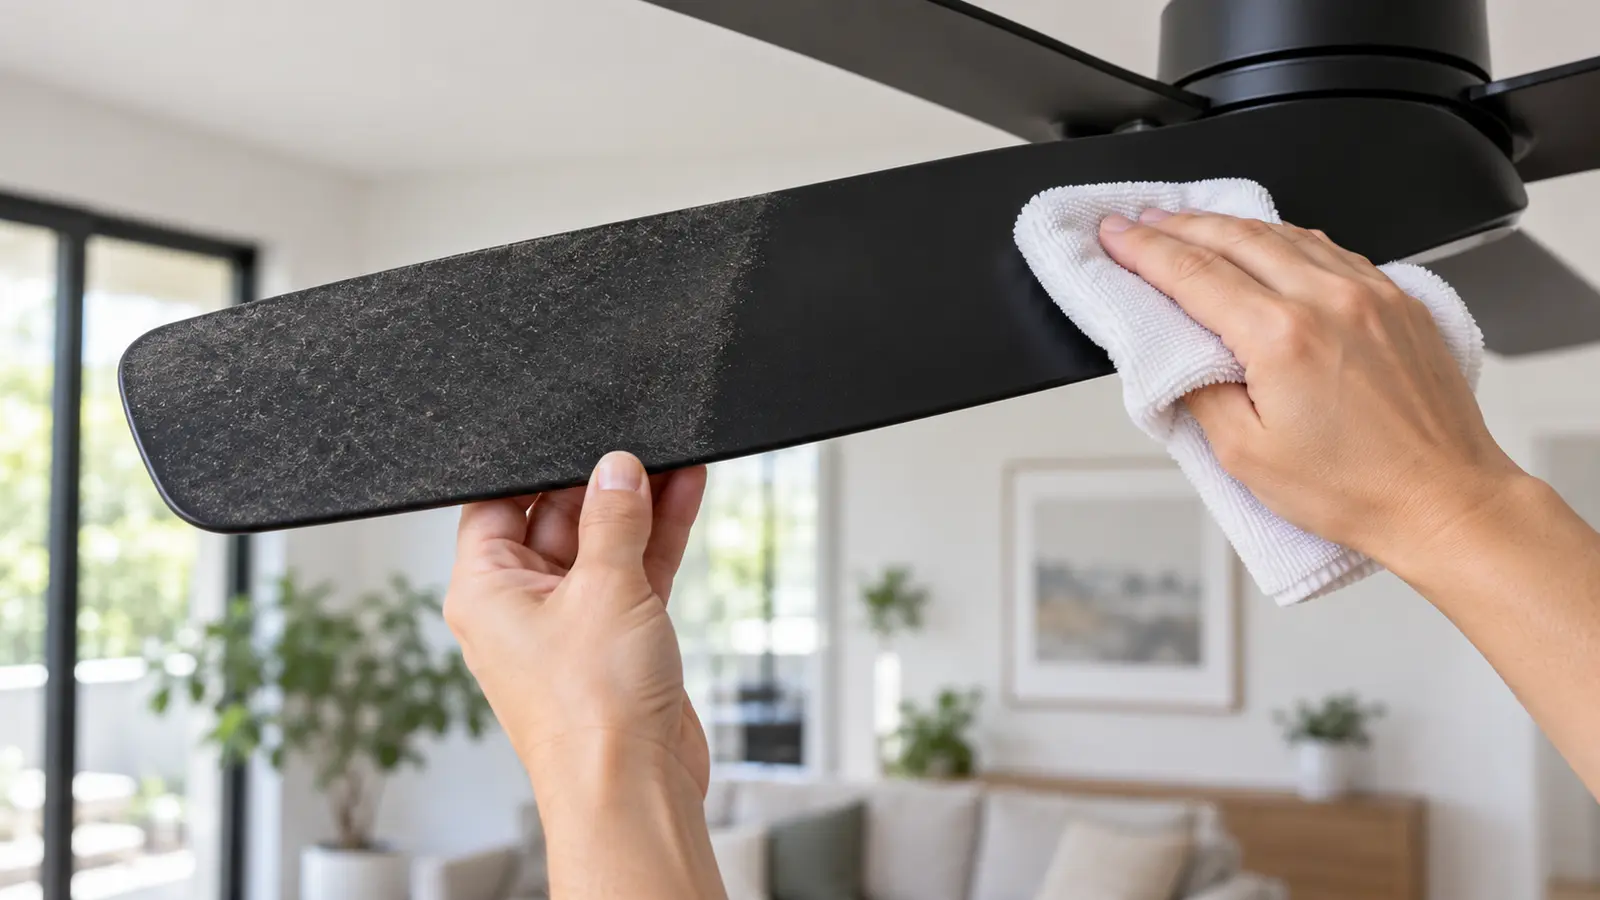
    Microfiber cloth wiping dust from a black ceiling fan blade while another hand supports it

    Avoid abrasive pads, saturated cloths, and harsh solvents. Do not assume that a viral homemade mixture is safe for sealed wood, painted metal, veneer, or plastic. Never mix cleaners. If the manual is missing, test the mildest manufacturer-approved method in a small, inconspicuous area.

    How do you clean the housing and light safely?

    Use a dry microfiber cloth or a soft vacuum brush on the outside of the motor housing, canopy, and vents. Do not push dust into openings or spray liquid toward the motor. A cotton swab or folded corner of a cloth can reach decorative grooves without scratching them.

    For an attached light, make sure the light is off and completely cool. Wipe the exterior lens with a dry, lint-free cloth. Remove a glass shade only if the manual shows how and you can support it securely. Hunter advises washing removable glass in warm, soapy water and drying it fully before reinstalling it. Integrated LED covers may have different care limits, so follow the model instructions instead of forcing the cover off.

    Which ceiling-fan cleaning mistakes should you avoid?

    • Cleaning while the fan can move: even a low speed can pull a cloth or duster into the blades.
    • Using a chair as a ladder: chairs can slide, swivel, or tip. Use properly sized access equipment.
    • Overreaching: climb down and move the ladder so your body stays centered.
    • Spraying the fan: mist can enter the motor, switches, or light kit. Apply approved moisture to the cloth.
    • Pressing hard on the blades: bending or twisting can contribute to uneven operation.
    • Skipping the blade edges: dust often collects along the leading edge and returns quickly if left behind.
    • Using one dirty cloth everywhere: change or refold microfiber as it loads with residue.
    • Ignoring the floor afterward: even a careful method releases a little dust, so vacuum below the fan at the end.

    What if the fan looks uneven or still seems dusty?

    The blades still look streaky

    Use a fresh, barely damp cloth to remove remaining cleaner, then buff dry. Reusing a loaded cloth often redistributes residue instead of lifting it.

    Dust falls as soon as the fan starts

    Recheck the top surface, blade brackets, housing rim, and light canopy. These narrow ledges are easy to miss. Vacuum the room once more after the fan has been off long enough for disturbed particles to settle.

    The fan wobbles or makes a new sound

    Turn it off. Confirm that nothing is caught around a blade or bracket and that no blade was visibly bent during cleaning. Do not adjust electrical connections or mounting hardware unless the owner’s manual authorizes the task and you are qualified to do it. A new wobble, clicking sound, loose housing, or damaged blade deserves inspection by the manufacturer, a qualified electrician, or another appropriate technician.

    How often should ceiling fans be cleaned?

    Let visible buildup and room conditions set the schedule. Hunter’s general guidance suggests dusting most fans every one to three months and deep cleaning every three to six months. Fans near kitchens, open windows, or frequently used rooms may need attention sooner.

    A quick monthly check is easier than waiting for a thick layer to form. Look across the top edge while the fan is off. If you can see a gray ridge, add it to the next top-to-bottom cleaning session. Pairing the task with cleaning blinds or high shelves keeps the sequence efficient.

    When does professional help make sense?

    Professional cleaning may be the practical choice when the fan is above a stairwell or vaulted ceiling, safe access equipment is unavailable, several rooms have heavy buildup, or the rest of the room also needs detailed top-to-bottom attention. Cleaning professionals can handle accessible exterior surfaces, but electrical repairs, unstable mounts, and mechanical problems belong with a qualified technician.

    If ceiling fans are one item on a much longer list, SRS Cleaning Services offers house cleaning and deep cleaning options across Orange County. You can request a quote and choose the level of help that fits the condition of the space—without pressure to book more than you need.

    Frequently asked questions

    Can you clean a ceiling fan without a ladder?

    For light dust and a reachable fan, an extendable microfiber duster with a flexible or U-shaped head may work. Keep both feet on the floor, move slowly, and cover furniture below. Sticky buildup usually requires closer access, so do not improvise with a chair or unstable platform.

    Should the pillowcase be dry or damp?

    Start dry to capture loose dust. If residue remains and the blade finish allows moisture, use a separate lightly damp microfiber cloth. A wet pillowcase can smear a heavy dust layer and place unnecessary moisture near the fan.

    Can you spray cleaner directly on ceiling-fan blades?

    No. Apply a product approved for the blade finish to the cloth, not directly to the fan. This gives you better control and helps keep moisture away from the motor and light kit.

    Do ceiling-fan blades need to be removed for cleaning?

    Most routine cleaning can be done with the blades installed. Remove them only when the manufacturer’s instructions call for it or when repair work is needed. Unnecessary disassembly can create alignment and hardware problems.

    A clean ceiling fan should leave the room feeling fresher, not create another round of dusting. Trap the dry layer first, use only the moisture the finish can tolerate, and work gently. If the full room needs attention, SRS can help you plan a practical next step through a no-pressure quote request.

  • How to Clean Laminate Floors Without Leaving Streaks

    How to Clean Laminate Floors Without Leaving Streaks

    Laminate floors can look cloudy even after mopping, especially when too much liquid or cleaner residue dries on the surface. The safest starting point is simple: remove loose grit first, use the cleaning method approved for your exact flooring, work with a clean microfiber pad, and keep moisture to a minimum. Prompt drying helps protect seams and leaves less residue behind.

    The important detail is that laminate products are not all maintained the same way. Pergo permits careful damp cleaning for its laminate floors and warns against using too much water, while Shaw directs owners of its laminate products to avoid wet mopping and use a cleaner made for laminate. Your floor’s care guide and warranty should therefore take priority over a generic internet recipe.

    What is the quickest safe way to clean laminate floors?

    Start with a soft broom, dust mop, or vacuum set for hard floors so loose grit cannot be dragged across the finish. Next, clean with the method and product named by the floor manufacturer. If damp cleaning is allowed, use a microfiber pad that is only lightly damp—not dripping—and clean in manageable sections. Replace or rinse a dirty pad before it spreads soil, then dry any remaining moisture promptly.

    Pergo’s current laminate maintenance guidance recommends vacuuming first, using a soft-wheeled vacuum with a suitable brush, limiting water, and working in the direction of the planks. Shaw’s laminate care guidance is more restrictive: it advises against washing or wet mopping and recommends a cleaner specifically made for laminate. These differences are why identifying the product matters.

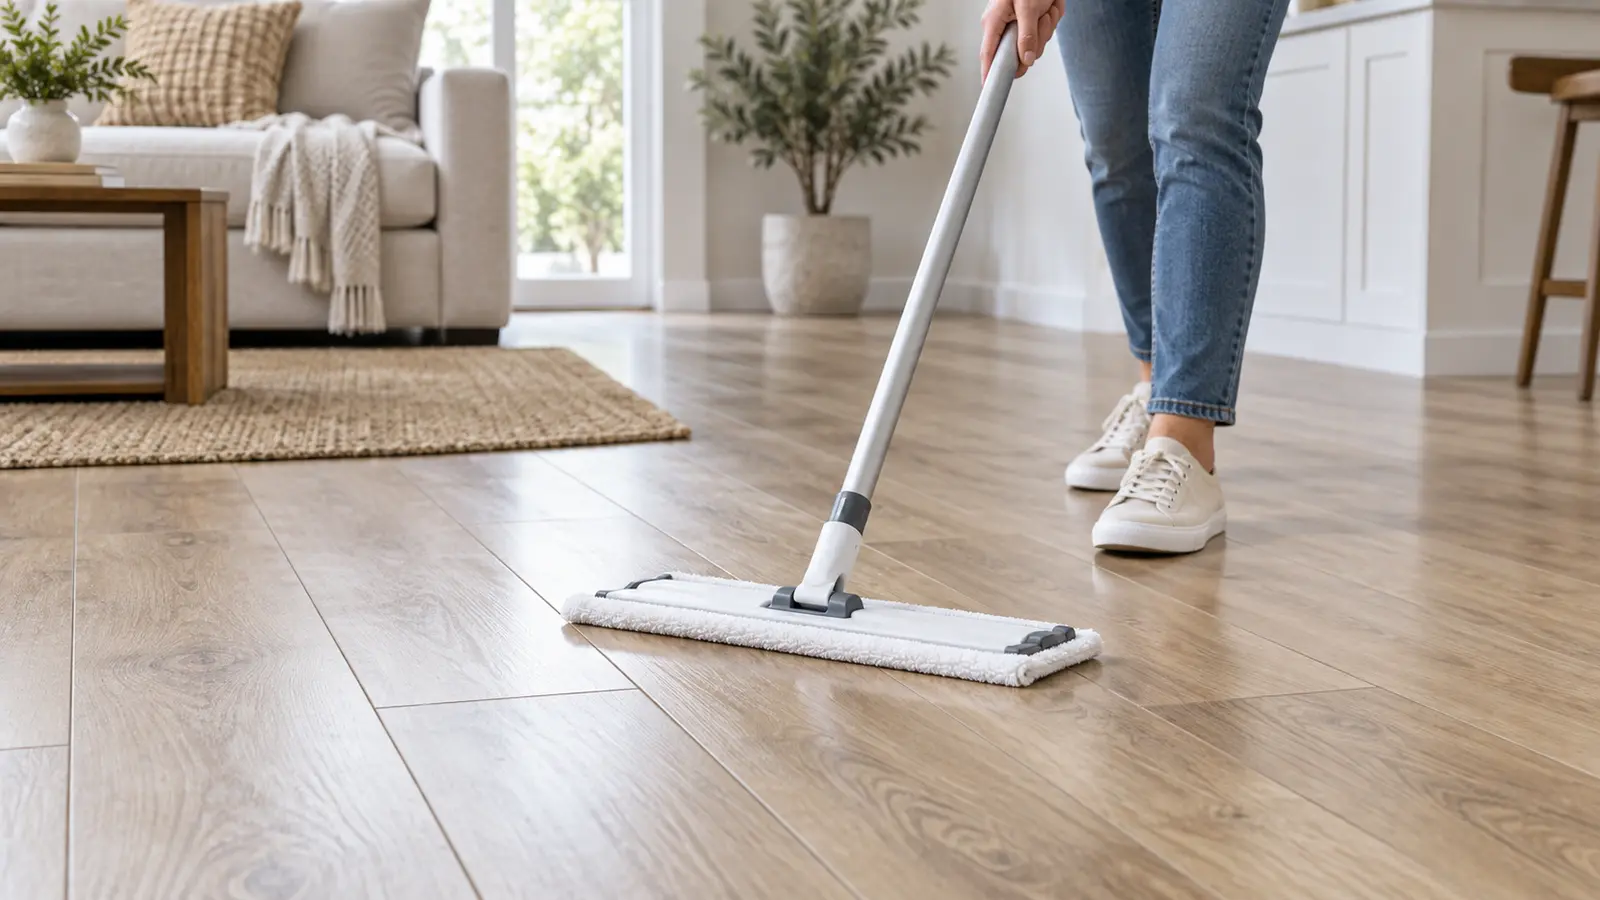
    Professional cleaner using a microfiber flat mop on light laminate flooring

    What should you check before cleaning?

    Before choosing a cleaner, confirm that the floor is laminate rather than hardwood or luxury vinyl. These surfaces can look similar but may have different care requirements. If you know the brand and product line, locate its maintenance guide or warranty. If you do not, start with dry soil removal and test any permitted product in a hidden area.

    • Look for open seams or lifted edges. Do not push liquid into damaged joints. A flooring professional may need to evaluate swelling or separation.
    • Check the finish. Glossy laminate shows residue and pad marks more readily than textured or matte flooring.
    • Read the cleaner label. Confirm that it names laminate as a compatible surface and follow its directions exactly.
    • Check the vacuum setting. Turn off or raise a rotating beater brush unless the appliance manufacturer specifically approves it for the floor.
    • Test first. A small, inconspicuous spot can reveal haze, discoloration, or an unexpected change in sheen.

    If the floor has wax, polish, adhesive residue, or a previous coating, routine cleaning may not remove the film evenly. Avoid adding another product until you know what is already on the surface.

    What supplies do you need?

    • A soft broom, microfiber dust mop, or vacuum with a hard-floor setting
    • A clean microfiber flat mop with at least one spare pad
    • The cleaner approved for your laminate product
    • A soft white cloth for spots and spills
    • A clean, dry microfiber cloth for edges and seams
    • A plastic scraper only if the floor manufacturer allows it for hardened residue

    Skip homemade mixtures unless your flooring manufacturer explicitly recommends one. A popular formula may be wrong for a particular wear layer, finish, or warranty. Never combine cleaning products, and keep every product in its original labeled container.

    How do you clean laminate floors without streaks?

    1. Clear the floor. Move light objects and lift—not drag—chairs or baskets. Check furniture feet for trapped grit.
    2. Remove dry debris. Work slowly along walls, under furniture edges, and between transitions. Loose sand and crumbs can scratch or turn into muddy streaks when moisture is added. If you are cleaning the room thoroughly, handle the baseboards before the final floor pass.
    3. Spot-clean spills. Blot fresh liquid promptly with a soft cloth. Do not flood a sticky spot. Use only a spot treatment allowed by the manufacturer.
    4. Prepare a clean pad. A soiled or detergent-loaded pad is a common source of streaks. Follow the care instructions for the pad and cleaner.
    5. Apply the approved method. Some products call for cleaner to be applied to the mop rather than directly onto the floor. Follow the label. If damp mopping is permitted, wring or mist the pad so it is lightly damp and cannot drip.
    6. Work in small sections. Move with the plank direction when practical. Use overlapping passes without pressing aggressively, and keep liquid away from open seams and wall edges.
    7. Finish with a clean pad. If the floor begins to look smeared, stop and change the pad rather than making repeated passes with dirty material. Dry visible moisture promptly and allow the floor to finish drying before replacing rugs.
    Microfiber flat mop cleaning laminate planks with a low-moisture technique

    How do you remove streaks or a cloudy film?

    First, determine whether the marks are residue, remaining soil, moisture, or permanent surface damage. View the floor from more than one angle after it is fully dry. A streak that changes when wiped with a clean dry microfiber cloth is more likely to be residue. A dull patch that remains unchanged may be wear or damage rather than dirt.

    For removable haze, check the cleaner directions before making another pass. Use a fresh pad and the smallest amount of the approved product or moisture the instructions call for. Cleaning the entire room repeatedly can compound the film; test one small section, let it dry, and compare it with the surrounding floor.

    If streaks follow the mop path, the pad may be dirty, over-saturated, or carrying old product. If marks gather at board edges, too much liquid may be reaching the seams. Stop wet work if edges appear raised, darkened, or swollen.

    What common mistakes can damage laminate?

    • Using a steam cleaner. Shaw specifically warns against steam cleaners and wet mops for its laminate products. Follow the rule for your floor rather than assuming “water-resistant” means steam-safe.
    • Flooding the floor. Standing liquid can reach joints, edges, and the material beneath the wear layer.
    • Using abrasive tools. Steel wool, rough scrub pads, and gritty powders can change the sheen or scratch the finish.
    • Adding polish or wax. Products intended to create shine can leave a stubborn film and may not be compatible with laminate.
    • Spraying too much cleaner. More product does not necessarily clean better. Excess can dry as haze.
    • Scrubbing without removing grit. Dirt behaves like an abrasive when pushed under a mop.
    • Treating every wood-look floor alike. Hardwood, laminate, and vinyl may require different products and moisture levels.

    The same “identify, test, then clean” approach also protects other kitchen surfaces. Our guide to cleaning kitchen cabinets without damaging the finish explains why the material should decide the method.

    How can you keep laminate cleaner longer?

    Prevention reduces both streaks and wear. Use entry mats compatible with the floor, clean beneath them regularly, and address spills before they spread. Felt or manufacturer-approved protective pads under furniture can reduce scratching. Lift heavy pieces instead of sliding them, and trim pet nails when appropriate.

    A light, repeatable routine is usually easier on the finish than waiting for heavy buildup. Dry-clean high-traffic areas as needed and schedule the approved deeper clean based on visible soil, not an arbitrary rule. If several rooms need attention at once, a simple whole-house cleaning checklist can help you work from higher surfaces down to the floors without redoing areas.

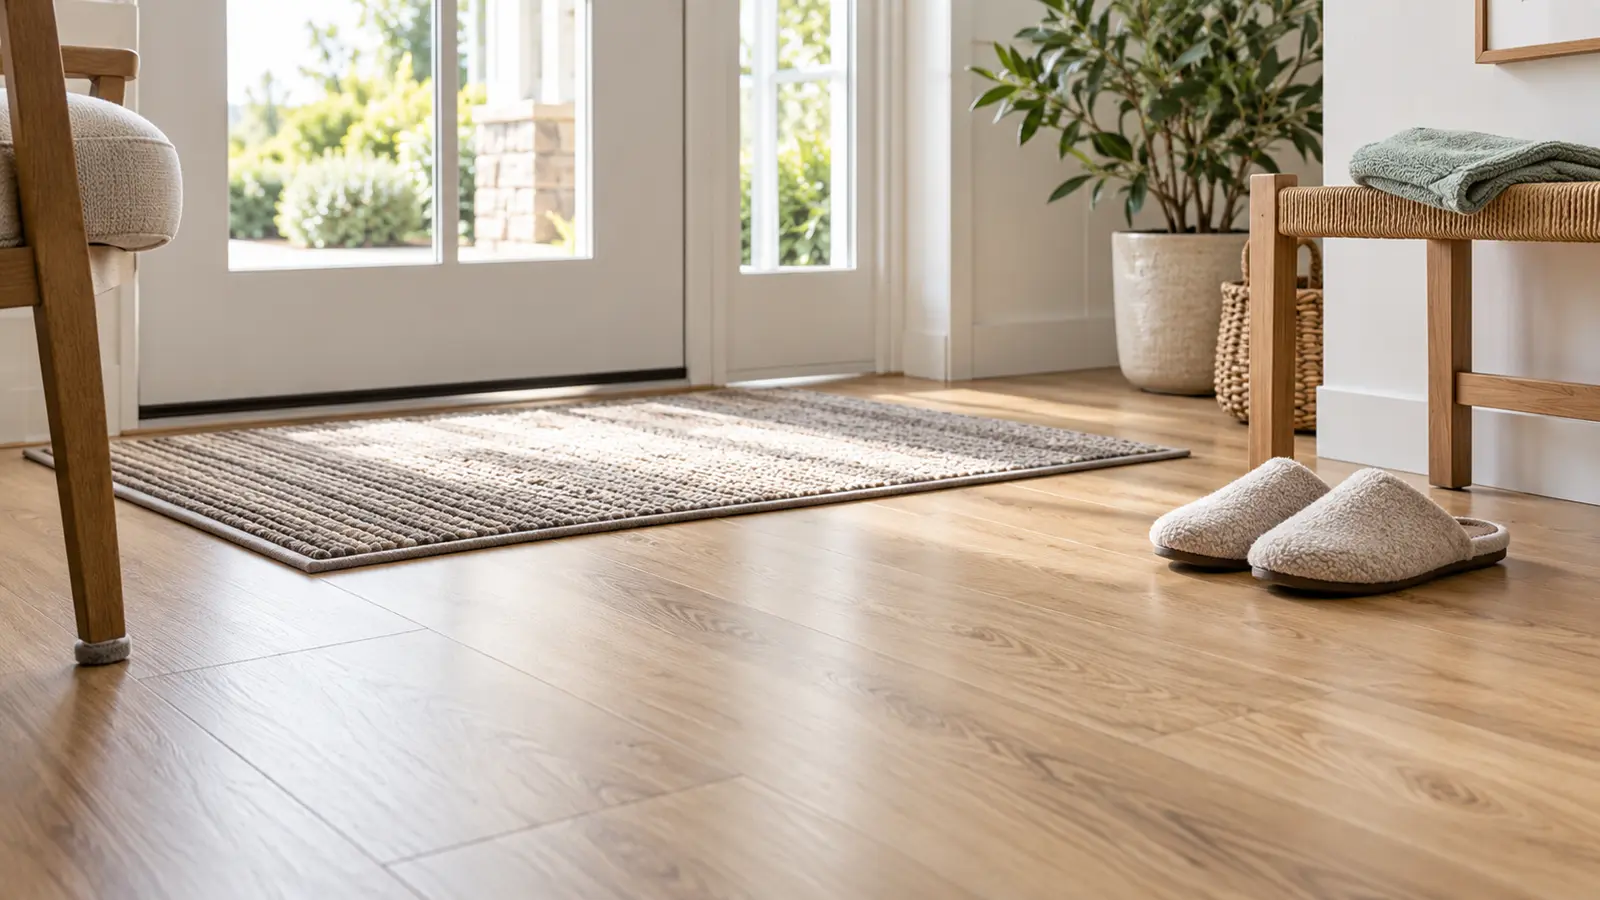
    Entry mat, slippers and felt furniture pads protecting a clean laminate floor

    When is professional help appropriate?

    Cleaning cannot reverse every problem. Raised seams, spreading gaps, peeling layers, darkened joints, or soft areas may point to moisture or installation damage. A flooring professional is the better next step when the structure or finish appears compromised.

    Professional cleaning can be useful when routine soil has built up across several rooms or when floor care is part of a larger reset. Before agreeing to service, share the flooring brand and care instructions if available, and ask how the method will control moisture and residue. SRS offers house cleaning services across Orange County and can discuss the broader cleaning scope through a quote request. Existing floor damage should still be evaluated by a flooring specialist.

    Laminate floor cleaning FAQ

    Can you mop laminate floors with water?

    Follow the instructions for the exact product. Pergo allows carefully controlled damp cleaning for its laminate, while Shaw tells customers not to wash or wet mop its laminate floors. Never leave standing water or assume every water-resistant product has the same maintenance rules.

    Why does laminate look dull after cleaning?

    Common causes include excess cleaner, a dirty mop pad, remaining fine grit, or moisture drying unevenly. Let the floor dry completely, test a small section with a fresh pad and the approved method, and avoid adding polish to hide the haze.

    Can you use a steam mop on laminate?

    Do not use one unless the flooring manufacturer explicitly permits it for that product. Shaw’s published laminate guidance warns against steam cleaners. Heat and moisture can be especially risky around seams and edges.

    How often should laminate floors be cleaned?

    Remove grit when it becomes visible and clean spills promptly. Use the approved damp or product-based method only as needed for soil and according to the maintenance guide. High-traffic entryways may need dry cleaning more often than low-use rooms.

    What if you do not know the laminate brand?

    Begin with dry debris removal and avoid steam, flooding, abrasive tools, polish, or improvised chemical mixtures. Test a laminate-labeled product in a hidden area, or ask a flooring professional to identify the product before attempting to remove a stubborn coating or stain.

    A clean laminate floor should feel easier to maintain—not become a cycle of haze and repeated mopping. If the entire space needs a reset, you can request an SRS cleaning quote and describe the rooms, flooring, and areas that need attention.

  • How to Clean Kitchen Cabinets Without Damaging the Finish

    How to Clean Kitchen Cabinets Without Damaging the Finish

    Kitchen cabinets usually clean up best with the gentlest method that works: remove loose dust, wipe a small section with a soft cloth that is only lightly damp, and dry it right away. Before using any cleaner, identify the cabinet finish and check the manufacturer’s care instructions. Painted wood, stained wood, laminate, thermofoil, high-gloss surfaces, and glass inserts do not always tolerate the same products.

    If greasy fingerprints and cooking residue have made the room feel less fresh, you do not need to attack every door at once. A careful top-to-bottom routine can restore a cleaner look while reducing the risk of haze, scratches, swollen edges, or a softened finish.

    What should you check before cleaning kitchen cabinets?

    Start with the finish, not the stain. Cabinet doors can look like wood while actually being wood veneer, laminate, thermofoil, or a painted engineered material. If you have the installation paperwork, model information, or manufacturer name, use its current care guide as the deciding authority.

    Next, inspect a discreet area for peeling paint, exposed wood, loose veneer, swollen seams, cracked thermofoil, or a failing clear coat. Moisture can move beneath an already damaged surface. If the finish is unstable, pause before wet cleaning and ask the cabinet manufacturer or a qualified refinisher for guidance.

    Even when the finish looks sound, test your planned method inside a door or along a low, hidden edge. Let the test area dry completely, then check it in good light for a change in sheen, color, texture, or adhesion.

    White painted, oak wood, and gray laminate kitchen cabinet finishes
    Identify the cabinet material and finish before choosing a cleaning method.

    What supplies do you need?

    • Several clean, soft cotton or microfiber cloths
    • A soft brush or vacuum with a soft dusting attachment
    • Two small bowls or buckets: one for the approved cleaning solution and one for clean rinse water
    • A dry towel for protecting counters and floors
    • A mild hand-dishwashing liquid only if the cabinet maker permits it
    • Cotton swabs for narrow corners, used without forcing moisture into seams
    • Gloves if the product label calls for them

    Keep the setup simple. MasterBrand’s cabinet-care guidance says a soft cloth dampened with warm water is often enough and describes a mild hand-dishwashing-liquid solution for heavier grime. It also says stained or painted cabinets should be wiped with a clean damp cloth and dried, while laminate and high-gloss materials should be dried with microfiber to avoid scratching. Follow your own cabinet manufacturer if its directions differ.

    How do you clean kitchen cabinets step by step?

    1. Clear the work zone

    Move countertop appliances and food away from the section you are cleaning. Place a dry towel below the cabinet doors to catch drips. Work on one or two doors at a time so moisture never sits while you move across the room.

    2. Remove loose dust first

    Use a soft dry cloth, a soft brush, or a vacuum dusting tool to lift dust from door panels, trim, hinges, and cabinet tops. Removing grit before wiping reduces the chance of dragging particles across glossy paint or laminate.

    3. Start with warm water

    Dampen a clean cloth with warm water and wring it until it feels barely damp, not wet. Wipe from the top of the door downward with light pressure. Do not spray liquid directly onto a door, hinge, seam, or glass insert.

    4. Use an approved mild solution only when needed

    If water alone does not lift the film, use the mild cleaner and dilution allowed by your manufacturer. Apply it to the cloth rather than the cabinet. Clean a small section, turning the cloth frequently so loosened grease is not spread onto the next door.

    5. Remove residue and dry immediately

    Wipe the section with a separate cloth lightly dampened with clean water, if the care guide calls for rinsing. Follow immediately with a soft dry cloth. Pay special attention to bottom edges, corners, joints, and the areas beside the sink or dishwasher.

    6. Clean hardware with control

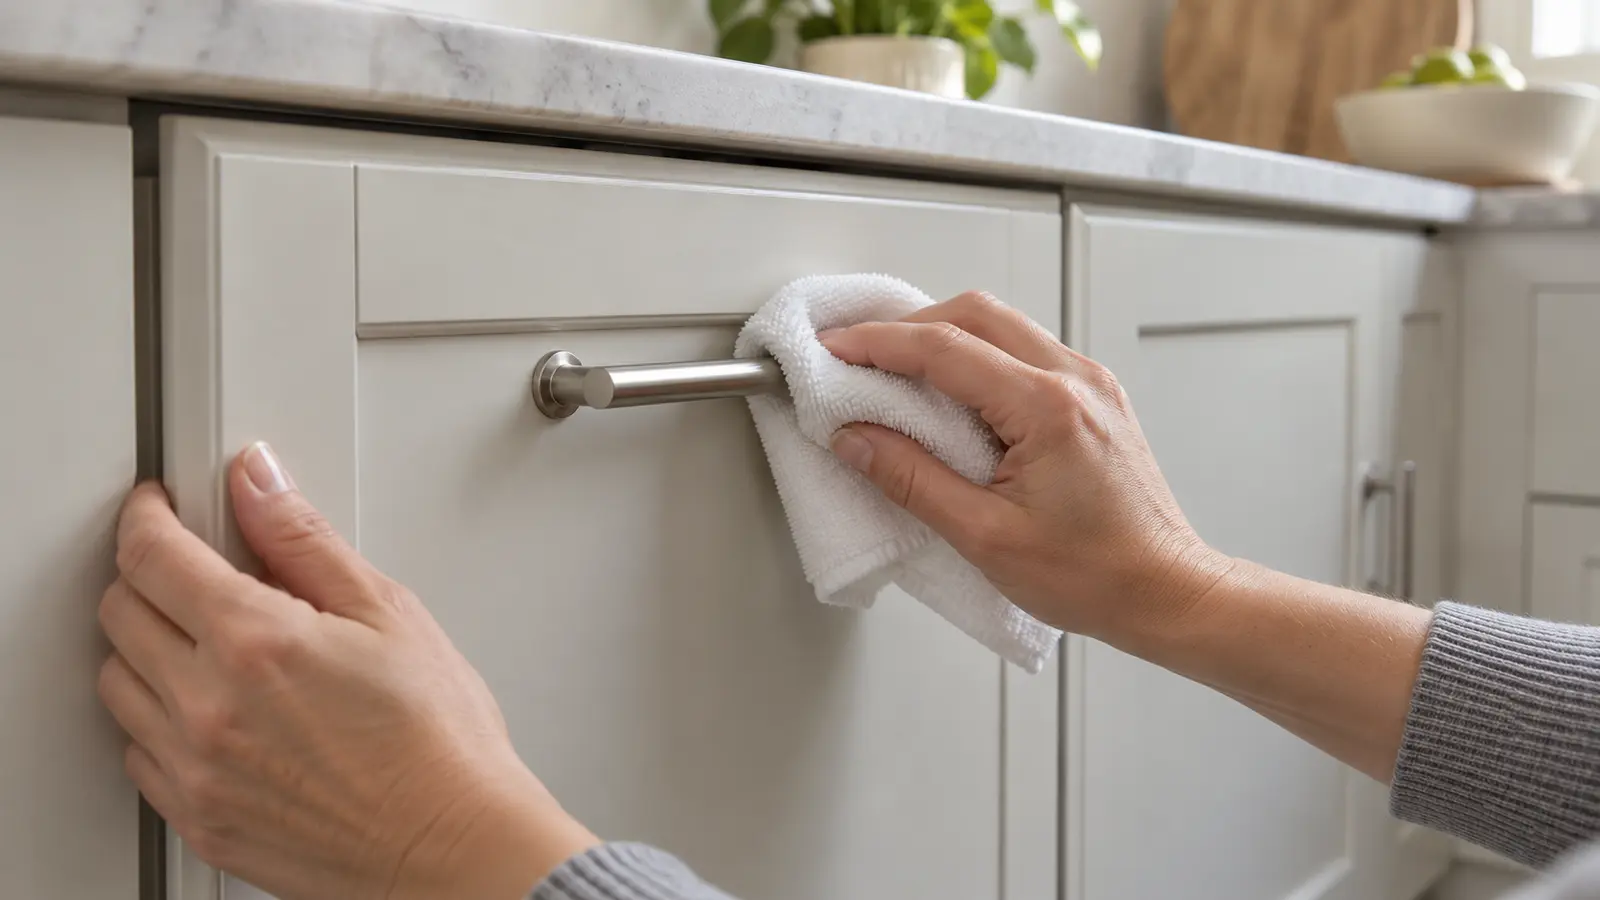
    Wipe knobs and pulls with a separate barely damp cloth, then dry them. Avoid flooding hinge cups, screw holes, and the edge where the door finish meets the hardware. If you plan to remove hardware for a deeper clean, confirm the manufacturer’s instructions first so you do not damage the finish or misalign the door.

    Hands gently cleaning around a kitchen cabinet handle with a microfiber cloth
    Apply moisture to the cloth—not directly to the cabinet—and dry around hardware promptly.

    How do you clean greasy cabinet doors?

    Grease responds better to patient passes than aggressive scrubbing. After dry dusting, hold an approved lightly dampened cloth against a small sticky area briefly, then wipe with gentle pressure. Repeat with a clean section of cloth rather than reaching for a rough pad or stronger chemical.

    Focus first on handles, the doors beside the range, the underside of upper cabinets, and the areas around the waste bin and sink. KraftMaid recommends routine, gentle cleaning, prompt spill cleanup, thorough drying, and avoiding harsh detergents, abrasive formulas, powdered cleaners, and scouring pads. Those principles are useful beyond one brand, but the instructions for your exact finish still come first.

    If sticky residue remains after two or three careful passes, stop and reassess. The film may be old polish, degraded finish, adhesive, or cooking residue that needs a product approved specifically for that cabinet. Scrubbing harder can turn a small problem into a permanent shiny or dull patch.

    How should different cabinet materials be cleaned?

    Painted and stained wood

    Use the least moisture possible and dry each area promptly. Avoid working liquid into joints, exposed edges, cracks, or places where the finish has worn through. Do not assume a general wood cleaner, furniture polish, vinegar solution, or degreaser is safe; confirm it for the specific topcoat.

    Laminate, thermofoil, and high-gloss doors

    Use a clean microfiber cloth and a nonabrasive method approved for the material. Keep moisture away from seams and edges, where it can reach the substrate or adhesive. Dry the surface with clean microfiber rather than paper towel or a used dishcloth that may hold grit.

    Glass-front cabinets

    Protect the surrounding frame. MasterBrand advises applying ammonia-free glass cleaner to a soft lint-free cloth rather than spraying the glass directly, which helps prevent seepage behind dividers and into nearby materials. Clean the glass in controlled passes and dry the frame immediately if it becomes damp.

    Unfinished, antique, or already damaged cabinets

    Do not treat these like sealed modern cabinetry. Unfinished wood can absorb moisture and discolor, while antique coatings may react unpredictably. Peeling thermofoil, swollen panels, flaking paint, or exposed substrate should be evaluated before wet cleaning.

    What cabinet-cleaning mistakes should you avoid?

    1. Spraying the door directly. Liquid can collect at edges, behind hardware, and inside joints.
    2. Using a soaked cloth. More water does not mean more cleaning power.
    3. Scrubbing with abrasive pads or powders. They can scratch or change the sheen.
    4. Applying bleach, ammonia, solvents, or a strong multipurpose degreaser without approval. Cabinet manufacturers commonly warn that harsh products can damage finishes.
    5. Mixing cleaners. Never combine cleaning products; follow one product label and the cabinet-care instructions.
    6. Using an old kitchen sponge or greasy dishcloth. Trapped grit and residue can spread soil or mark glossy surfaces.
    7. Skipping the dry pass. Moisture left around seams, sink bases, and dishwasher-adjacent doors can cause damage.
    8. Waxing or polishing by habit. MasterBrand advises against wax and polish because buildup can become hazy, streaked, or yellowed.
    9. Using steam. Concentrated heat and moisture can affect adhesives, finishes, and edge bonds; use only if the cabinet manufacturer expressly allows it.

    How do you troubleshoot streaks, stickiness, and damage?

    The cabinets look streaky after drying

    Residue or an overloaded cloth is the likely cause. With the manufacturer’s approval, make one light pass using a clean cloth barely dampened with plain water, then buff dry with fresh microfiber. Work in smaller sections and replace cloudy rinse water.

    The surface still feels sticky

    Do not keep adding stronger products. The stickiness could be grease, cleaner residue, old wax, deteriorating coating, or failing adhesive. Stop after a gentle rinse-and-dry attempt and contact the manufacturer or a refinisher if the cause is unclear.

    The finish looks dull, soft, or discolored

    Stop cleaning that surface. Do not polish over the area or try another solvent. Photograph the change, note the product used, save its label, and contact the cabinet maker or a qualified finish professional. Further rubbing can make diagnosis and repair harder.

    A seam or edge is swollen or lifting

    Keep the area dry and address the source of moisture. Swelling, delamination, or peeling is a material problem, not a soil problem. Cleaning will not reverse it, and more liquid may spread the damage.

    How can you keep cabinets cleaner between deep cleans?

    • Wipe fresh splashes and greasy fingerprints promptly using the approved method.
    • Give the handles and doors beside the range a gentle regular wipe before residue hardens.
    • Run the kitchen exhaust system as directed while cooking to help manage airborne grease and moisture.
    • Keep wet towels off cabinet doors and dry splashes around the sink and dishwasher.
    • Dust cabinet tops periodically so the buildup does not combine with grease.
    • Use clean cloths reserved for delicate surfaces.

    A simple maintenance rhythm is easier than an occasional aggressive scrub. You can pair cabinet care with a broader whole-house cleaning checklist, then handle nearby details with the guides for streak-free stainless steel and cleaning baseboards without making a mess.

    When is professional cleaning the better next step?

    Consider professional help when grease covers a large kitchen, buildup extends across doors, trim, and cabinet tops, or the job needs to be coordinated with the rest of the room. Professional cleaning is also practical when time is limited or when a detailed kitchen reset is part of a larger deep cleaning project.

    A cleaner still needs accurate material information. Point out delicate, newly painted, antique, repaired, or already damaged surfaces, and share any available manufacturer instructions. Finish repair, refinishing, delamination, and water damage should go to the appropriate specialist rather than being treated as routine cleaning.

    A professional cleaner gently wiping a white kitchen cabinet door with a microfiber cloth
    For widespread kitchen buildup, a careful room-by-room cleaning plan can save time and reduce rushed scrubbing.

    Kitchen cabinet cleaning FAQ

    Can you use dish soap on kitchen cabinets?

    Some manufacturers allow a mild hand-dishwashing-liquid solution for certain finished cabinets, but formulas and finishes vary. Check the cabinet maker’s instructions, use the stated dilution, test first, keep the cloth lightly damp, remove residue as directed, and dry promptly. Dishwasher detergent is not the same product.

    Can you use vinegar on wood cabinets?

    Do not assume vinegar is safe for a wood finish. Acids can affect some coatings, and online recipes cannot account for your cabinet’s topcoat or condition. Use only a method approved by the manufacturer or a qualified finish professional.

    Should you clean the inside of cabinets the same way?

    Not automatically. Interior panels and shelf surfaces may use a different material from the door fronts. Empty one section, vacuum crumbs, check the care instructions, spot test, use minimal moisture, and let the area dry completely before replacing food or shelf liners.

    How often should kitchen cabinets be cleaned?

    Clean spills promptly and wipe high-touch or cooking-adjacent areas as buildup appears. The right deeper-cleaning schedule depends on cooking frequency, ventilation, cabinet color and sheen, and the manufacturer’s maintenance advice. Frequent light care is generally safer than waiting for heavy greasy buildup.

    Want the rest of the kitchen handled too?

    If cabinet fronts are only one part of a bigger cleaning list, SRS Cleaning Services can help with detailed house cleaning in Orange County. Tell us about the space, the areas that need attention, and any delicate finishes when you request a quote.

  • How to Clean Blinds Without Damaging the Finish

    How to Clean Blinds Without Damaging the Finish

    Blinds collect dust quickly, but cleaning them safely starts with one simple decision: identify the material before adding moisture. For most blinds, the safest routine is to remove loose dust with a soft cloth or a vacuum brush attachment, then use only the material-specific care method recommended by the manufacturer. That approach clears everyday buildup without warping slats, staining fabric, or dulling a finish.

    This guide shows how to clean blinds in place, what to avoid, and when a delicate or heavily soiled window treatment is better left to a specialist.

    How do you identify the blind material?

    Look at the slats, vanes, or pleats before you begin. Real wood usually shows natural grain variation and feels lighter than composite material. Faux wood often has a uniform printed grain and may be made from PVC or a composite. Metal blinds have thin, flexible slats. Cellular, roller, Roman, and sheer shades are fabric-based window treatments, even when they are casually called blinds.

    If you are unsure, check the label inside the headrail, the installation paperwork, or the manufacturer’s website. Motorized products and blinds with decorative tapes can have extra restrictions. The safest rule is to treat an unknown material as delicate: start dry, apply no cleaner, and test any approved method in a hidden area.

    Three windows showing wood blinds, white horizontal blinds, and a cellular fabric shade

    What supplies do you need?

    A short supply list is usually enough:

    • Two or more clean microfiber cloths
    • A vacuum with a soft brush attachment
    • A stable step stool if the headrail is above comfortable reach
    • A bowl of lukewarm water only when the product instructions allow damp cleaning
    • A mild product approved by the blind manufacturer, if needed
    • A towel for protecting the sill or floor during approved damp cleaning

    Skip abrasive pads, stiff brushes, chemical solvents, and strong all-purpose sprays unless the product’s instructions specifically permit them. Do not mix cleaners. More product does not mean better results, and residue can make slats look streaky or attract dust faster.

    Why should you dry-clean blinds first?

    Dry dusting removes loose particles before they can become muddy streaks. It also gives you a chance to notice loose cords, cracked slats, delicate tapes, or a finish that should not get wet.

    Use this basic process:

    1. Lower the blind fully. Keep it supported and avoid pulling hard on the lift cord or wand.
    2. Tilt the slats almost closed. Leave a slight gap so the overlapping edges remain accessible.
    3. Dust from the top down. Wipe gently with a clean microfiber cloth or use the vacuum’s soft brush attachment at low suction.
    4. Reverse the tilt. Clean the other side with the same light pressure.
    5. Vacuum the sill and floor. Removing fallen dust now prevents it from circulating back onto the window treatment.

    Hunter Douglas recommends routine dusting and gentle vacuuming with a brush attachment for many window treatments, while noting product-specific exceptions for delicate fabrics. Its current care guidance also suggests cool air for selected products—not warm or hot air, which can distort delicate materials. Review the instructions for your exact product before using air or suction. See Hunter Douglas care guidance.

    How do you clean real wood blinds?

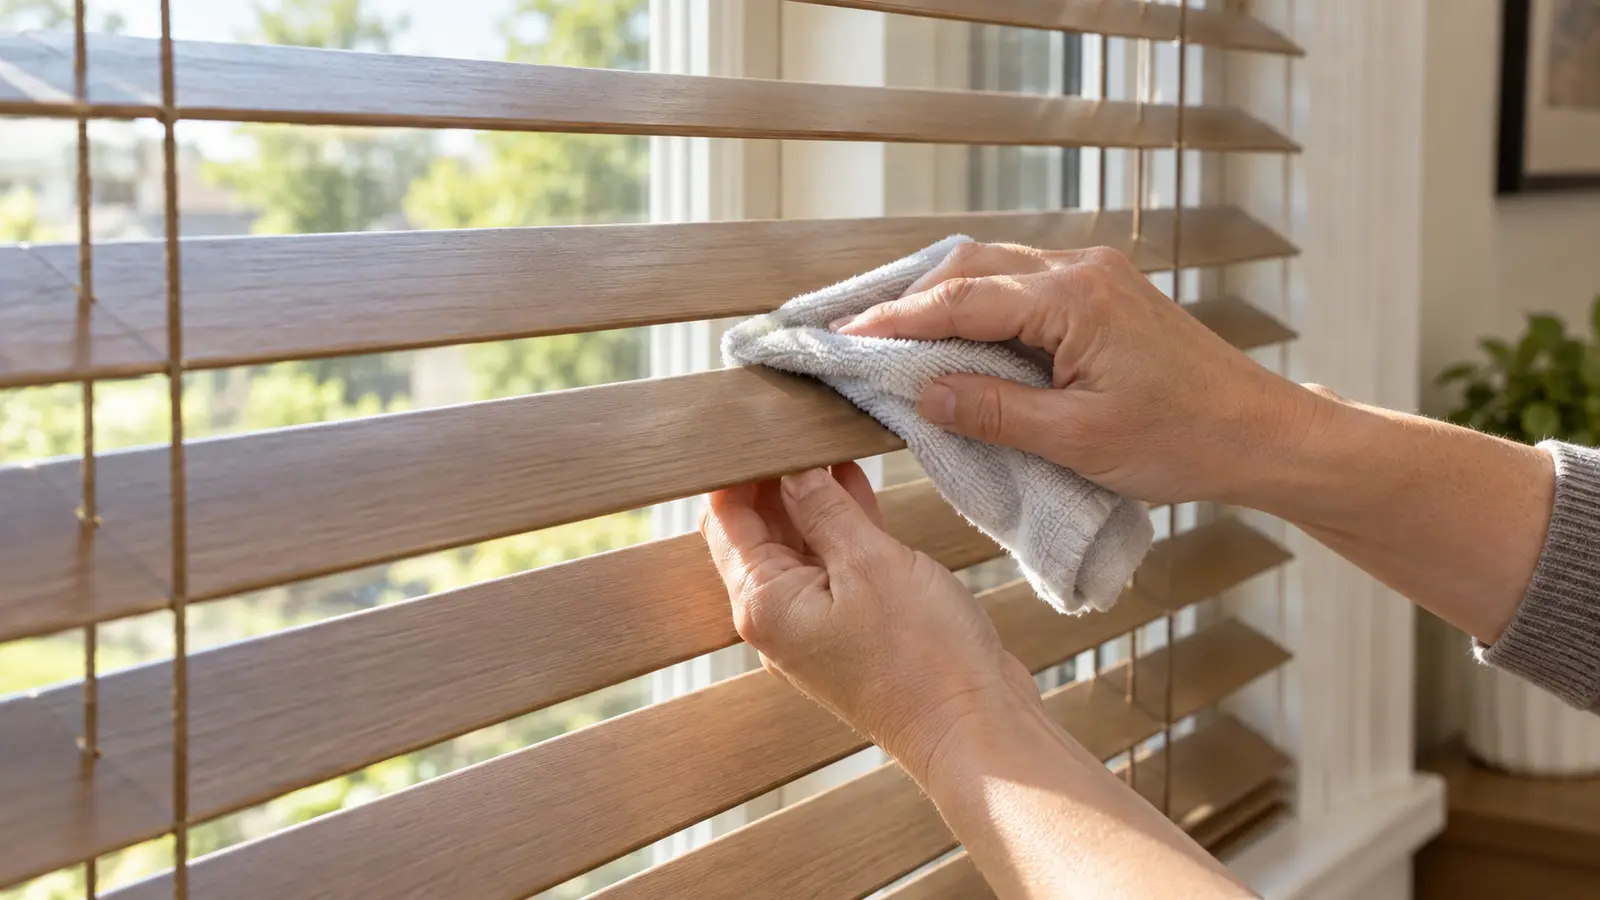
    Real wood blinds need a dry-first approach because excessive moisture can affect the wood and its finish. Support each slat with one hand and wipe with a dry, soft cloth using light pressure. Work from the center toward the ends so you do not pull against the ladder cords.

    For settled dust, use a vacuum brush attachment gently. Avoid soaking, steam, chemical solvents, and scrubbing cleansers. Hunter Douglas specifically advises protecting fine wood products from high moisture and spraying glass cleaner onto a cloth—not directly at the window—so overspray does not reach the finish. Review the manufacturer’s wood-blind guidance.

    Hands supporting a wood blind slat while gently wiping it with a microfiber cloth

    If a real-wood slat has a mark that dry dusting will not remove, stop before experimenting. Check the model’s care guide or contact the manufacturer. A spot can be less noticeable than a permanently dulled or swollen finish.

    How do you clean faux-wood and metal blinds?

    Faux-wood and metal blinds are often more tolerant of a lightly damp cloth, but that does not make every blind washable. Motorized headrails, decorative tapes, coatings, and specialty collections may require different care.

    1. Remove loose dust on both sides.
    2. Read the product label or care guide.
    3. If damp cleaning is approved, wring the microfiber cloth until it is only lightly damp.
    4. Support one slat at a time and wipe without bending it.
    5. Follow immediately with a clean dry cloth.
    6. Leave the blind lowered until every surface is dry.

    LEVOLOR’s current guidance allows a soft, lightly dampened cloth for faux-wood and metal blinds and warns against solvents or abrasive solutions. Check LEVOLOR’s material-specific instructions. Do not assume that bathtub immersion is safe: even where a manufacturer permits it for a particular metal collection, headrails, decorative tapes, lift systems, or other components may be excluded.

    How do you clean fabric shades?

    Fabric shades need the lightest touch. Begin with gentle dusting, low-suction vacuuming with an approved attachment, or cool air if the manufacturer allows it. Move vertically on pleated or sheer products to avoid pulling the structure sideways.

    Do not automatically spot-clean fabric. Some materials can be blotted with lukewarm water and a mild approved detergent, while others can crease, discolor, or develop a visibly cleaner patch. Hunter Douglas lists products and fabrics that should not be spot-cleaned, and LEVOLOR warns that window-cleaning products can discolor certain shades. Product-specific instructions should decide the method.

    If spot cleaning is approved, test an inconspicuous area first. Use a clean white cloth, blot instead of rubbing, keep moisture away from motors and headrails, and allow the shade to dry fully in the position recommended by the manufacturer.

    What mistakes can damage blinds?

    • Spraying the window directly. Cleaner can splatter onto wood, fabric, cords, and headrails. Apply glass cleaner to a cloth away from the treatment.
    • Starting wet. Water turns loose dust into streaks and can push grime into fabric or cord openings.
    • Using one method on every material. A damp cloth that works on approved faux wood may damage real wood or leave a mark on fabric.
    • Scrubbing thin slats. Excess pressure can bend metal or crack an aging finish.
    • Using heat. Hot air and steam can distort some synthetic or delicate products unless explicitly approved.
    • Soaking the headrail. Water can reach mechanisms or electronics.
    • Closing slats completely while dusting. Overlapping edges remain dirty. Tilt them almost closed instead.

    What if dust or spots remain?

    If dust returns immediately, clean the sill, frame, nearby vent, and floor before repeating the blind. Replace or wash the microfiber cloth once it stops picking up particles. Working with a dirty cloth simply redistributes dust.

    For greasy buildup near a kitchen, first confirm the blind material and approved cleaner. Do not improvise with degreasers, solvents, or abrasive powders. Use the smallest amount of an allowed product on a hidden area, then dry promptly. If residue remains, contact the manufacturer or a specialist.

    For streaks on approved faux-wood or metal blinds, repeat with a clean, barely damp cloth and immediately buff dry. For spots on fabric or real wood, pause instead of adding more moisture.

    When should you call a professional?

    Professional help may be appropriate for tall or difficult-to-reach windows, delicate sheers, motorized treatments, smoke or heavy grease residue, mold-like growth, damaged cords, or a treatment whose instructions require a specialized process. Some manufacturers recognize professional injection/extraction or ultrasonic cleaning only for selected products; those methods are not universal.

    If the blinds are part of a larger reset, SRS can help with the surrounding room, window sills, baseboards, floors, and other included surfaces. Explore house cleaning services, review the baseboard-cleaning guide, or use the whole-house cleaning checklist to plan the work in a practical order.

    Cleaning blinds FAQ

    What is the fastest safe way to clean dusty blinds?

    Lower them, tilt the slats almost closed, and work from top to bottom with a clean microfiber cloth or an approved soft vacuum brush. Reverse the tilt and clean the other side. This dry-first method is appropriate for many products, but always check the care guide.

    Can you clean blinds with water?

    Only when the manufacturer permits it for that material and model. A lightly damp cloth may be suitable for some faux-wood or metal blinds. Real wood, fabrics, motors, headrails, and decorative tapes can have stricter limits.

    Should you remove blinds before cleaning?

    Routine dusting is usually done in place. Removal or immersion should happen only when the product instructions explicitly approve it and you can safely handle and reinstall the treatment.

    How often should blinds be dusted?

    There is no universal schedule. Dust them when buildup becomes visible or during the room’s regular cleaning cycle. Homes near open windows, busy roads, pets, or active ventilation may need more frequent attention.

    Want the rest of the room to feel just as refreshed?

    SRS Cleaning Services provides dependable house cleaning across Orange County. Tell us what needs attention and request a quote without pressure.

  • Green Cleaning for a Healthier Orange County Home

    Green Cleaning for a Healthier Orange County Home

    Green cleaning means choosing the least intensive method that safely does the job, using products exactly as labeled, protecting each surface, and reducing unnecessary waste. Start with routine cleaning, choose products with transparent directions, and disinfect only when the situation calls for it.

    You do not need to replace everything under the sink or follow a complicated routine. A few repeatable habits can leave a space feeling fresher while making product choices easier to understand.

    What does green cleaning mean?

    Green cleaning is a practical approach to removing dust, soil, grease, and everyday messes while considering product ingredients, packaging, indoor air, water use, and surface life. It is not a promise that one product is harmless in every situation.

    A useful routine begins with the task and surface—not the marketing language on the bottle. “Natural,” “plant-based,” and “eco-friendly” may describe part of a product, but the label directions still determine where and how it should be used. Test unfamiliar products in an inconspicuous area and follow the surface manufacturer’s care instructions.

    The goal is a clean, comfortable result with fewer unnecessary products and less avoidable waste. That can mean using washable cloths, preventing buildup with regular care, selecting an appropriate cleaner, and applying only the amount directed on the label.

    What supplies should you prepare?

    Keep the supply list short and match it to the rooms you plan to clean. A basic setup may include:

    • Washable microfiber or other surface-safe cleaning cloths
    • A vacuum with the appropriate attachment for floors and upholstery
    • A mop or floor tool approved for the flooring material
    • A mild cleaner labeled for the intended surface
    • Gloves or eye protection when the product label requires them
    • Separate cloths or tools for bathrooms and food-preparation areas
    • A small container for collecting items that belong in another room

    Before starting, clear loose clutter, check labels, open windows or use normal ventilation when directions recommend it, and keep products away from children and pets. Avoid transferring a cleaner into an unlabeled container.

    How do you build a simple green-cleaning routine?

    The easiest routine is one you can repeat before residue and clutter become difficult to manage. Use these steps as a flexible starting point:

    1. Remove clutter first. Put away loose items so surfaces can be cleaned without repeatedly moving around them.
    2. Work from higher areas to lower ones. Dust shelves and fixtures before cleaning counters and floors.
    3. Dry-clean before adding moisture. Vacuum or remove loose soil so it does not turn into streaks or residue.
    4. Use the correct product sparingly. Follow the label instead of assuming more product will clean better.
    5. Give attention to high-use areas. Kitchen counters, sinks, bathroom fixtures, entry floors, and frequently handled surfaces often create the biggest visible difference.
    6. Clean tools after use. Launder cloths according to their care instructions and allow reusable tools to dry before storage.

    Short resets can prevent a larger weekend project. Wiping cooking residue after a meal, drying bathroom fixtures, and vacuuming high-traffic areas regularly can make a future deep cleaning easier to manage.

    How should you choose cleaning products?

    Look for a product that identifies its intended surfaces, provides clear directions, and fits the actual task. If you want an independently reviewed option, the EPA Safer Choice program evaluates every intentionally added ingredient and also considers performance, packaging, and other criteria. EPA maintains a searchable list of certified products, including fragrance-free options.

    Cleaning, sanitizing, and disinfecting are not interchangeable. The CDC explains that routine cleaning with soap or detergent removes most dirt and germs; disinfecting is generally most relevant when someone is sick or recently visited while sick. When disinfection is appropriate, clean visible soil first and follow the product label for surface compatibility, protective equipment, application, and contact time.

    Never mix cleaning products. In particular, CDC safety reporting warns that mixing bleach with ammonia or acids can generate dangerous gases. Do not invent a dilution or substitute an online recipe for the manufacturer’s directions.

    How do you protect different surfaces?

    A product can be suitable for one surface and damaging to another. Check the material before cleaning and follow its manufacturer’s care instructions.

    • Wood and laminate: limit moisture, wipe spills promptly, and avoid assuming a floor product is safe for cabinets or furniture.
    • Natural stone: use a stone-compatible product; acidic cleaners can affect some materials.
    • Stainless steel: work with the visible grain and use a nonabrasive method. See the SRS guide to cleaning stainless steel without streaks.
    • Painted walls and trim: start gently, test first, and avoid soaking the finish. The same cautious approach applies when cleaning baseboards.
    • Electronics: follow the device manufacturer’s instructions and avoid spraying liquid directly onto screens, ports, or controls.

    If the material is unknown, stop before using a strong chemical or abrasive tool. A small amount of soil is usually easier to correct than a dulled finish, etched stone, swollen laminate edge, or scratched appliance panel.

    What common mistakes should you avoid?

    • Using too much product: excess cleaner can leave a film that attracts soil or creates streaks.
    • Skipping the label: a familiar brand may have different directions for different formulas.
    • Calling every task “disinfection”: routine cleaning is often sufficient; use disinfectants for situations and surfaces covered by their labels.
    • Using one cloth everywhere: separate tools for bathrooms and food-preparation areas to avoid moving soil between them.
    • Ignoring dwell or contact time: wiping a disinfectant away immediately may not follow the label.
    • Assuming green means risk-free: certified or plant-derived products still require correct storage and use.
    • Forcing a DIY solution: stop when a method changes the color, sheen, texture, or finish of the surface.

    What should you do when cleaning leaves poor results?

    If a surface looks streaky, first check whether too much product was used. Use a clean cloth and the rinse or finishing method allowed by the manufacturer. Do not add a second chemical on top of the first.

    If residue returns quickly, inspect the tool as well as the cleaner. A saturated cloth, dirty mop pad, or vacuum attachment can redistribute soil.

    If an odor remains, remove the source instead of adding more fragrance. Empty waste containers, clean spills, launder washable fabrics as directed, and use normal ventilation when conditions allow.

    If the finish changes, stop immediately. Blot away excess moisture if safe, keep the product container and instructions available, and contact the surface manufacturer or an appropriate specialist before trying another method.

    When does professional help make sense?

    Professional help can be useful when buildup covers several rooms, the available time is limited, the surface materials need different care, or a detailed reset would make regular upkeep easier. It can also help before or after a move when the scope is larger than routine cleaning.

    Before requesting service, identify any sensitivities, preferred fragrance level, delicate surfaces, and products that must or must not be used. Clear information helps the cleaning team plan the work and protects expectations on both sides.

    SRS Cleaning provides house cleaning services in Orange County. If a practical cleaning plan would give you back time, request a quote and share the rooms, priorities, and surface concerns you want the team to review.

    Green cleaning FAQ

    Does green cleaning mean using only homemade cleaners?

    No. Green cleaning can include commercially prepared products with clear directions and third-party certifications. Homemade mixtures are not automatically safer or compatible with every surface.

    Do I need to disinfect every surface?

    Usually not. CDC guidance says routine cleaning is sufficient in many household situations. Disinfection may be appropriate when someone is sick or for another specific need; always follow the disinfectant label.

    How can I reduce cleaning-product waste?

    Use the labeled amount, choose refill or concentrate formats when practical, maintain washable tools, and prevent buildup with short regular cleaning sessions. Buy only products that match the surfaces you actually clean.

    What is the safest first step on an unfamiliar surface?

    Check the manufacturer’s care guidance, choose a product labeled for the material, and test it in a hidden area. Stop if the color, sheen, or texture changes.

  • How to Clean Stainless Steel Appliances Without Streaks

    How to Clean Stainless Steel Appliances Without Streaks

    The simplest way to clean stainless steel appliances without streaks is to use a soft microfiber cloth, wipe in the direction of the grain, remove all cleaner residue, and dry the surface immediately with a second clean cloth. Start with the appliance manufacturer’s care instructions because traditional stainless steel, fingerprint-resistant finishes, and black stainless steel can require different treatment.

    You do not need a crowded shelf of products to make a refrigerator, dishwasher, or range look noticeably better. A careful, low-moisture method handles most fingerprints and everyday smudges while reducing the chance of scratches, haze, and water marks.

    Professional cleaner wiping a stainless steel refrigerator with a microfiber cloth
    Use a soft cloth, follow the grain, and dry the surface completely for a cleaner finish.

    What is the quickest streak-free method?

    For light fingerprints and ordinary kitchen dust, begin with a clean microfiber cloth lightly dampened with water. Wipe along the grain, not across it. Follow immediately with a dry microfiber cloth, using the same direction.

    If water alone does not lift the residue, use warm water with a small amount of mild dish detergent according to its label, then wipe again with a separate cloth dampened with clean water. Dry and buff before the surface air-dries.

    This approach follows the basic care direction published by both GE Appliances and Whirlpool: use a soft, nonabrasive material, work with the grain, and dry the surface thoroughly. Always defer to the manual for your specific model.

    What supplies should you prepare?

    A short supply list keeps the process controlled:

    • Two or three clean, soft microfiber cloths
    • Warm water
    • Mild dish detergent used according to the label
    • A clean bowl or container
    • A manufacturer-approved stainless steel cleaner, only if needed
    • Your appliance’s owner manual or online care guide

    Use separate cloths for washing, rinsing, and drying. A cloth that still holds grease, polish, or laundry residue can redistribute a film across the appliance. If a cloth smells strongly of another cleaner or feels coated, choose a fresh one.

    Before you begin, check whether the surface is traditional stainless steel, fingerprint-resistant stainless, black stainless, or a coated finish. The appearance may be similar, but the care directions may not be interchangeable. Whirlpool’s guidance for fingerprint-resistant stainless steel, for example, emphasizes mild soap, water, a soft cloth, and complete drying.

    How do you clean stainless steel step by step?

    1. Read the model-specific instructions. Check the owner manual before applying a commercial product or attempting to treat a stain. If you are cleaning a range or cooktop, make sure the controls are off and the surface is cool.
    2. Find the grain. Look closely for fine horizontal or vertical lines. Test your wiping direction on a small area; moving with those lines generally produces a more even finish.
    3. Remove loose debris. Use a dry microfiber cloth to lift dust and crumbs. Do not drag hardened food particles across the surface.
    4. Clean a small section. Lightly dampen a soft cloth with warm water or label-directed mild soapy water. Wipe evenly with the grain. Avoid flooding seams, control panels, displays, vents, handles, and dispenser openings.
    5. Rinse away residue. Use a second cloth lightly dampened with clean water. A thin detergent film is a common source of haze and streaks.
    6. Dry immediately. Buff with a clean, dry microfiber cloth in the direction of the grain. Continue until no moisture or cloudy patches remain.
    7. Inspect from two angles. Step to the side and look across the surface in natural light. If you see a streak, use the clean rinse cloth followed by the dry cloth instead of adding more product.

    Work from the top down so drips do not cross an area you already finished. Clean one door or panel at a time. That is usually faster than coating the entire appliance and racing to dry it.

    How should you remove fingerprints?

    Most fresh fingerprints are a light mix of skin oils and dust. Water and a clean microfiber cloth may be enough. For marks that remain, mild soapy water can break up the oily film; rinse and dry afterward.

    Avoid the instinct to keep spraying more cleaner. Too much product can leave a visible coating, especially under kitchen lighting. Apply a manufacturer-approved cleaner to the cloth when its label or appliance instructions direct you to do so, rather than spraying near controls or openings.

    If fingerprints return quickly, keep one dedicated dry microfiber cloth nearby for brief touch-ups on handles and door fronts. Regular light care is easier than waiting for multiple layers of grease and dust to build up.

    What about grease and water spots?

    For a greasy film, first remove loose debris. Then make several gentle passes with mild soapy water instead of scrubbing aggressively. Rinse with a clean damp cloth and dry completely. Grease may require a second pass, but added pressure can create scratches without improving the result.

    Water spots often remain because mineral-containing droplets dried on the surface. Start by rewetting the area with clean water, wiping with the grain, and drying immediately. If the spot persists, consult the appliance manual before using an acidic cleaner or stain-removal product. Coated and specialty finishes may react differently.

    GE’s stainless steel guidance distinguishes ordinary cleaning from treatment for rust, tarnish, or discoloration and directs people to specific products and model instructions. That is a useful boundary: a stubborn blemish is not a reason to improvise with several cleaners at once.

    What should you avoid?

    Skip tools and products that can scratch, discolor, or leave residue unless your appliance manufacturer specifically approves them:

    • Steel wool and metal brushes
    • Abrasive green pads, gritty cloths, and harsh scouring powders
    • Commercial oven cleaner on exterior stainless steel
    • Chlorine bleach or products containing chlorine unless expressly approved for that exact surface and use
    • Ammonia or acidic products where the manufacturer warns against them
    • Heavy spraying around displays, controls, seams, or vents
    • Mixing any cleaning products

    Whirlpool warns against abrasive cleaners and pads on stainless cooktops, while GE advises against steel wool and other abrasives on traditional stainless exteriors. The safest rule is simple: read both the appliance manual and product label before use, test an approved method in an inconspicuous spot, and never combine cleaners.

    Why do streaks keep coming back?

    If the surface still looks cloudy, the problem is usually technique or residue rather than a lack of cleaning power.

    What you notice Likely cause What to try
    Long lines after drying Wiping across the grain Rinse lightly and dry with the grain
    Cloudy film Too much detergent or polish Use a clean damp cloth, then dry
    Small spots Water left to air-dry Rewipe and dry immediately
    Greasy smears A dirty or coated cloth Switch to fresh microfiber cloths
    Uneven shine Product applied inconsistently Follow the product label in small sections

    Also check the cloth itself. Fabric softener and dryer-sheet residue can reduce microfiber’s absorbency and leave a faint film. Launder cleaning cloths according to their care label and keep a few dedicated to glass and stainless steel.

    How often should appliances be cleaned?

    Wipe visible fingerprints and fresh food splashes when you notice them. Handles and frequently touched areas may need attention several times a week, while full appliance fronts may only need a more complete cleaning weekly or as needed.

    Prompt cleaning matters most around cooking areas, where grease and food residue can harden. Short, regular passes also make a larger kitchen reset more manageable. Pair this task with an organized cleaning checklist or a room-by-room routine so overlooked details do not accumulate.

    If you are already working through dusty trim and edges, the same dry-to-damp principle appears in our guide to cleaning baseboards without spreading dust.

    When is professional help useful?

    Professional cleaning can help when kitchen buildup is part of a larger list, time is limited, or the appliance exterior needs to be cleaned alongside cabinets, counters, floors, and other surfaces. If the cabinet fronts need attention too, follow the finish-aware guide to cleaning kitchen cabinets without causing damage. A routine house cleaning service can help maintain the room, while deep cleaning may be more appropriate when residue has accumulated across many areas.

    A cleaner should not attempt appliance repair or promise to remove permanent scratches, corrosion, or damaged coatings. Contact the appliance manufacturer or a qualified service professional when the finish appears peeled, deeply scratched, rusted, or otherwise damaged.

    Stainless steel cleaning FAQ

    Should you wipe stainless steel in circles?

    Follow the visible grain instead. Circular wiping can cross the grain repeatedly and make residue or fine marks more noticeable.

    Can you use paper towels?

    Manufacturer guidance commonly favors a clean microfiber or other soft cloth. Paper products vary in texture and can leave lint, so a dedicated soft cloth is the more predictable option.

    Can you use vinegar on every stainless steel appliance?

    No. Finishes and manufacturer instructions vary. Check the owner manual before using vinegar or another acidic product, especially on coated, black, or fingerprint-resistant stainless steel.

    Why should you dry stainless steel immediately?

    Drying removes remaining moisture and helps prevent water spots or discoloration. Whirlpool specifically advises thorough drying in its stainless steel care guidance.

    What is the best cleaner for stainless steel?

    For everyday smudges, begin with the mildest manufacturer-approved method—often water or mild soapy water with a soft cloth. For stubborn marks, use only a stainless steel product approved by the appliance manufacturer and follow its label.

    Want the kitchen refreshed without adding another project to your week? Explore SRS house cleaning options in Orange County and request a quote for the level of help that fits your space.

  • Move Out Cleaning Cost: What Affects the Price?

    Move Out Cleaning Cost: What Affects the Price?

    Move Out Cleaning cost is rarely one flat number that fits every property. A compact, lightly used apartment can require far less labor than a larger home with grease buildup, multiple bathrooms, interior appliances, cabinet shelves, blinds, and detailed floor work. The most useful quote is based on the actual size, condition, scope, and deadline—not only the bedroom count.

    This guide explains what typically changes the price, what to confirm before booking, and how to compare estimates fairly. Published national ranges can provide context, but they are not a substitute for a written quote for an Orange County property.

    Professional cleaner vacuuming an empty Orange County home during Move Out Cleaning
    An accurate Move Out Cleaning estimate starts with the property’s size, condition, and required scope.

    Move Out Cleaning cost: the quick answer

    Current published estimates vary considerably. Angi’s guide, updated July 10, 2026, reports a national range of $120 to $420, depending on property size, condition, and cleaning level. Care.com’s March 19, 2026 guide gives a broader typical range of $200 to $500. Those figures come from different datasets and methods, which is why they should be treated as planning context rather than a guaranteed local price.

    Orange County pricing may land above or below those ranges. A detailed empty-home service often takes longer than routine cleaning because it reaches cabinet interiors, appliance interiors, baseboards, doors, fixtures, edges, and other areas that become visible after belongings are removed. Access, parking, stairs, timing, and special requests can also affect labor.

    Pricing inputWhy it mattersWhat to provide
    Square footageMore surface area generally requires more laborApproximate interior square footage
    Current conditionHeavy residue, dust, or pet hair takes longerRecent photos and honest notes
    Requested scopeInterior appliances, cabinets, windows, and blinds add detail workA written task list
    Deadline and accessTight windows or difficult access can affect schedulingKey-return time, parking, gate, and stair details

    What affects Move Out Cleaning cost?

    The strongest cost driver is usually the amount of work required. Two properties with the same floor plan can receive different estimates when one is empty and maintained while the other has cooking residue, soap buildup, pet hair, adhesive marks, or neglected detail areas.

    • Property size: More rooms, bathrooms, storage areas, and floor space increase cleaning time.
    • Condition: Built-up grease, hard-water residue, dust, and debris require additional passes and tools.
    • Bathrooms and kitchens: These rooms tend to contain the most detailed surfaces, fixtures, and residue.
    • Appliance and cabinet interiors: Emptying and cleaning shelves, racks, drawers, and interior surfaces adds labor.
    • Windows, tracks, and blinds: These are often separate from a basic scope and should be confirmed in writing.
    • Floor type: Carpet, tile, laminate, and natural materials may require different processes or separate specialists.
    • Access: Stairs, elevators, parking distance, gated entry, and key coordination can change the time on site.
    • Timing: A firm same-day key deadline leaves less flexibility than a normal appointment window.

    Photos are especially helpful. Clear images of the kitchen, bathrooms, floors, appliance interiors, and any problem areas allow a cleaning company to estimate labor more accurately before arrival.

    Common ways cleaning companies price the work

    Cleaning companies may use a flat rate, an hourly rate, a square-foot formula, or a blended estimate. No method is automatically better; clarity matters more than the label.

    Flat-rate estimates

    A flat rate is convenient when the scope and condition are well documented. Ask what assumptions support the number and what could trigger a price change.

    Hourly pricing

    An hourly arrangement can suit an uncertain or custom scope, but the total depends on crew size and time. Confirm whether the quoted rate is per cleaner or for the entire team, whether there is a minimum, and whether the work stops at a time cap.

    Square-foot or room-based pricing

    Size-based pricing creates a useful baseline, but condition and scope still matter. Bedrooms do not always predict labor well; a small kitchen with heavy residue can take longer than a large empty bedroom.

    What is usually included?

    A complete scope should explain what happens in every room. It may include dust removal, vacuuming, mopping, baseboards, doors, switches, accessible fixtures, bathroom surfaces, kitchen surfaces, and empty storage areas. Interior ovens, refrigerators, cabinets, drawers, blinds, and window tracks may be included or priced separately.

    Professional cleaner wiping inside empty kitchen cabinets during Move Out Cleaning
    Interior cabinets and appliances are detail-intensive areas that should be confirmed in the written scope.

    Do not assume that “deep cleaning” and Move Out Cleaning describe identical services. An occupied deep clean may focus on buildup around furniture and everyday living areas, while an empty-property service can include cabinet interiors, closet shelves, appliance interiors, and edges that were previously inaccessible. SRS explains the practical difference in its Move In Cleaning versus Move Out Cleaning guide.

    Add-ons and exclusions that change the total

    Some tasks require equipment, training, insurance, or time beyond general house cleaning. Common examples include carpet extraction, exterior windows, high glass, pressure washing, hauling, wall washing, mold remediation, pest waste, construction debris, and restoration work.

    A cleaning quote should separate included tasks from optional work. That prevents a low starting price from becoming an unexpectedly high total after arrival. It also helps identify work that needs a different specialist. Ask about:

    • Oven and refrigerator interiors
    • Cabinet and drawer interiors
    • Interior windows, tracks, screens, and blinds
    • Garage, balcony, patio, or storage areas
    • Carpet cleaning or stain treatment
    • Adhesive, paint, wax, or heavy residue removal
    • Trash, furniture, or unwanted-item removal
    • Areas above normal reach

    If a task is important to the final walkthrough, put it on the scope before confirming the appointment.

    How to compare Move Out Cleaning quotes

    The lowest number is not necessarily the least expensive choice if it excludes the work needed for the handoff. Compare the same scope, property information, and service standard.

    1. Send every company the same details. Include square footage, room count, condition, access instructions, deadline, and photos.
    2. Request an itemized scope. Confirm kitchens, bathrooms, floors, baseboards, cabinets, appliances, windows, blinds, and storage areas.
    3. Ask what is excluded. A clear exclusion list is as valuable as the included list.
    4. Confirm the pricing model. Understand minimums, time caps, team size, and conditions that permit a price adjustment.
    5. Check scheduling and correction policies. Know what happens if access is delayed or a missed area is found after service.
    6. Confirm insurance and communication. Reliable arrival updates and a defined contact make a tight moving schedule easier to manage.

    A detailed estimate may initially look higher than an abbreviated quote while including more of the required work. Comparing line by line makes the difference visible.

    When professional cleaning may be worth the cost

    Professional help can be practical when the property is large, the condition requires detail work, the handoff window is short, or moving tasks have already filled the schedule. It may also help when consistent documentation and a final walkthrough matter.

    A do-it-yourself clean may be reasonable for a small, lightly used property when there is enough time, equipment, and energy to complete the full checklist. The decision is not only about the cleaning invoice. It also involves time, supplies, equipment, transportation, and the risk of leaving demanding work until the last day. The SRS article Is Move Out Cleaning Worth It? explores that trade-off in more detail.

    Service coordinator completing a final walkthrough in a clean empty apartment
    A documented final walkthrough helps confirm the agreed scope before keys are returned.

    How to keep the final cost predictable

    Start early enough to provide accurate information. Waiting until the key-return day makes it harder to compare options or handle an access problem.

    • Remove belongings, food, and trash before the crew arrives.
    • Share recent, well-lit photos rather than relying only on room count.
    • List every required interior appliance, cabinet, window, blind, and storage area.
    • Disclose heavy buildup, pet hair, stairs, parking limits, or access restrictions.
    • Separate cleaning from hauling, repairs, carpet extraction, and restoration work.
    • Confirm the final scope, price basis, appointment window, and payment terms in writing.
    • Leave enough time for a walkthrough before the final handoff.

    The SRS Move Out Cleaning guide can help organize the broader timeline before cleaning day.

    Move Out Cleaning cost FAQ

    Why do published cost estimates differ so much?

    Sources use different markets, property sizes, scopes, and pricing methods. Some figures represent starting rates, while others describe completed-job totals. Compare definitions before comparing numbers.

    Does an empty property cost less to clean?

    Removing belongings improves access, but it also reveals cabinet interiors, wall edges, floor areas, and appliance spaces that may require detailed work. Condition and scope determine whether the total is lower.

    Are supplies normally included?

    Many professional companies bring standard supplies and equipment, but policies vary. Confirm whether specialty products, carpet equipment, ladders, or disposal fees are separate.

    Can the price change after arrival?

    It may change when the actual condition or requested scope differs materially from the information provided. A reputable company should explain the difference and obtain approval before performing additional paid work.

    How far ahead should Move Out Cleaning be scheduled?

    Reserve the appointment as soon as the moving and key-return dates are known, especially near weekends and month-end. Schedule the service after belongings are removed and before the final walkthrough whenever possible.

    Request a clear Orange County quote

    SRS Cleaning Services provides detailed house cleaning across Orange County, including Move Out Cleaning. Share the property size, current condition, requested scope, access information, and deadline so the estimate reflects the work that actually needs to be completed.

  • How to Clean Baseboards Without Making a Mess

    How to Clean Baseboards Without Making a Mess

    Baseboards collect the evidence of everyday life: dust along the top edge, hair near the floor, scuffs in hallways, and sticky marks around kitchens or entryways. The frustrating part is that a rushed wet wipe can turn that loose soil into gray streaks. Learning how to clean baseboards in the right order makes the work faster, neater, and gentler on the finish.

    The simplest method is dry first, damp second, and dry again. Work in short sections, keep your tools clean, and use only as much moisture as the surface needs. This guide explains that process, how to handle stubborn marks, and what to change for painted, wood, and composite trim.

    Baseboard Cleaning: The Quick Answer

    Vacuum or dust the baseboards before introducing water. Then wipe a small section with a soft cloth that is damp rather than wet. Use plain warm water first; if the finish allows it and soil remains, follow the paint or trim manufacturer’s care guidance for a mild cleaning product. Wipe away residue with a second clean cloth and dry the trim promptly.

    This order matters. Dry removal captures loose particles instead of spreading them across the paint. Small sections keep the cloth from becoming overloaded, while prompt drying helps protect joints, chipped areas, and moisture-sensitive trim.

    What You Need

    • A vacuum with a soft brush attachment or a clean microfiber duster
    • Two or more soft microfiber cloths
    • A small bowl or bucket of warm water
    • A mild cleaner approved for the specific finish, if plain water is not enough
    • A soft detail brush for grooves and corners
    • A towel to protect the floor and a dry cloth for the final pass

    Skip scouring pads, stiff brushes, and unverified cleaning hacks. Benjamin Moore advises using a non-abrasive sponge and gentle pressure on painted walls; its maintenance guidance also warns against abrasive sponges on painted finishes. Sherwin-Williams similarly recommends mild soap, warm water, and a soft cloth or sponge for painted surfaces. Baseboard paint can vary, so test any damp method in a discreet spot before cleaning a visible area. See the current manufacturer guidance from Benjamin Moore and Sherwin-Williams.

    Vacuum brush attachment removing loose dust from a white baseboard
    Remove loose dust before using a damp cloth.

    How to Clean Baseboards Step by Step

    1. Clear the working area

    Move small objects, cords, and lightweight furniture away from the wall. Place a towel beneath the section if the flooring is sensitive to moisture. Open blinds or turn on nearby lights so scuffs and residue are easier to see.

    2. Remove loose dust from top to bottom

    Use the vacuum’s soft brush attachment along the top ledge, molded grooves, vertical face, and floor edge. Keep the nozzle moving gently so it does not scrape the finish. A clean microfiber duster works when a vacuum is unavailable, but shake or change it before it becomes loaded with dust.

    3. Test the damp method

    Dampen a white microfiber cloth with plain warm water and wring it thoroughly. Wipe an inconspicuous spot, then allow it to dry. Stop if color transfers to the cloth, the finish becomes dull, or the trim swells. If you know the paint or trim product, check its manufacturer instructions before proceeding.

    4. Wipe in short sections

    Start with a section about an arm’s length. Wipe the top edge first, then the face and bottom edge. Fold the cloth to expose a clean side as it picks up soil. Rinse or replace it frequently; continuing with a dirty cloth simply redistributes grime.

    5. Detail grooves and corners

    Wrap the cloth around a finger for simple profiles. For narrow grooves, loosen residue with a soft detail brush, then wipe it away. Avoid forcing water into seams, nail holes, chipped paint, or the joint where trim meets flooring.

    6. Remove residue and dry

    If a manufacturer-approved cleaner was needed, use a separate barely damp cloth to remove remaining residue. Finish with a dry microfiber cloth. Check the floor edge for dust or drips before moving furniture back.

    Hand wiping a painted baseboard with a barely damp microfiber cloth
    Use minimal moisture and dry the surface promptly.

    How to Clean Stubborn Marks

    For a stubborn spot, first identify what you are cleaning. A dusty streak, shoe scuff, food splash, and paint transfer do not always respond to the same method. Begin with the least aggressive option: plain warm water and gentle pressure. If that fails, use only a product the finish manufacturer permits, following the label exactly.

    Do not jump straight to abrasive pads or powerful chemicals. Aggressive rubbing can polish or dull paint unevenly, a change sometimes called burnishing. Benjamin Moore’s paint troubleshooting guidance recommends non-abrasive cleaners with a soft cloth or sponge and a clean-water rinse for painted surfaces. If a mark remains after a careful second attempt, it may be damaged paint rather than removable soil.

    Keep products in their original containers, ventilate as directed, and never mix cleaners. The U.S. Environmental Protection Agency advises following labels, avoiding chemical mixtures, and using mild soap and water when appropriate; its indoor environment guidance also points readers to EPA Safer Choice products.

    How to Clean Different Baseboard Finishes

    Painted wood or MDF

    Use a soft cloth, low moisture, and light pressure. Pay particular attention to chips and exposed edges because composite material can be sensitive to water. Recently painted trim may need curing time before washing; consult the paint manufacturer instead of assuming it is ready.

    Stained or sealed wood

    Dust thoroughly and follow the wood finish manufacturer’s care instructions. Do not let water collect in joints or along the floor. If the finish is unknown, a dry microfiber pass is the safest routine starting point until compatible care is confirmed.

    Vinyl, PVC, or other synthetic trim

    These materials may tolerate damp cleaning, but the printed or coated surface can still scratch or discolor. Check the manufacturer’s instructions, test first, and avoid abrasive tools. Caulk lines and wall paint beside the trim may be less washable than the trim itself.

    How to Avoid Making a Mess

    1. Vacuum before wiping. This is the most important step for preventing muddy streaks.
    2. Work from cleaner rooms toward dirtier ones. Change cloths before moving from an entry or kitchen into another area.
    3. Use two-cloth control. Keep one cloth for damp cleaning and another for drying.
    4. Carry a small container. A smaller water supply is easier to control than a full bucket near flooring.
    5. Clean in short runs. Finish and inspect one wall before starting the next.
    6. Vacuum the floor last. This captures anything loosened during detailing.

    If you are cleaning several rooms, add baseboards to an entire-house cleaning checklist rather than treating them as a separate marathon. Pairing them with floor care reduces repeated setup and keeps the order logical. For laminate, follow the separate guide to clean laminate floors without leaving streaks so moisture and residue stay controlled.

    How Often to Clean Baseboards

    There is no universal schedule. A quick dry dusting during regular floor care is often enough to prevent heavy buildup. Entryways, kitchens, hallways, and rooms with pets or frequent open windows may need attention sooner than low-traffic rooms.

    Use visible soil as the trigger. If the top edge has a gray line, corners are collecting hair, or scuffs are becoming harder to remove, shorten the interval. A practical house cleaning maintenance schedule should adapt to the space instead of forcing every task into the same frequency.

    When Professional Cleaning Helps

    Baseboards become time-consuming when dust has settled into detailed profiles, marks run through several rooms, or the task is part of a larger reset. Professional help can make sense when floors, trim, doors, kitchens, and bathrooms all need coordinated attention.

    SRS Cleaning Services provides house cleaning in Orange County, including detailed options for spaces that need more than routine upkeep. Review the scope of Deep Cleaning and ask which trim details are included before booking.

    Baseboard Cleaning FAQ

    What is the best thing to use to clean baseboards?

    For routine care, start with a vacuum brush or microfiber duster, followed by a barely damp soft cloth if needed. Plain warm water is the least aggressive wet option. Use a cleaner only when the finish manufacturer and product label indicate compatibility.

    Can I clean baseboards without getting on the floor?

    An extendable microfiber duster or a clean flat mop with a soft pad can handle light dust while standing. It offers less precision around corners and grooves, so detailed spots may still require closer work. Avoid pressing hard with a long handle because it is easier to damage the finish.

    Should baseboards be cleaned before or after vacuuming floors?

    Vacuum the baseboards first, clean them, and then vacuum the floor. The first pass removes dust from the trim; the final floor pass captures particles dislodged during detailing.

    Professional cleaner wiping white baseboards in a bright living room
    A careful dry-to-damp process keeps baseboard cleaning controlled.

    Ready for a More Detailed Clean?

    If baseboards are one item on a much longer list, ask SRS Cleaning Services about the right cleaning scope for your Orange County space.