
Get a Quote

Tag: Cleaning Checklist

  • How to Get Dog Smell Out of House Without Masking It

    How to Get Dog Smell Out of House Without Masking It

    If you are wondering how to get dog smell out of house without simply covering it up, start with the places where odor actually settles. Dog smell can linger even after a room looks clean because odor often sits in soft fabrics, floor edges, pet bedding, entry mats, upholstery, and the places where oils, saliva, dander, and moisture collect. The best approach is not to cover the smell with fragrance. It is to find the source, clean the material holding the odor, improve airflow when conditions allow, and use cleaning products only according to their labels.

    This guide explains how to get dog smell out of the house with a practical room-by-room plan. It focuses on source removal, washable items, floors, upholstery, ventilation, and safe product use. When the odor is part of a larger cleaning reset, SRS Cleaning Services can help with House Cleaning, Deep Cleaning, and recurring cleaning routines across Orange County.

    Related SRS resources: For cleaning help beyond odor control, compare House Cleaning, Deep Cleaning, Recurring Cleaning, and the house cleaning maintenance schedule.
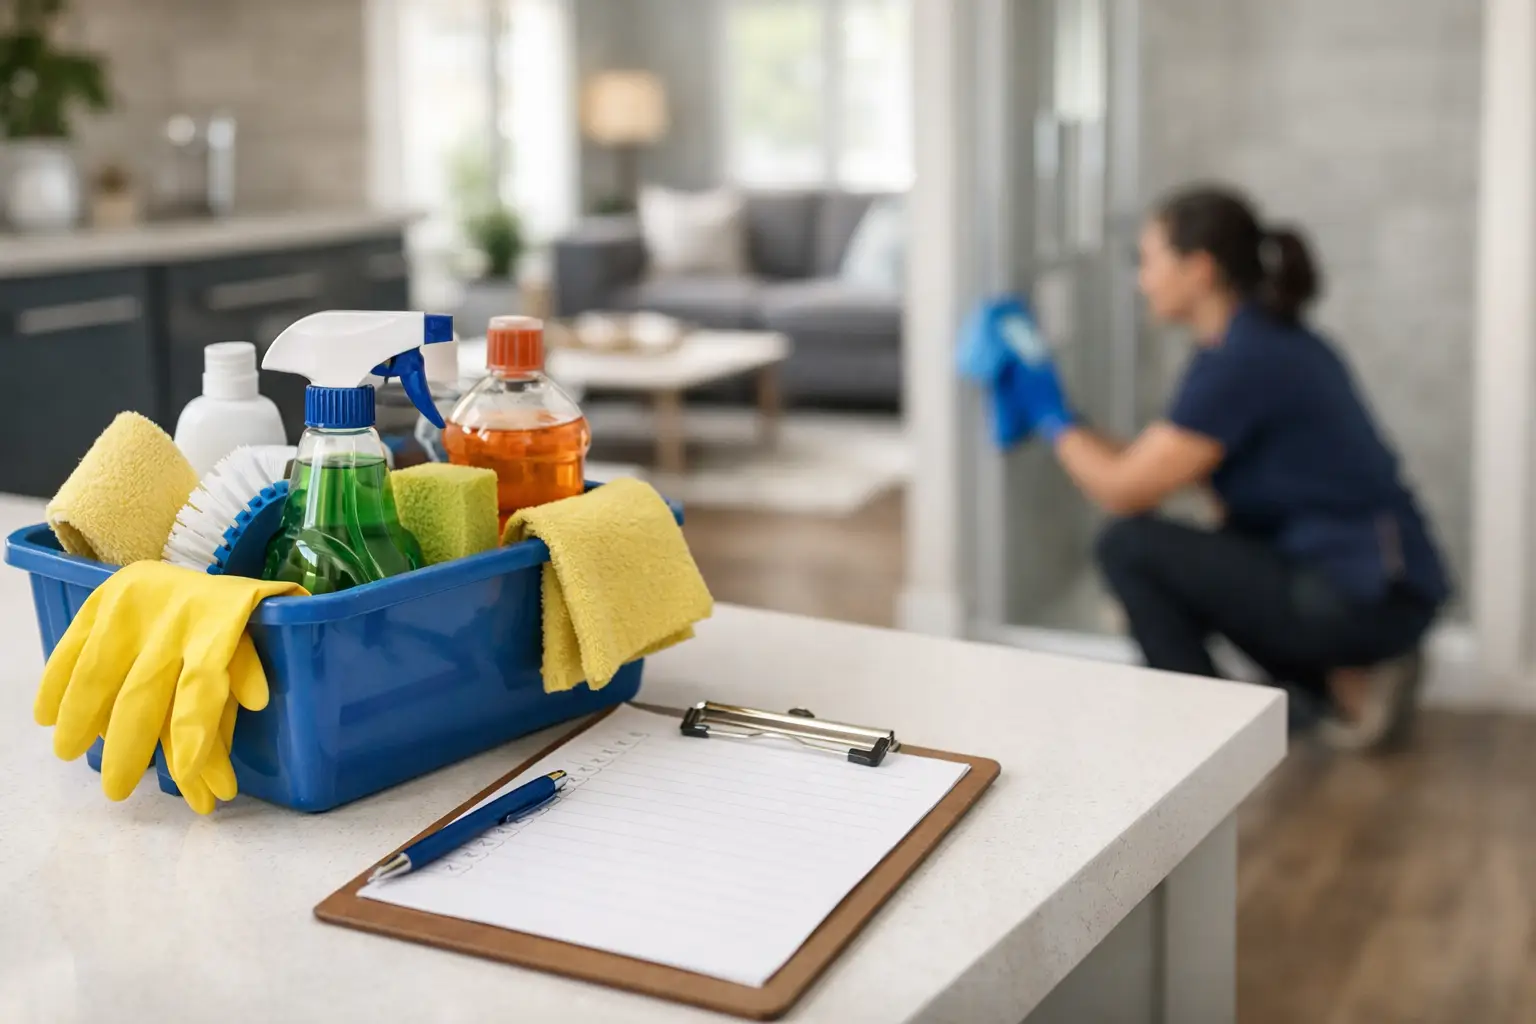
    Fresh clean living room with washable textiles and hard floors after dog odor cleaning.

    Why dog smell lingers

    Dog odor usually lasts because the source is still present somewhere in the space. Soft materials can hold oils, dander, dried saliva, and moisture. Floors and baseboards can collect dust, hair, and residue along edges. Entry areas can trap outdoor soil, damp paw prints, and odor from frequently used mats. A room may look neat while the odor source remains in textiles or porous surfaces.

    Air fresheners, candles, and heavy fragrances may make a room smell different for a short time, but they do not remove the material causing the odor. The EPA describes source control as an important part of improving indoor air quality, and ventilation can help remove or dilute indoor pollutants when outdoor conditions are appropriate (EPA indoor air quality guidance). For dog smell, that means cleaning the source first and using fresh air as support, not as the whole solution.

    Find the source before you clean

    Start with the areas that carry the most contact: dog beds, blankets, sofa throws, rugs, favorite resting spots, entry mats, baseboards near feeding areas, and carpet or upholstery where accidents may have happened. Work from soft surfaces to hard surfaces. If one room smells stronger than the others, check the textiles and floor edges there before cleaning the whole house.

    A simple source check prevents wasted effort. Remove washable items from the room, open them up so they are not folded around odor, and smell the room again after ten or fifteen minutes. If the room improves quickly, laundry is probably the first priority. If the smell remains strongest near one rug, corner, crate area, or upholstered seat, treat that area separately.

    • Check pet bedding, removable covers, blankets, and washable throws.
    • Inspect rugs, carpet edges, sofa cushions, and furniture seams.
    • Look around baseboards, doors, feeding areas, and entry mats.
    • Clean dried spills or accident spots before general deodorizing.
    • Use a flashlight along floor edges where hair and dust collect.

    Wash fabrics that hold odor

    Washable fabrics are often the fastest win. Launder removable bed covers, blankets, washable throws, cushion covers that are safe to wash, and towels used near doors. Follow the fabric-care label, because heat, bleach, or the wrong cycle can damage some materials. For fabrics that cannot be machine washed, vacuum thoroughly and follow the manufacturer’s upholstery-care instructions before applying any cleaner.

    Regular grooming also reduces what settles into the home. The American Kennel Club notes that brushing removes dirt, debris, loose hair, and dandruff while helping distribute natural oils through the coat (AKC dog grooming guidance). This does not replace cleaning, but it can reduce the amount of hair and dander that reaches floors, bedding, and furniture.
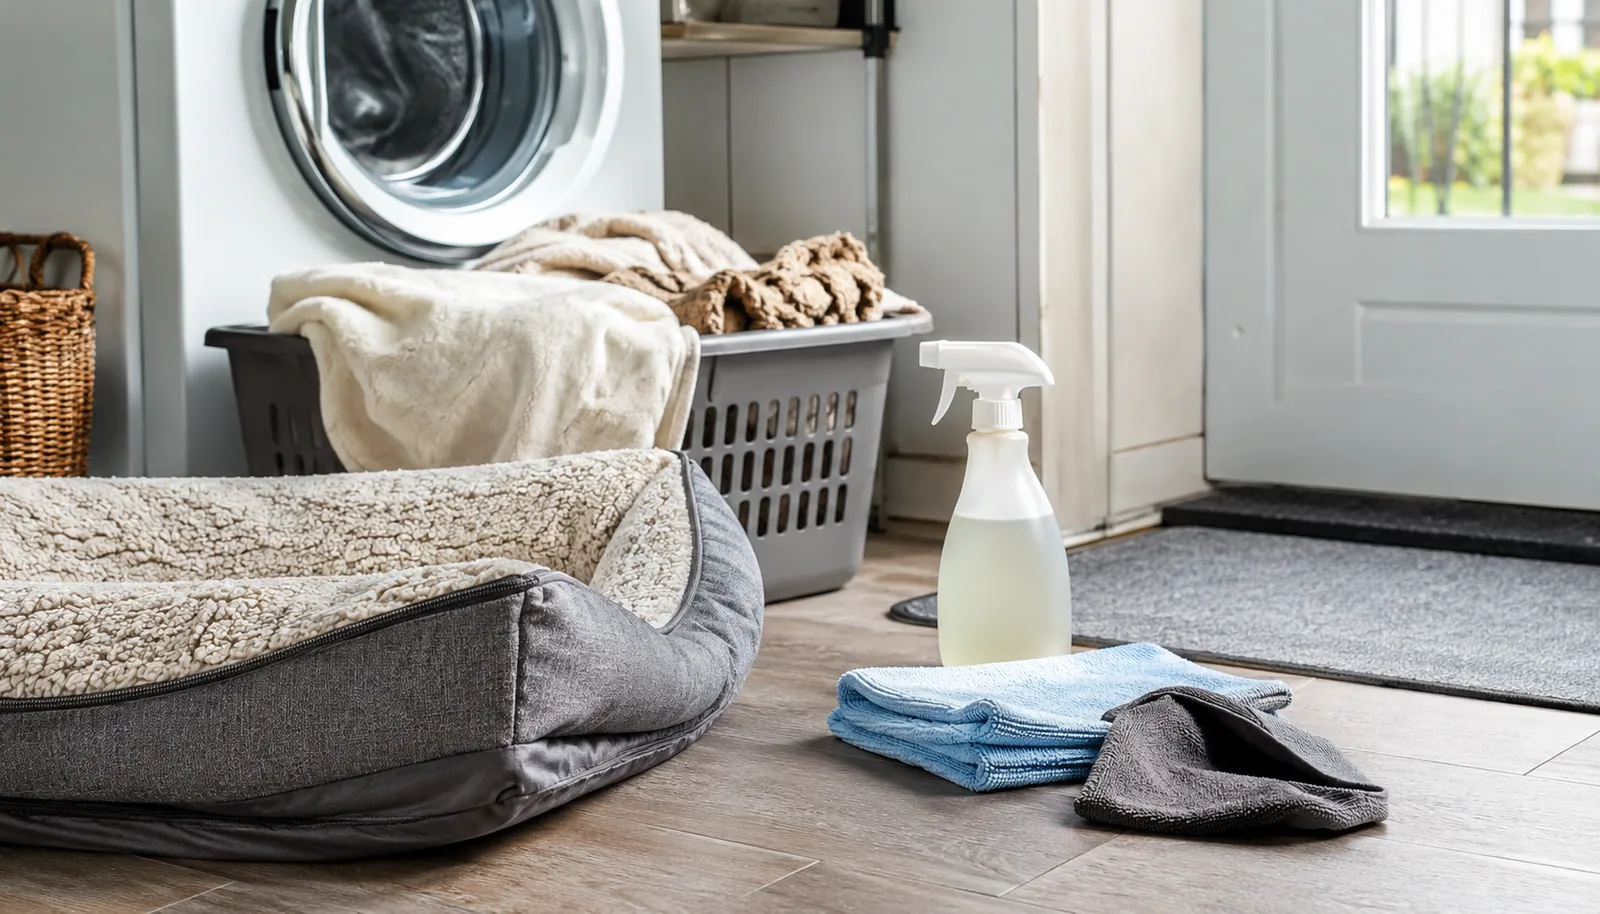
    Dog odor cleaning setup with washable pet bed cover, microfiber cloths, and entry mat.

    Clean floors, baseboards, and entry areas

    Hard floors are easier to reset than carpet, but they still need detail. Vacuum or sweep first so hair and grit do not turn into a damp film when mopping. Then clean with a product appropriate for the floor type. Avoid soaking laminate, engineered wood, or hardwood. Use a slightly damp mop or cloth, work in small sections, and dry any areas where moisture sits too long.

    Baseboards matter because hair, dust, and odor residue collect along room edges. Wipe baseboards, corners, lower door frames, and the floor line near feeding areas. Entry mats should be vacuumed, shaken outside when appropriate, and washed or replaced when they hold odor. If outdoor moisture or sand comes in regularly, a washable indoor mat near the door can reduce what spreads across the room.

    For a broader maintenance rhythm, the SRS guide to a house cleaning maintenance schedule can help turn these tasks into a repeatable weekly plan.

    Treat carpet and upholstery carefully

    Carpet and upholstery need more patience because odor can move below the visible surface. For fresh accident spots, blot first instead of scrubbing. Bissell’s pet urine cleaning guidance recommends blotting, testing the cleaner in a hidden spot, and using an enzymatic cleaner according to directions for pet urine odor on carpet (Bissell pet urine carpet guidance). Scrubbing can spread residue deeper into fibers, so slow pressure with clean towels is usually safer than aggressive rubbing.

    Product labels matter. OxiClean’s pet stain and odor remover directions say to test a hidden carpet area for colorfastness and note that the product should not be used on wool, leather, or silk (OxiClean product directions). Rocco & Roxie’s stain and odor instructions also call for testing an inconspicuous area before use and giving the product time to sit before drying and vacuuming (Rocco & Roxie instructions). These examples are not endorsements; they show why the label should guide contact time, surface compatibility, and drying.

    If a rug, carpet pad, subfloor, or upholstery cushion has absorbed old urine or moisture, surface cleaning may not fully solve the odor. Repeated smell from the same location can mean the source is below the surface. In that case, professional carpet, upholstery, flooring, or restoration guidance may be needed before the room will smell clean again.

    Use airflow without hiding the problem

    Fresh air helps after odor sources are cleaned. The EPA explains that opening windows and doors, using fans that exhaust outdoors, and increasing outdoor ventilation can help remove or dilute indoor airborne pollutants when weather and outdoor air conditions allow (EPA ventilation guidance). Use ventilation during and after cleaning, especially when cleaning products are in use.

    Air cleaners may help with particles such as dust and dander, but they are not a substitute for cleaning the source. EPA guidance notes that the long-term performance of an air cleaner depends on maintaining it according to the manufacturer’s directions (EPA air cleaners and filtration guidance). Replace or clean filters on schedule, and do not expect a small air cleaner to fix odor trapped in bedding, rugs, or carpet padding.

    Choose products safely

    Use the mildest product that fits the surface and the mess, and always follow the label. CDC guidance for cleaning and disinfecting warns not to mix cleaning or disinfecting products, to use good ventilation indoors, and to keep chemicals out of reach of children and pets (CDC cleaning and disinfecting safety guidance). The same CDC guidance also says not to wipe or bathe pets with disinfection products.

    When using products that emit odors or vapors, the EPA advises increasing ventilation, following label precautions, using household products according to manufacturer directions, and never mixing household care products unless directed on the label (EPA VOC and product-use guidance). If a product is meant for carpet, do not assume it belongs on wood, leather, wool, stone, or delicate fabric.

    The EPA Safer Choice product search can help identify cleaning products that meet the Safer Choice Standard (EPA Safer Choice product search). That label does not mean a product can be used anywhere or in any amount. It still needs to be used as directed, on compatible surfaces, with proper storage and ventilation.
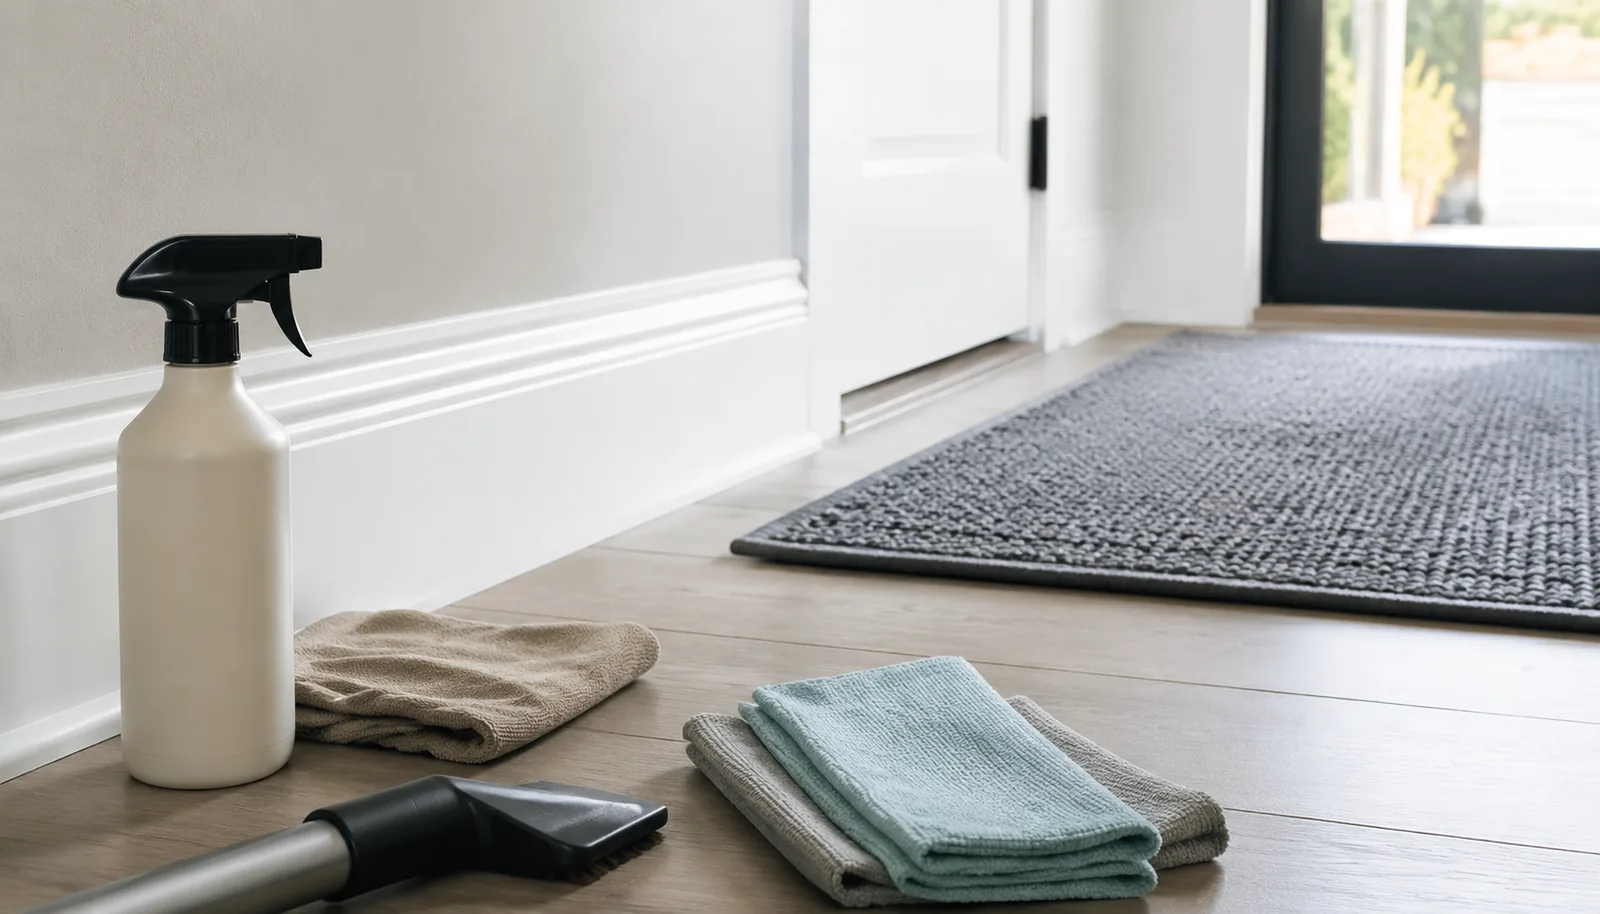
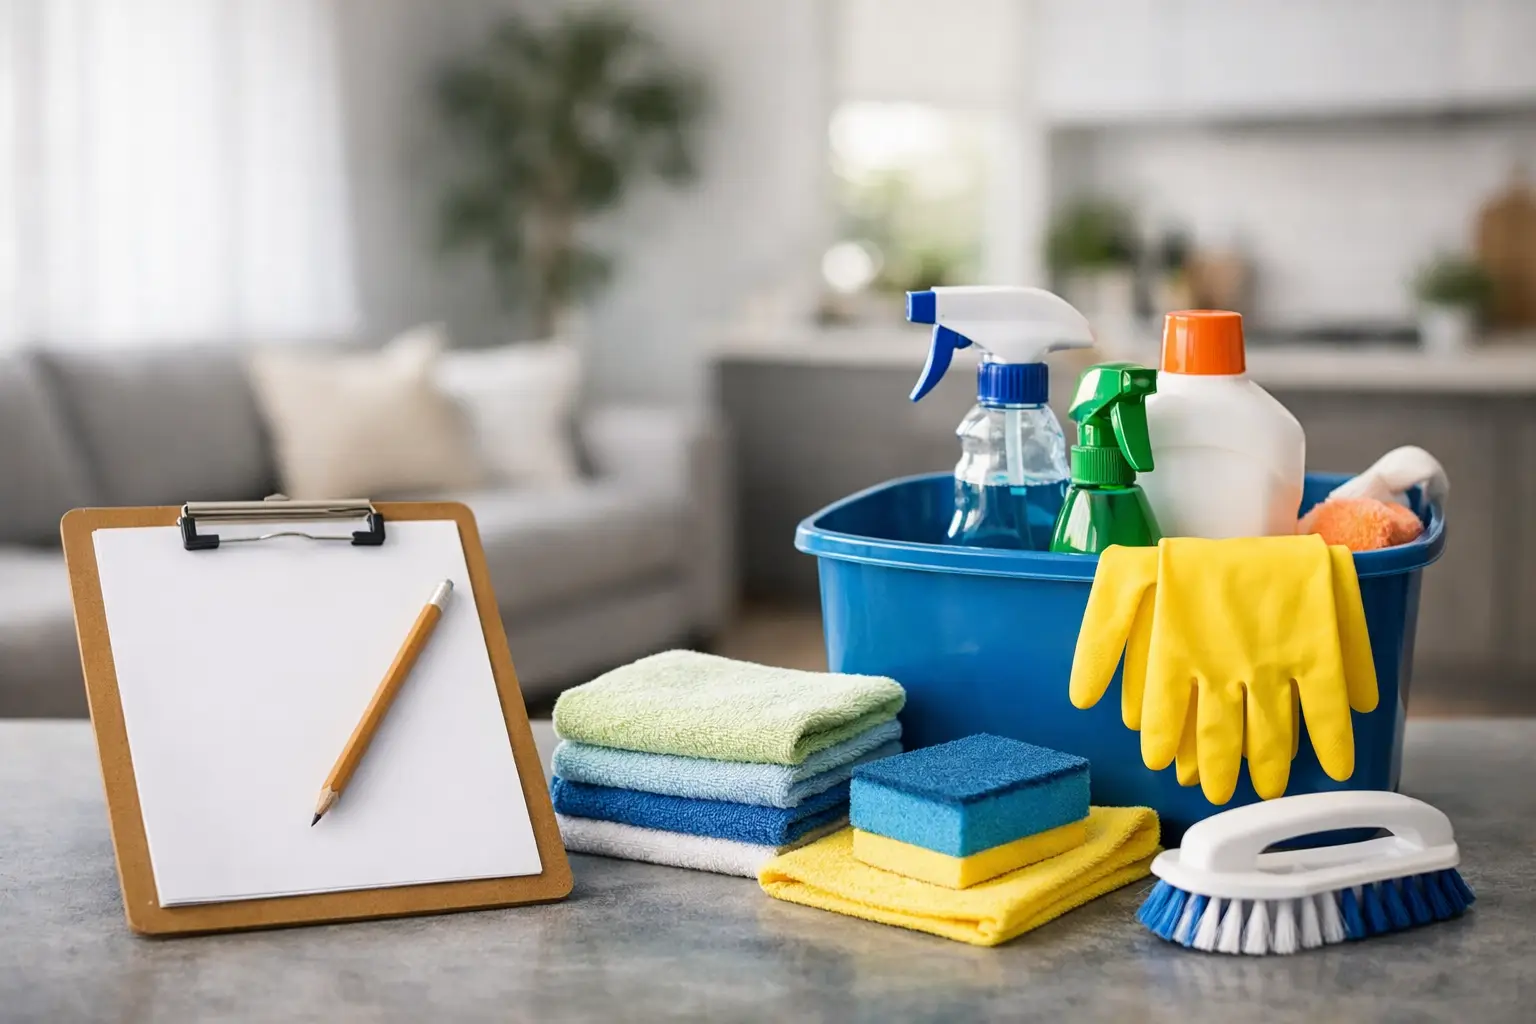
    Floor and baseboard cleaning supplies for removing dog smell from entry areas.

    Build a routine that keeps odor from returning

    Once the house smells fresh again, the maintenance plan should be simple enough to repeat. Focus on the places where odor starts: bedding, favorite resting spots, entry areas, floors, baseboards, trash, and washable textiles. A short routine is better than a complicated checklist that gets skipped.

    Area Helpful routine Why it helps
    Dog bedding and throws Wash removable covers and rotate clean extras Removes odor from the fabric source
    Floors and baseboards Vacuum first, then damp-clean with a surface-safe product Removes hair, dust, and residue along edges
    Entry mats Vacuum, shake outside when appropriate, and wash if compatible Stops outdoor soil and damp odors from spreading
    Carpet or upholstery spots Blot, test, apply the correct cleaner, and dry fully Prevents residue from settling deeper

    For a practical supply setup, the SRS article on cleaning supplies for pet-friendly spaces explains which everyday tools are useful for fur, floors, washable textiles, and quick resets.

    When a deeper cleaning reset helps

    A deeper cleaning reset helps when odor is spread across several rooms, when soft surfaces and floor edges have not been detailed in a while, or when regular upkeep is taking more time than expected. The most useful reset usually includes vacuuming edges, cleaning baseboards, wiping lower doors and trim, washing compatible textiles, cleaning entry areas, and giving floors a surface-appropriate clean.

    SRS Cleaning Services can help reset the home and then keep the routine easier with Deep Cleaning or Recurring Cleaning. If the odor is tied to carpet padding, subfloor damage, mold, biohazards, or a strong animal-waste issue beyond ordinary cleaning, the safer next step is a qualified specialist for that material or hazard before routine cleaning continues.

    Dog smell cleaning FAQ

    What removes dog smell from a house fastest?

    Remove the main odor sources first: washable bedding, blankets, entry mats, rugs, floor edges, and any accident spots. Then clean surfaces, dry them fully, and ventilate when outdoor conditions are appropriate. Fragrance alone may make the room smell different, but it will not remove the source.

    Should disinfectant be used for dog smell?

    Usually, dog smell is a cleaning and odor-source problem, not a reason to disinfect every surface. If disinfecting is needed for a specific situation, clean the surface first and follow the product label for contact time, ventilation, and compatible surfaces. Do not use disinfectants on pets.

    Do enzyme cleaners work on dog urine smell?

    Enzymatic cleaners are commonly used for pet urine odor on compatible carpet and upholstery, but the product directions control how they should be applied, how long they should sit, and which surfaces to avoid. Always test a hidden area first.

    Why does the smell come back after cleaning?

    The source may still be below the surface, especially in carpet padding, upholstery foam, rug backing, or floor edges. It can also return if items are cleaned but not dried fully. Track the strongest odor point before repeating the same general cleaning routine.

    Dog smell is easier to solve when the plan starts with source removal instead of cover-up. Wash what can be washed, clean floors and baseboards carefully, treat carpet and upholstery according to the label, use airflow as support, and keep the routine simple. For help with a deeper reset or recurring cleaning in Orange County, start with the SRS cleaning quote page.
  • Commercial Cleaning Checklist for Small Orange County Workplaces

    Commercial Cleaning Checklist for Small Orange County Workplaces

    A practical commercial cleaning checklist keeps shared spaces easier to use, easier to maintain, and more consistent from week to week. The best checklist does not try to disinfect everything every day or turn cleaning into a complicated system. It simply puts the right tasks in the right order: remove debris, clean visible soil, reset high-use areas, handle restrooms and break areas carefully, and schedule deeper work before buildup becomes obvious.

    This guide is written for everyday workplace environments such as offices, reception areas, shared kitchens, restrooms, conference rooms, and light commercial spaces. It also explains when cleaning, sanitizing, and disinfecting are different tasks, because product misuse can create safety problems. For local help with recurring service or a deeper reset, SRS Cleaning Services provides Office Cleaning, cleaning services, and quote support for Orange County workplaces.

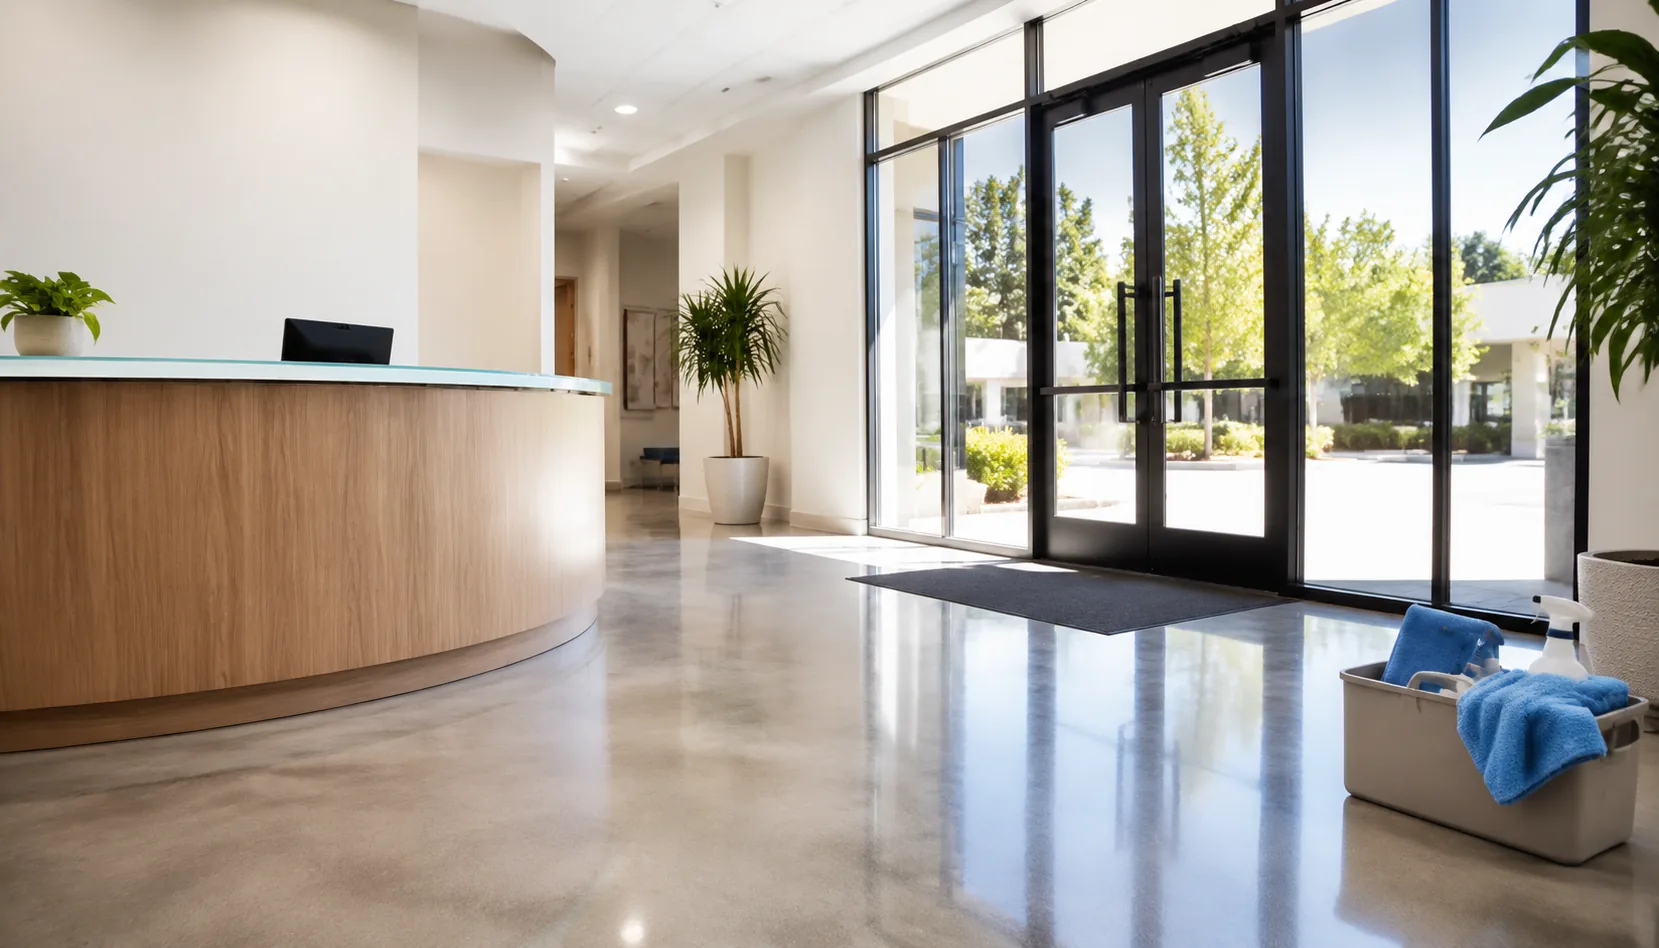
    Commercial lobby cleaning checklist setup with supplies and glass entry doors.

    What a commercial cleaning checklist should cover

    A useful checklist starts with zones, not random tasks. Most workplaces have an entrance or lobby, work areas, meeting rooms, restrooms, a break room or kitchenette, floors, trash areas, and supply storage. Each zone should have a basic reset standard and a frequency. For example, the lobby may need daily floor attention and glass touch-up, while high shelves or vents may only need periodic dusting.

    The checklist should also separate visible presentation from health-related cleaning. Presentation tasks include trash removal, dusting, glass, floors, and clutter control. Health-related tasks include cleaning high-touch surfaces, handling restroom fixtures, and using sanitizers or disinfectants only where they are appropriate and label directions can be followed.

    Cleaning, sanitizing, and disinfecting

    Cleaning removes most dirt, germs, and impurities from surfaces with soap, water, and scrubbing, according to the CDC (CDC cleaning and disinfecting guidance). Sanitizing reduces germs to levels considered safe by public-health codes or regulations, and disinfecting uses chemicals to kill many remaining germs on surfaces; the CDC notes that surfaces should be cleaned before sanitizing or disinfecting (CDC definitions of cleaning, sanitizing, and disinfecting).

    That distinction matters in commercial spaces because disinfecting dirty surfaces is not a shortcut for cleaning. If a surface has dust, food residue, restroom soil, or visible grime, clean first. Then use a sanitizer or disinfectant only when the surface, product label, ventilation, and required wet contact time make sense. The CDC’s facility guidance also recommends regular cleaning of high-touch surfaces and using products appropriate for the surface being cleaned (CDC facility cleaning guidance).

    Daily commercial cleaning tasks

    Daily cleaning should keep the workplace presentable and prevent easy-to-control buildup. Start at the entrance. Remove trash, straighten visible areas, spot-clean glass doors, wipe reception counters, clean door handles, and vacuum or mop high-traffic flooring. Continue into shared work areas by removing debris, wiping accessible horizontal surfaces, emptying trash and recycling, and cleaning touch points such as switches, handles, railings, shared phones, and conference-room tables.

    • Empty trash and replace liners where needed.
    • Clean entry glass, door handles, counters, and waiting-area surfaces.
    • Wipe shared tables, conference surfaces, and exposed high-touch points.
    • Vacuum carpet traffic lanes and mop hard floors with a surface-appropriate method.
    • Reset chairs, visible clutter, and shared supply areas.
    • Check odors, spills, overflowing bins, and restroom supply levels.

    For more workplace-specific planning, compare this broader checklist with the SRS office cleaning checklist and the guide to janitorial service vs. office cleaning. Shared residential-building spaces have their own traffic patterns, so the apartment common area cleaning checklist adds focused tasks for lobbies, hallways, elevators, laundry rooms, and waste areas.

    Copy-this daily reset

    1. Walk the entry and remove anything that does not belong.
    2. Empty trash before wiping surfaces so debris does not spread.
    3. Clean high-touch points before floors.
    4. Check restrooms and break areas for supplies, odors, spills, and visible residue.
    5. Finish with floors, then inspect from the entrance as if arriving for the first time.

    Restroom and break area checklist

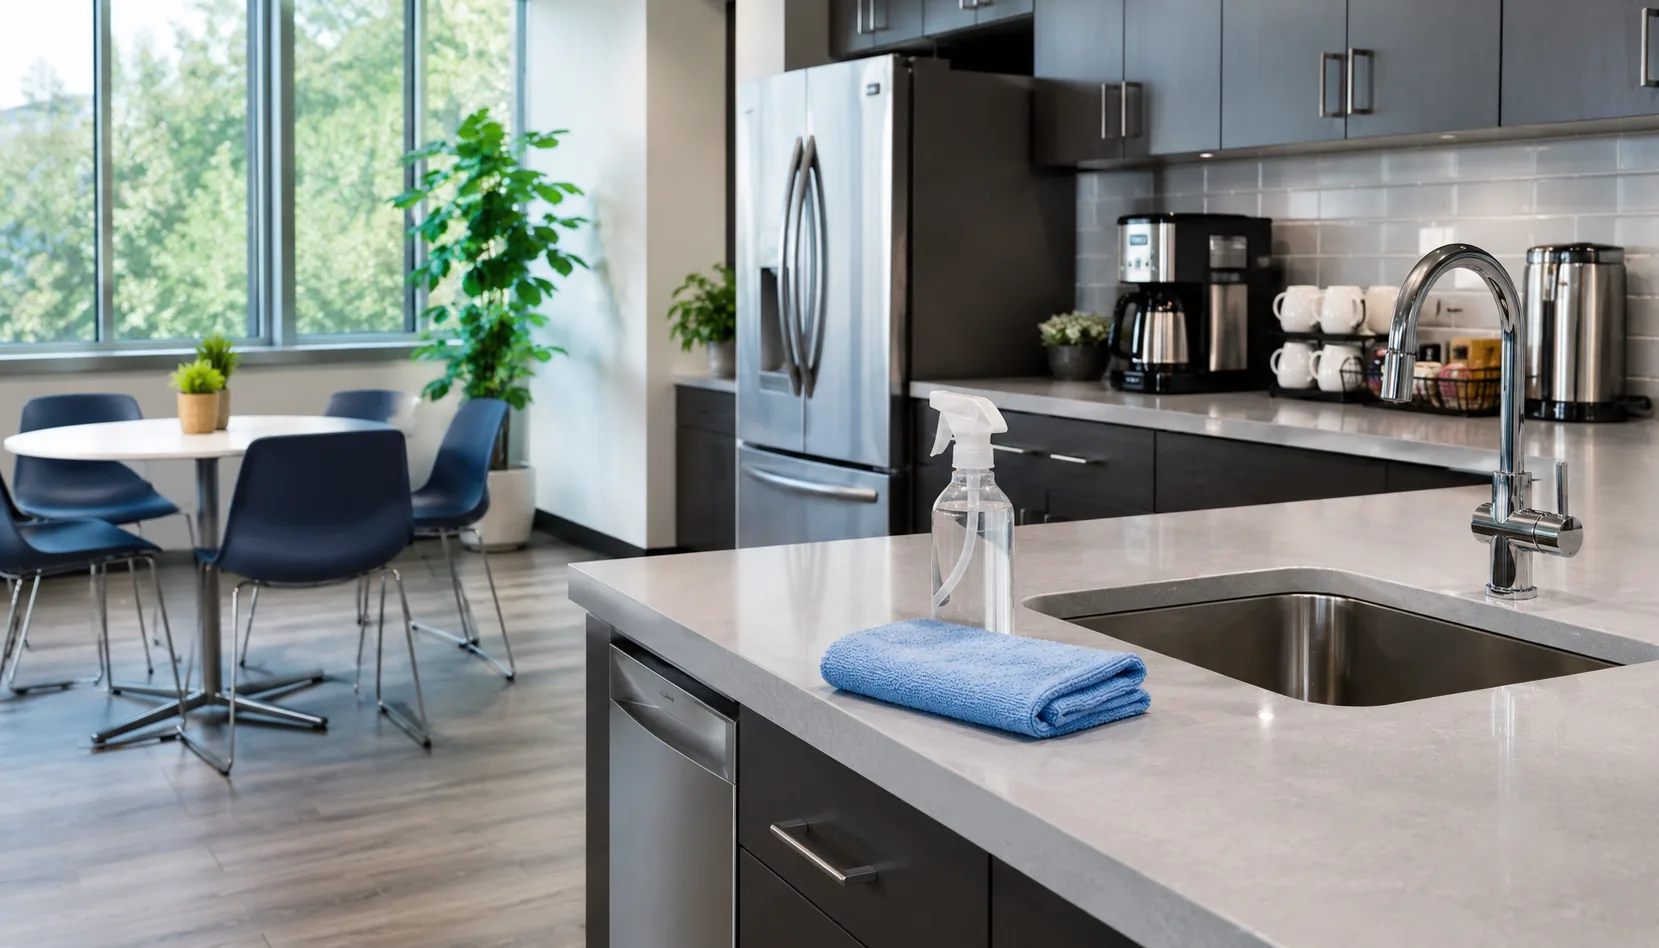
    Clean commercial break room prepared as part of a workplace cleaning checklist.

    Restrooms and break areas need more detail because moisture, food, trash, and frequent hand contact can create odors and visible residue quickly. In restrooms, clean sinks, faucets, counters, toilets, partitions, mirrors, dispensers, door handles, light switches, and floors. Refill soap, paper products, and liners. In break rooms, clean counters, sink areas, table surfaces, chair backs, appliance handles, cabinet pulls, and trash areas.

    Use separate tools for restroom and food-area cleaning to avoid cross-contamination. Keep cloths, brushes, and mop heads organized by zone or color when possible. If sanitizing or disinfecting is part of the task, follow the product label rather than guessing the contact time. Labels matter because a product may need the surface to remain wet for a specific period before it can do what the label claims.

    Weekly and monthly deep cleaning

    Weekly tasks prevent the slow buildup that daily cleaning can miss. Dust vents, baseboards, window ledges, door frames, chair bases, cabinet faces, and lower wall edges. Detail conference rooms, clean interior glass, vacuum edges, mop behind movable items, and inspect corners where debris collects. Monthly tasks may include high dusting, machine floor care, detailed wall-spot cleaning, upholstery vacuuming, and deeper restroom detail.

    The exact schedule depends on traffic, flooring, weather, food use, restroom volume, and how visible the space is to visitors. A small low-traffic office may need lighter weekly detail than a busy medical, retail, or customer-facing environment. The useful standard is simple: if a task is repeatedly noticeable by the time it is cleaned, move it to a more frequent schedule.

    Safe product use and supplies

    Workplace cleaning products should be selected and stored with safety in mind. OSHA explains that employers with hazardous chemicals in the workplace must have labels, safety data sheets, and training for exposed workers (OSHA Hazard Communication overview). OSHA’s Safety Data Sheet guidance explains that SDS documents include chemical properties, hazards, protective measures, and safe handling information (OSHA Safety Data Sheet brief).

    Never mix cleaning chemicals. The CDC warns that mixing bleach or disinfectants with other cleaners can release dangerous vapors (CDC bleach safety guidance). For lower-hazard product selection, the EPA Safer Choice product search helps identify products that meet the Safer Choice Standard (EPA Safer Choice product search). Safer Choice does not remove the need to follow labels, but it is a useful filter when comparing cleaning-product options.

    How to build a cleaning frequency plan

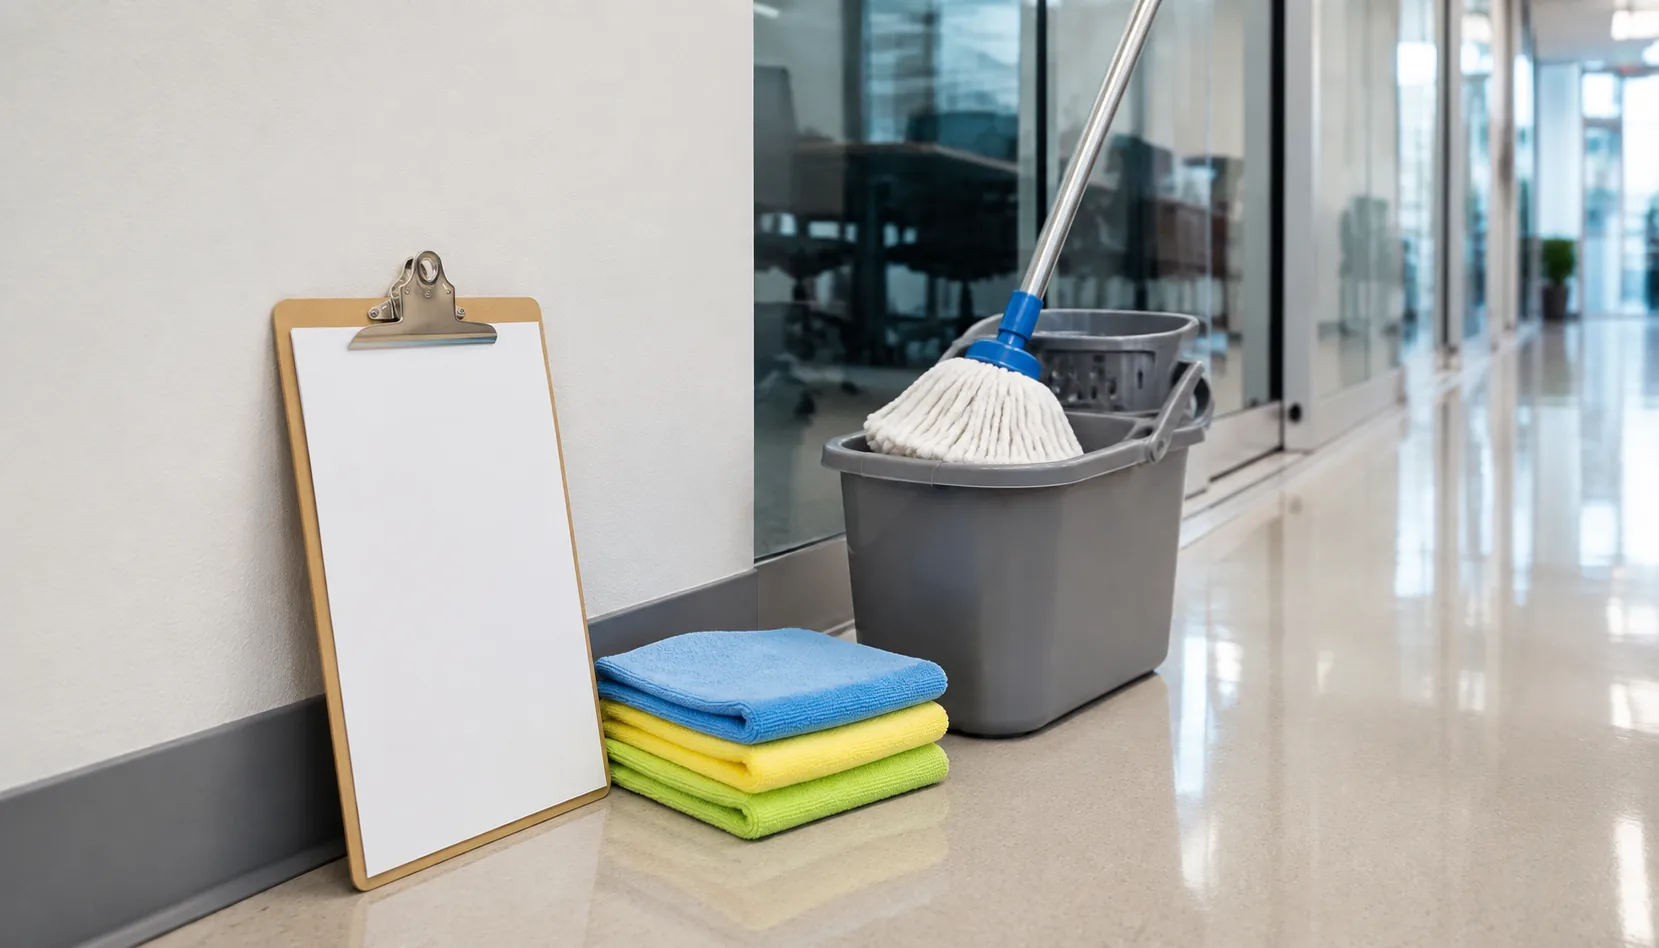
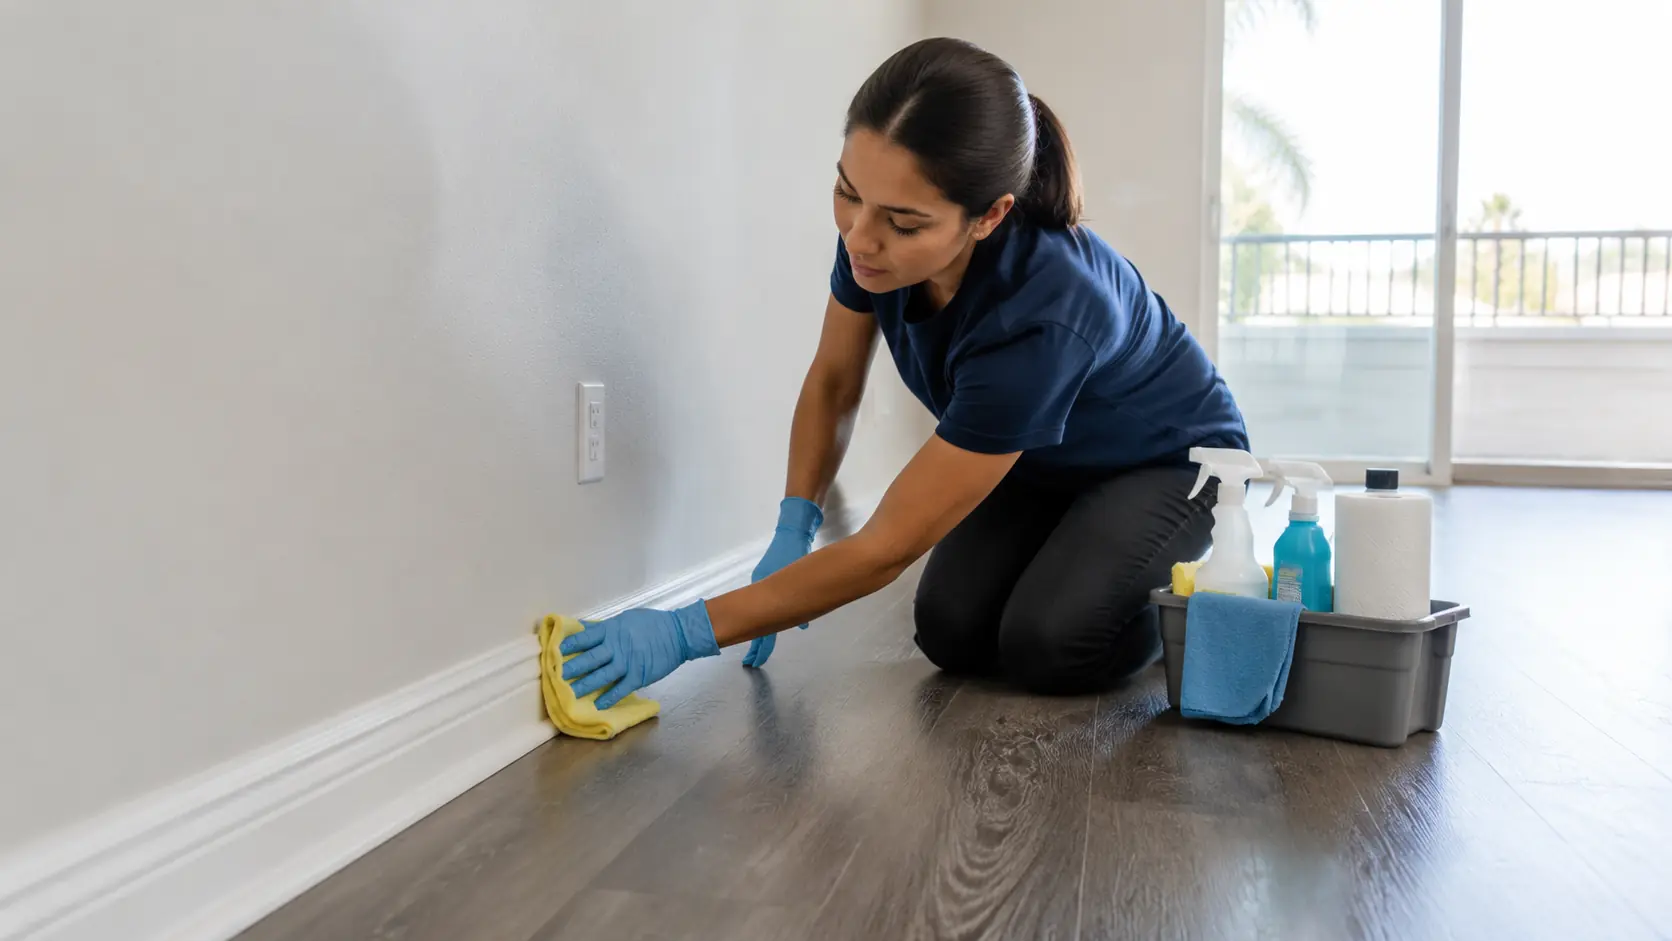
    Detailed commercial floor cleaning checklist scene with supplies and baseboards.

    Build the plan around use, not guesswork. List every zone, note what gets touched most, decide what must be clean before each workday, and separate daily, weekly, and monthly tasks. Then review the checklist after two weeks. If restrooms run out of supplies, floors look dull midweek, or kitchen trash creates odors, the frequency is too light. If areas look consistently clean with no rushed catch-up work, the schedule is closer to right.

    Area Typical daily focus Typical periodic focus
    Entry and lobby Trash, glass, handles, floors Baseboards, vents, detailed edges
    Work areas Trash, touch points, visible surfaces Chairs, ledges, detailed dusting
    Restrooms Fixtures, mirrors, supplies, floors Partitions, tile edges, odor sources
    Break room Counters, sink, tables, trash Cabinet faces, appliance exteriors, corners

    When professional commercial cleaning helps

    Professional cleaning helps when the checklist needs to be reliable, documented, and consistent. It is also useful when restrooms, floors, kitchens, glass, and shared areas need regular attention without interrupting the workday. SRS Cleaning Services supports Orange County workplaces with commercial and office cleaning service that can be adjusted around the space, traffic level, and cleaning priorities.

    If the space needs a one-time reset before starting a recurring schedule, ask for the scope to include detailed dusting, restrooms, break areas, high-touch points, floors, and visible buildup. If ongoing service is the goal, start with the zones that affect daily comfort most and adjust after the first few visits. You can also review the SRS Office Cleaning page, the office cleaning quote page, and the main Orange County service area page.

    Commercial cleaning checklist FAQ

    How often should a commercial space be cleaned?

    High-use areas usually need daily attention, while detailed dusting, edge cleaning, vents, and other deeper tasks may be weekly or monthly depending on traffic. The right frequency is the one that prevents visible buildup before it becomes distracting.

    Is commercial cleaning the same as disinfecting?

    No. Cleaning removes dirt, germs, and impurities. Disinfecting uses chemicals to kill many remaining germs after cleaning. Disinfecting can be useful in selected areas, but it should follow the product label and should not replace basic cleaning.

    What should be cleaned first?

    Start by removing trash and obvious debris, then dust or wipe upper surfaces, clean high-touch points, handle restrooms and break areas, and finish with floors. Cleaning floors last prevents extra dust or debris from landing on newly finished surfaces.

    What tags or categories fit this kind of checklist?

    For the SRS blog, this topic belongs under Commercial Cleaning because it focuses on workplace cleaning systems. Useful supporting tags include Office Cleaning, Janitorial Service, Cleaning Checklist, and Orange County.

    A strong commercial cleaning checklist makes the work easier to repeat and easier to inspect. Keep the plan simple, clean before sanitizing or disinfecting, follow product labels, schedule deeper detail before buildup becomes obvious, and adjust the frequency based on how the space is actually used. To plan a commercial cleaning routine in Orange County, review SRS Office Cleaning or start with the office cleaning quote page.
  • Pre-Listing Cleaning Checklist to Prepare a Home for Showings

    Pre-Listing Cleaning Checklist to Prepare a Home for Showings

    A good pre-listing cleaning checklist helps a space look brighter, calmer, and easier to evaluate before photos, showings, walkthroughs, or an open house. The goal is not to make a property look unrealistic. The goal is to remove the small distractions that pull attention away from the room itself: dusty baseboards, cloudy mirrors, greasy appliance fronts, fingerprints on doors, window-track buildup, dull sinks, and cluttered surfaces.

    This guide keeps the work practical. It separates cleaning from staging, explains where disinfecting is useful, and gives a room-by-room checklist you can follow before a listing goes live. For Orange County properties that need a deeper reset before photos or appointments, SRS Cleaning Services can help with Deep Cleaning, Move Out Cleaning, and general House Cleaning Services.

    Bright clean living room prepared for listing photos.
    Photo by Lotus Design N Print on Unsplash

    Why pre-listing cleaning matters

    Pre-listing cleaning matters because a clean room lets the eye focus on layout, light, storage, finishes, and condition. The National Association of Realtors describes staging as a process that can include cleaning, decluttering, repairing, depersonalizing, and updating a home so people can better picture the space for themselves (NAR staging overview). NAR also reports that many agents see staging influence how buyers visualize a property, while seller-side agents often connect staging with shorter market time or stronger presentation outcomes (2025 Profile of Home Staging).

    Cleaning is the foundation underneath all of that. Fresh pillows and attractive furniture cannot hide dusty vents, fingerprints around switches, sticky cabinet pulls, or a cloudy shower door. A pre-listing clean should make the property feel cared for without making exaggerated claims about condition. It is especially useful before professional photos because cameras often catch streaks, floor debris, hard-water spots, and reflective-surface smudges that are easy to miss in person.

    Cleaning vs. staging vs. disinfecting

    Cleaning, staging, and disinfecting are related, but they are not the same job. The CDC defines cleaning as using water, soap, and scrubbing to remove germs, dirt, and impurities from surfaces; disinfecting uses chemical products to kill remaining germs on surfaces after cleaning (CDC cleaning and disinfecting definitions). For most pre-listing prep, routine cleaning is the main priority. Disinfecting is most useful for bathrooms, kitchen touch points, trash areas, and other high-touch surfaces when there is a reason to do so.

    Always follow the product label. The CDC warns never to mix bleach or disinfectants with other cleaners because dangerous vapors can be released (CDC bleach safety guidance). The CDC also recommends cleaning surfaces with soap and water before disinfecting when disinfecting is needed (CDC home cleaning and disinfecting guidance). For product selection, the EPA Safer Choice program helps identify products whose ingredients have been reviewed for safer chemistry while still being designed to perform (EPA Safer Choice).

    Pre-listing cleaning supplies

    Use a simple kit instead of collecting too many products. A practical pre-listing kit may include microfiber cloths, a vacuum with attachments, a mop appropriate for the floor type, glass cleaner, mild all-purpose cleaner, bathroom cleaner, non-scratch pads, trash bags, gloves, and fresh towels for finishing. For any cleaner, check the label for intended surfaces, ventilation, dwell time if disinfecting, storage, and safety precautions.

    Avoid applying harsh products to natural stone, unsealed wood, specialty tile, stainless steel, or delicate fixtures unless the label confirms compatibility. When in doubt, test a hidden area or use the manufacturer’s care instructions. The purpose is to improve presentation, not risk etching, discoloration, residue, or finish damage right before photos.

    Whole-home first pass

    Start with a fast whole-home reset before detailed cleaning. Remove trash, donation bags, extra packaging, old mail, loose cords, excess countertop items, and visible personal clutter. Put away laundry, shoes, toiletries, pet bowls, toys, and small appliances that are not needed for the showing. Open window coverings to see where dust, smudges, and floor debris show in natural light.

    Then work top to bottom. Dust ceiling fans, high corners, vents, light fixtures, picture frames, window sills, doors, and trim before cleaning floors. Wipe switch plates, door frames, doorknobs, stair rails, cabinet pulls, and appliance handles. These touch points are small, but they quietly shape the impression of care.

    Kitchen checklist

    Clean staged room with furniture arranged for listing presentation.
    Photo by Spacejoy on Unsplash

    The kitchen usually needs the most detail because counters, sinks, appliances, and cabinet fronts are heavily used and highly visible. Clear counters first. Leave only a few intentional items, then wipe the full counter surface, backsplash, outlet covers, and edges. Polish the sink and faucet, remove water spots, wipe the disposal rim where accessible, and clean the window or ledge above the sink.

    • Wipe cabinet and drawer fronts, especially near handles.
    • Clean the stovetop, control panel, range hood exterior, and microwave exterior.
    • Wipe refrigerator handles, dishwasher front, and oven door glass.
    • Remove crumbs from drawers and visible cabinet shelves if they will be opened.
    • Clean trash area, pantry floor, baseboards, and toe-kicks.
    • Finish with swept and mopped floors, paying attention to corners.

    If a property is vacant or needs a deeper presentation reset, appliance interiors, cabinet interiors, blinds, tracks, and baseboards can be folded into Move Out Cleaning or deep cleaning scope rather than rushed at the last minute.

    Bathroom checklist

    Bathrooms should look fresh, dry, and residue-free. Start by removing excess bottles, razors, cleaning products, bath mats, and personal items. Clean mirrors, counters, faucet bases, sinks, vanity fronts, towel bars, and switch plates. Scrub toilets, tubs, showers, glass doors, tile edges, and visible grout lines. Pay close attention to hard-water spotting on glass and chrome because it shows strongly under bathroom lighting.

    Use ventilation when cleaning bathrooms, follow product labels, and avoid mixing products. If there is mold-like growth, water damage, sewage backup, or a biohazard concern, ordinary cleaning is not the right solution. Those situations should be evaluated by qualified professionals or handled according to appropriate public-health and remediation guidance.

    Living areas, bedrooms, and hallways

    Living areas, bedrooms, and hallways should feel calm and easy to walk through. Dust horizontal surfaces, shelves, lamps, fans, vent covers, baseboards, window ledges, closet tracks, and door panels. Vacuum upholstery if needed, straighten cushions, and remove stray cords or crowded decor. In bedrooms, simplify nightstands, clear floors, and clean closet floors if storage areas may be opened.

    Hallways deserve more attention than they usually get. Fingerprints on walls, dusty baseboards, scuffed doors, and dirty return vents can make a clean property feel less maintained. Wipe what is visible at eye level and what is visible in photos: railings, light switches, trim, door handles, and the first few inches along baseboards where dust collects.

    Floors, windows, and light

    Floors and windows control much of the first impression. Vacuum carpets slowly, using edge tools along walls and thresholds. Mop hard floors with a product that matches the floor type and does not leave a sticky or cloudy residue. Avoid over-wetting wood or laminate. Clean interior glass, mirrors, and accessible window tracks, then check the room from several angles for streaks.

    Light is part of cleanliness. Open blinds, dust slats, wipe window sills, and replace obviously burned-out bulbs. Clean light switch plates and visible fixture covers. A room with clean glass, clean floors, and simple surfaces often feels larger and more inviting without needing heavy staging.

    Final showing-day reset

    Neutral clean living area ready for a listing walkthrough.
    Photo by Francesca Tosolini on Unsplash

    On showing day, do a short reset rather than a full cleaning session. Empty trash, wipe kitchen counters, dry sinks, close toilet lids, replace used towels, remove floor debris, straighten pillows, and check entry areas. Walk through with lights on and blinds open. Look at mirrors, appliance fronts, floors near doors, and the main photo angles. If something stands out immediately, handle that first.

    A final reset should be quick because the deep work has already been done. If the property is still occupied, a small daily routine helps keep the space ready between appointments: dishes away, counters cleared, bathroom surfaces dry, floors touched up, and clutter returned to storage.

    When to use professional cleaning

    Professional cleaning is useful when the property needs more than a light reset, when timing is tight, or when photos and showings are already scheduled. It can also help when kitchens, bathrooms, baseboards, blinds, window tracks, and floors need consistent detail across the whole property. SRS Cleaning Services serves Orange County with cleaning services that can support pre-listing prep, move-related cleaning, recurring maintenance, and deeper room-by-room cleaning.

    For related planning, compare this checklist with the SRS guide to cleaning a new house before move-in, the Move In Cleaning vs. Move Out Cleaning explainer, the deep cleaning checklist, and the deep cleaning service scope guide. Those articles cover different timing scenarios, while this page focuses specifically on the pre-listing presentation pass.

    If you need help deciding the right scope, the simplest next step is to request a quote and describe the property condition, square footage, timing, and priority rooms. You can start through the Get a Quote page or review the SRS service area for Orange County coverage.

    Pre-listing cleaning FAQ

    How early should pre-listing cleaning be done?

    For a property that is mostly ready, one to three days before photos is usually practical. If the property needs deep cleaning, repairs, decluttering, or hauling, start earlier so cleaning happens after the messy work is complete.

    Should cleaning happen before or after staging?

    Do the main cleaning before staging whenever possible. After furniture, decor, and photo prep are in place, do a final light reset for dust, floors, counters, mirrors, and touch points.

    Does everything need to be disinfected?

    No. Routine cleaning is the main job for most pre-listing preparation. Disinfecting may be useful for selected high-touch surfaces, bathrooms, and kitchen areas, but products should be used according to label directions and after cleaning when needed.

    What areas are most often missed?

    Common misses include baseboards, door frames, light switches, cabinet pulls, vent covers, window tracks, appliance handles, closet floors, trash areas, and the corners behind doors.

    Preparing a property for listing is easier when the cleaning plan is specific. Start with clutter, work from top to bottom, focus on kitchens and bathrooms, finish floors and glass last, and leave time for a final showing-day reset. For deeper help across an Orange County property, SRS Cleaning Services can help you choose the right cleaning scope and schedule it before photos or showings.

  • Office Cleaning Checklist for a Healthier, Client-Ready Workplace

    Office Cleaning Checklist for a Healthier, Client-Ready Workplace

    A good office cleaning checklist makes shared spaces easier to manage because it turns a vague goal, “keep the office clean,” into visible tasks that can be repeated, checked, and improved. The best checklist is not complicated. It separates daily touch points from weekly detail work, names the rooms that need attention, and makes room for deeper periodic cleaning when traffic, weather, or special events create extra mess.

    This guide lays out a practical office cleaning checklist for desks, restrooms, break rooms, floors, meeting rooms, entry areas, and high-touch surfaces. It also explains the difference between cleaning and disinfecting, with links to current government guidance where safety or product use matters.

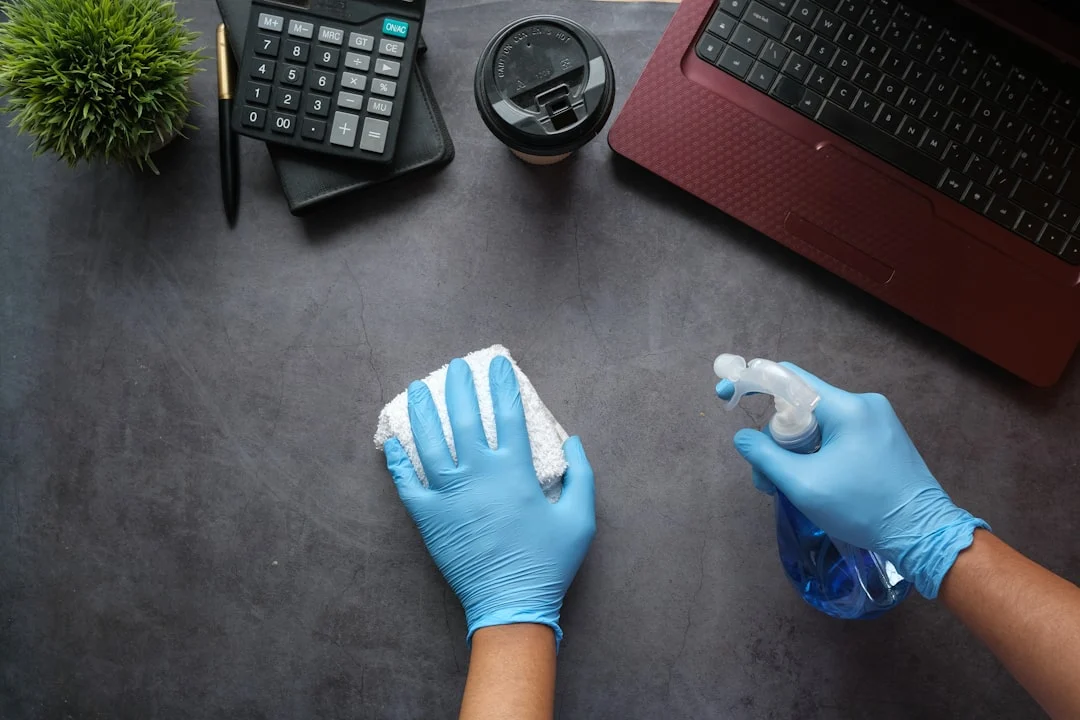
    Gloved hands cleaning an office desk with a spray bottle and cloth
    Photo by Towfiqu barbhuiya on Unsplash

    How to Use This Office Cleaning Checklist

    Start by matching tasks to how the space is actually used. A quiet administrative suite will not need the same routine as a medical office, sales office, coworking space, or busy reception area. The checklist below is a baseline, then the frequency can be adjusted based on foot traffic, spills, shared kitchens, restrooms, pets, children, deliveries, and the amount of dust or outdoor debris that gets tracked inside.

    Office cleaning should also respect basic workplace sanitation expectations. OSHA’s sanitation standard says workplaces must be kept clean to the extent the nature of the work allows, and it addresses sanitary washing facilities, waste disposal, and clean, dry walking surfaces where practical in general workplace settings. The details matter because a checklist is only useful when it supports a safer, more comfortable environment, not just a better-looking one. See OSHA’s workplace sanitation standard for the regulatory language.

    Use the daily tasks to keep the office presentable and hygienic, the weekly tasks to prevent buildup, and the monthly tasks to handle details that are easy to miss. When the work becomes too time-consuming to handle consistently, SRS Cleaning’s Office Cleaning service can help keep the routine steady across Orange County. For service-area planning, the locations page is the safest place to check current coverage before relying on a city-specific page.

    Frequency Main Goal Best Tasks
    Daily Keep high-use areas ready Trash, restrooms, break room counters, entry glass, visible floors, high-touch surfaces
    Weekly Prevent buildup Dusting, detailed floor edges, conference rooms, appliance exteriors, interior glass, supply checks
    Monthly Refresh overlooked details Vents, baseboards, chair rails, blinds, accessible window tracks, appliance interiors if included

    Daily Office Cleaning Checklist

    Daily office cleaning focuses on the areas people see, touch, and use the most. These tasks help prevent trash buildup, visible soil, odors, crumbs, and sticky surfaces from carrying into the next workday.

    • Empty trash and recycling bins, then replace liners where needed.
    • Wipe reception counters, front desks, conference tables, shared counters, and break room surfaces.
    • Clean visible fingerprints from glass doors, interior entry glass, and frequently touched panels.
    • Vacuum high-traffic carpet paths and spot clean obvious debris.
    • Sweep or mop hard floors in entry areas, kitchens, restrooms, and walkways.
    • Clean restroom sinks, counters, mirrors, toilets, fixtures, dispensers, and floors.
    • Restock soap, paper towels, toilet tissue, and hand sanitizer where supplied.
    • Clean break room sinks, counters, appliance handles, tables, and exterior microwave surfaces.
    • Remove food waste from common areas to reduce odors.
    • Wipe high-touch surfaces such as door handles, light switches, shared controls, railings, and cabinet pulls.

    Daily cleaning does not have to mean every detail receives the same amount of time every day. The point is to keep the office from drifting into visible neglect. For a small office, the daily routine may be short. For a larger workplace, separating tasks by room or zone can make the checklist easier to complete without rushing.

    Weekly Office Cleaning Checklist

    Weekly office cleaning picks up the details that are noticeable over time but not always urgent every day. These tasks help the office feel cared for when someone looks beyond the main walkway or reception desk.

    • Dust desks, open shelving, window ledges, file cabinets, baseboards, and low partitions.
    • Vacuum upholstered chairs and waiting room seating where fabric allows.
    • Detail conference rooms, including chair bases, table edges, presentation remotes, and cabinet fronts.
    • Clean appliance exteriors, refrigerator handles, coffee stations, and cabinet faces in break rooms.
    • Wipe interior glass partitions and smudged office windows within safe reach.
    • Mop hard floors more thoroughly, including corners and edges.
    • Spot clean walls, doors, kick plates, and switch plates.
    • Check supply closets for low paper products, liners, soap, and approved cleaning products.
    • Remove cobwebs and dust from visible ceiling corners where safely reachable.

    A weekly checklist is also a good place to note recurring issues. If one restroom always runs out of paper towels, one entrance constantly tracks in grit, or one break room surface keeps getting sticky, the cleaning schedule may need a small adjustment instead of a bigger overhaul.

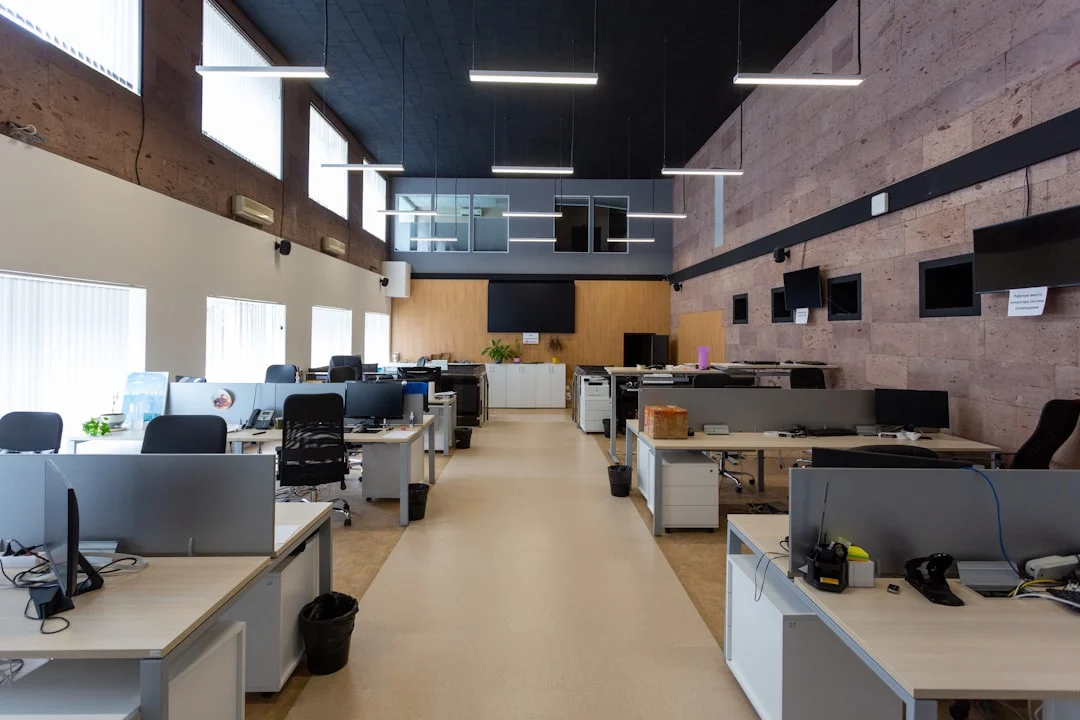
    Clean open plan office with rows of desks and computers
    Photo by Petr on Unsplash

    Monthly and Periodic Office Cleaning Checklist

    Monthly and periodic tasks protect the details that affect long-term appearance. These tasks are especially helpful before inspections, busy seasons, client visits, staff events, or lease transitions.

    • Dust vents, higher ledges, ceiling fan blades, light fixtures, and upper shelves where safely reachable.
    • Detail baseboards, door frames, chair rails, and corners.
    • Clean behind movable furniture where access is safe and practical.
    • Schedule carpet spot treatment or extraction when traffic lanes look worn or stained.
    • Deep clean break room appliances, including refrigerator interiors if that task is part of the agreed scope.
    • Clean interior windows, tracks, and blinds where accessible and included.
    • Review restroom grout, partition bases, floor edges, and odor sources.
    • Refresh the checklist based on complaints, supply use, seasonal dust, and office traffic.

    Some periodic work may require special equipment, safe access, or a separate scope. High windows, exterior pressure washing, biohazard conditions, pest issues, water damage, mold, and hazardous materials should not be handled as ordinary office cleaning tasks. Those situations need the right qualified professional and the appropriate safety guidance.

    Room-by-Room Office Cleaning Tasks

    A room-by-room office cleaning checklist is easier to follow than one long mixed list. It also helps prevent common misses, such as wiping a conference table but forgetting the chair arms, or cleaning a restroom sink but overlooking the dispenser area.

    Reception and Entry Areas

    Clean doors, handles, front counters, waiting chairs, floors, glass, sign-in surfaces, and visible dust. Entry areas carry the first impression of the office, so they usually deserve daily attention even in smaller workplaces.

    Workstations and Private Offices

    Dust open surfaces, wipe shared touch points, remove trash, vacuum around desks, and clean visible smudges. Personal papers, electronics, and desk items should be handled according to the office’s preference. Many workplaces ask cleaners to clean around personal items instead of moving them.

    Conference Rooms

    Clean tables, chair arms, presentation controls, glass boards where appropriate, floor areas, cabinet fronts, and trash. Meeting rooms can look clean from the doorway while still having fingerprints, crumbs, coffee rings, and dust along table edges.

    Break Rooms and Kitchens

    Clean counters, tables, sinks, faucet handles, appliance handles, microwave exteriors, cabinet pulls, trash areas, and floors. Food residue should be handled promptly because it can cause odors and attract pests. Use the dedicated office kitchen cleaning checklist to separate daily resets from weekly appliance and refrigerator detail work.

    Restrooms

    Clean toilets, urinals where present, sinks, counters, mirrors, dispensers, partitions, handles, and floors. Restrooms need a clear routine because inconsistent cleaning is noticed quickly and can affect comfort for everyone using the space.

    Cleaning Versus Disinfecting in an Office

    Cleaning, sanitizing, and disinfecting are not the same thing. The CDC explains that cleaning removes most germs, dirt, and impurities from surfaces, while disinfecting uses chemicals to kill germs on surfaces; cleaning normally comes before disinfecting because dirt can make disinfectants less effective. See the CDC’s overview of cleaning and disinfecting basics. For related practical context, SRS also has a guide to office hygiene practices and a post on what to ask about cleaning supplies.

    Routine disinfecting is not always necessary for every office surface every day. CDC guidance says cleaning alone is usually enough for many surfaces when no one is sick, while disinfecting can be appropriate for high-touch surfaces after illness or when certain germs are a concern. The CDC’s facility guidance also says to follow the label and use a disinfectant registered for the relevant organism when disinfecting is needed. See CDC guidance on when and how to clean and disinfect a facility and the EPA’s list of selected EPA-registered disinfectants.

    Product safety should stay simple: follow the label, use ventilation when directed, wear protective equipment when the product requires it, and never mix products unless the label specifically allows it. The CDC warns that bleach should not be mixed with other cleaners or disinfectants because dangerous gases can form. See the CDC’s bleach cleaning and disinfecting guidance.

    How to Build a Cleaning Schedule That Works

    A useful office cleaning schedule starts with the space, not the calendar. Walk through the office at the end of a normal day and note what looks used: restrooms, break room counters, floor paths, trash bins, conference rooms, shared desks, and entry glass. Then assign those items to daily, weekly, or monthly frequency.

    Next, decide what needs documentation. A simple checklist can include the task, the room, the frequency, the person responsible, and a notes column. For professional service, the notes column is often the most useful part because it captures real-world changes: a new coffee station, an extra trash bin, construction dust nearby, or a restroom supply issue.

    Finally, review the schedule after two to four weeks. If the office looks good but the checklist takes too long, reduce unnecessary detail. If certain areas still look missed, add frequency or define the task more clearly. A good checklist is a working tool, not a perfect document.

    Clean office desk with computer and organized workspace
    Photo by Alesia Kazantceva on Unsplash

    Step-by-Step Office Cleaning Plan

    Use this simple process to turn the office cleaning checklist into a routine that can be followed and inspected.

    1. Walk the space after a normal workday. Note trash levels, restroom condition, food residue, visible floor debris, dusty surfaces, and the areas people touch most.
    2. Separate tasks by frequency. Daily tasks should protect presentation and hygiene. Weekly tasks should prevent buildup. Monthly tasks should refresh details that are easy to miss.
    3. Match supplies to surfaces. Keep products labeled, stored safely, and selected for the material being cleaned. Follow manufacturer directions and product labels for dwell time, ventilation, and protective equipment.
    4. Document exceptions. Write down locked rooms, personal desks, electronics, delicate finishes, appliance interiors, and tasks that need approval before cleaning.
    5. Inspect the same way every time. Review restrooms, break rooms, entry glass, floor edges, trash areas, and conference rooms after cleaning so the standard stays consistent.
    6. Adjust after two to four weeks. Remove tasks that do not matter, add frequency where buildup returns quickly, and update the checklist when furniture, staffing, or traffic changes.

    When Professional Office Cleaning Helps

    Professional office cleaning is useful when consistency matters and the cleaning routine has outgrown whoever is trying to squeeze it in around regular work. It can also help when a space needs cleaning outside normal business hours, when the office has several restrooms or shared rooms, or when floors and surfaces need a more predictable routine.

    SRS Cleaning provides office cleaning across Orange County with practical routines for workspaces, restrooms, break rooms, floors, and shared areas. The service can be paired with a checklist like this so expectations are clear from the start. For broader planning, the office cleaning guide and the comparison of janitorial service versus office cleaning can help clarify what level of service fits the space.

    For local availability, review the SRS service areas. When the checklist feels larger than the time available, the simplest next step is to request a quote and describe the rooms, frequency, and priorities.

    Printable Office Cleaning Checklist

    Use this condensed version when assigning tasks or reviewing an office after cleaning. Keep a copy in a shared operations folder, supply closet, or vendor file so the routine stays visible.

    • Entry: clean glass, handles, reception counters, waiting chairs, floors, and visible dust.
    • Work areas: empty trash, vacuum traffic paths, dust open surfaces, and wipe shared touch points.
    • Conference rooms: clean tables, chair arms, presentation controls, whiteboards if approved, and floor areas.
    • Break room: clean counters, sink, faucet handles, appliance handles, tables, cabinet pulls, trash area, and floors.
    • Restrooms: clean toilets, sinks, counters, mirrors, partitions, dispensers, fixtures, floors, and restock supplies.
    • Weekly detail: dust baseboards, ledges, interior glass, door frames, chair bases, vents within safe reach, and floor edges.
    • Monthly review: check appliance interiors, blinds, window tracks, grout lines, carpet spots, supply levels, and recurring trouble areas.

    Before using any disinfectant, confirm that the product label matches the surface and the purpose. The EPA notes that disinfectant labels identify directions and the organisms the product is registered to address, so the label should guide product choice and contact time.

    These SRS resources can help refine the checklist around service scope, supplies, and cleaning frequency:

    Office Cleaning Checklist FAQs

    What should be cleaned every day in an office?

    Daily office cleaning usually includes trash removal, restrooms, break room counters, high-touch surfaces, entry glass, visible floor debris, and shared surfaces such as reception counters or conference tables.

    How often should an office be deep cleaned?

    The right frequency depends on foot traffic, floor type, restroom use, shared kitchens, and how visible the space is to visitors. Many offices benefit from periodic detail cleaning in addition to a daily or weekly routine.

    Should every office surface be disinfected daily?

    Not necessarily. CDC guidance distinguishes cleaning from disinfecting and explains that cleaning alone is usually enough for many surfaces when no one is sick. Disinfecting should follow the product label and be used where it fits the situation.

    What is the easiest way to keep an office cleaning checklist manageable?

    Group tasks by room and frequency. Keep daily work focused on visible, high-use areas, then reserve detail work for weekly or monthly cleaning so the routine stays realistic.

    Keep the Checklist Practical

    The strongest office cleaning checklist is the one people can actually follow. It names the spaces, separates the frequencies, avoids unsafe product shortcuts, and gives high-use areas the attention they need. It also changes when the office changes.

    Use this checklist as a starting point, then adjust it around the real rhythm of the workplace. When daily cleaning, weekly detail work, and periodic deeper cleaning are organized clearly, the office feels easier to use, easier to maintain, and more ready for the next workday.

  • Apartment Turnover Cleaning Checklist for Faster Unit Readiness

    Apartment Turnover Cleaning Checklist for Faster Unit Readiness

    An apartment turnover cleaning checklist helps property managers move a vacant unit from move-out condition to ready-for-showing without losing track of details, access, or vendor handoffs. The best checklist does more than name surfaces to wipe. It puts inspection, repairs, cleaning, quality control, and documentation in the right order so work is not repeated.

    This practical guide is designed for apartment communities and rental-property teams throughout Orange County. Use it as a master workflow, then adapt it to the unit, lease requirements, property standards, and work your maintenance team has already approved.

    What apartment turnover cleaning should accomplish

    Turnover cleaning prepares a vacant apartment for its next approved use: maintenance inspection, marketing photos, a prospective-resident tour, or move-in. It is different from routine occupied-apartment cleaning because cabinets are empty, appliances can be cleaned inside, and areas normally blocked by furniture are accessible.

    Cleaning is only one part of the turn. Damage assessment, abandoned-property handling, pest treatment, painting, repairs, flooring work, and safety checks may require separate vendors or authorized staff. A clear scope prevents a cleaner from being asked to make repair decisions and keeps dust-producing work from undoing a completed clean.

    For a broader overview of coordination and common turnover priorities, see SRS Cleaning’s rental turnover cleaning guide for property managers. The checklist below turns that strategy into a repeatable sequence.

    Apartment turnover cleaning checklist: the correct order

    1. Inspect and document the vacant unit

    Begin only after possession and entry requirements have been handled according to your property’s procedures. Walk the unit before moving supplies inside. Record the starting condition with dated photos or your approved inspection system, and separate cleaning issues from damage or maintenance issues.

    • Confirm the unit number, floor plan, keys, codes, and authorized access window.
    • Photograph kitchens, bathrooms, floors, walls, windows, closets, and appliance interiors.
    • Flag leaks, broken fixtures, damaged screens, loose hardware, pest evidence, or other concerns for the appropriate team.
    • Identify belongings, trash, or bulky items that must be handled before cleaning.
    • Note surfaces that need special care, including stone, stainless steel, wood, or delicate finishes.

    This first walk-through creates a shared definition of the work. It also gives the cleaner a reliable way to report a pre-existing stain, chip, or worn finish without confusing it with a missed cleaning task.

    2. Clear the unit and complete dust-producing work

    Schedule removal, repairs, patching, sanding, painting, flooring replacement, and similar work before the final clean whenever possible. If a repair must happen afterward, identify the affected room and plan a focused touch-up visit rather than assuming the unit will stay move-in ready.

    • Remove approved trash and remaining materials.
    • Finish repairs and allow paint, grout, caulk, or other materials to cure as directed.
    • Remove contractor packaging, labels, tape, and protective coverings that are ready to come off.
    • Confirm electricity and water are available where needed for cleaning.
    • Make sure maintenance tools and debris are out of the cleaner’s path.

    3. Clean high areas before low areas

    Work from dry tasks to wet tasks, from high surfaces to low surfaces, and from the farthest room toward the exit. That sequence keeps settled dust from falling onto finished counters or floors. A practical order is vents and ledges, cabinets and fixtures, counters and appliances, baseboards, and then flooring.

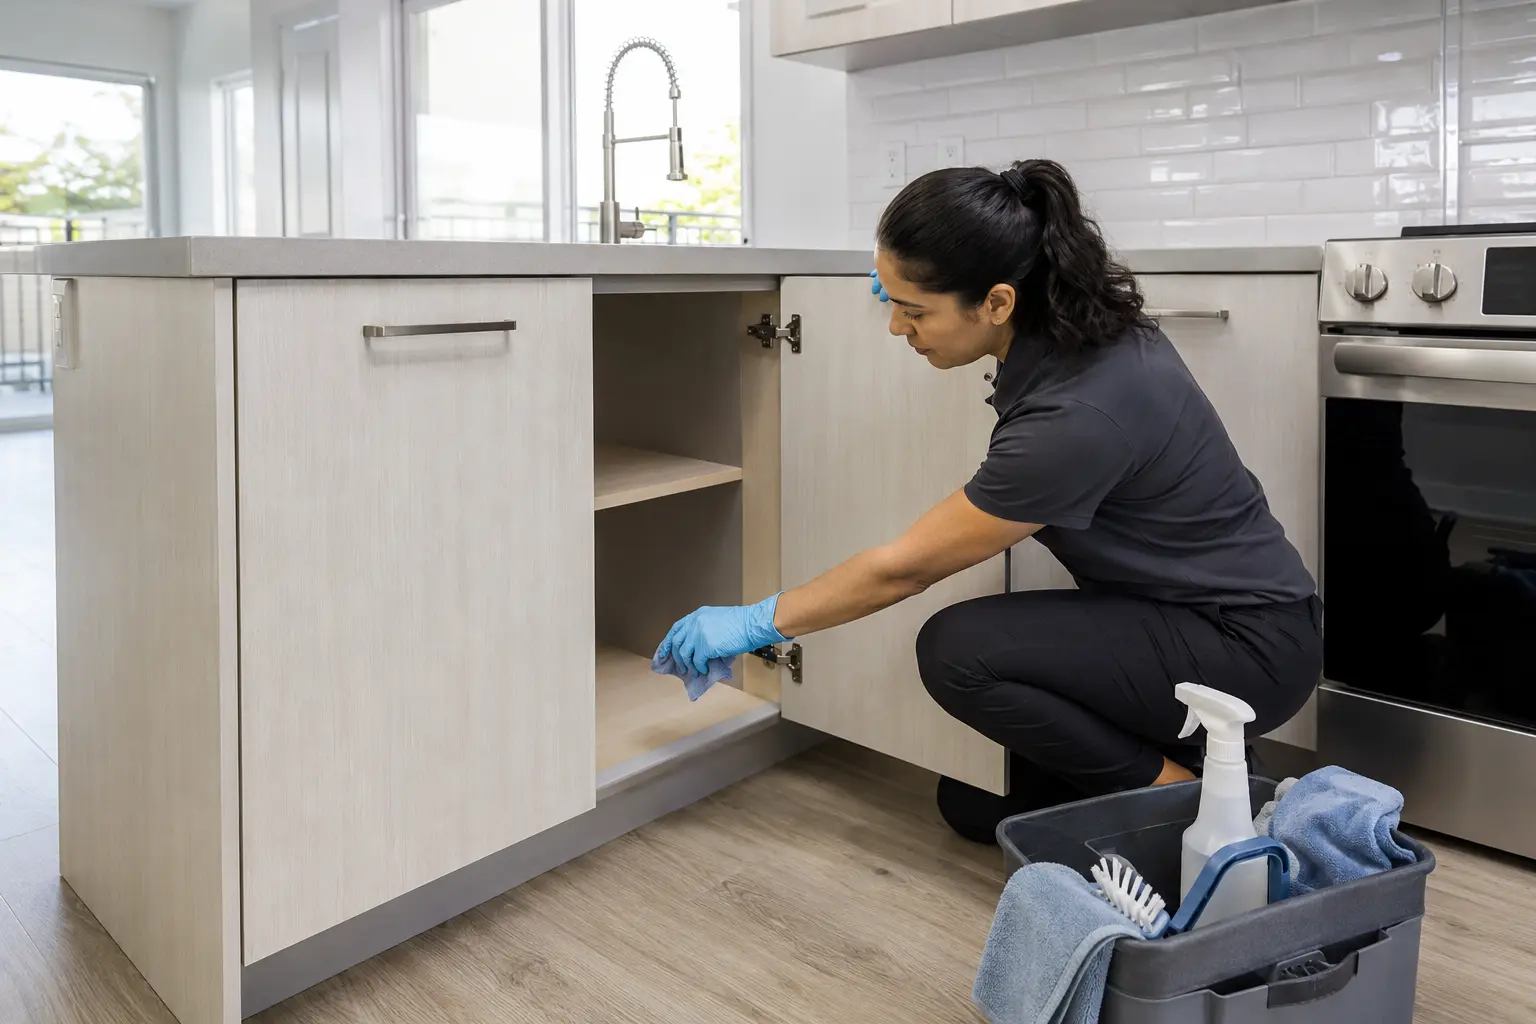
    Professional cleaner wiping the inside of an empty kitchen cabinet during apartment turnover cleaning
    Empty cabinets make it possible to clean shelves, corners, and hardware before the next resident moves in.

    Room-by-room turnover cleaning tasks

    Kitchen

    • Remove loose crumbs and debris from empty drawers, shelves, and cabinet corners.
    • Wipe cabinet and drawer interiors, fronts, handles, and accessible edges using a surface-appropriate method.
    • Clean countertops, backsplash, sink basin, faucet, drain area, and exposed plumbing cabinet surfaces.
    • Clean the refrigerator interior, drawers, shelves, seals, exterior, and accessible top and sides when included in the scope.
    • Clean the oven and cooktop according to the appliance finish; wipe knobs, control panels, hood exterior, and accessible filters.
    • Wipe the dishwasher interior lip, exterior, controls, and surrounding cabinet faces.
    • Check corners, toe kicks, baseboards, wall plates, and the floor beneath movable items.

    Appliances vary, so the scope should say whether interior oven and refrigerator cleaning is included and whether appliances may be moved. Cleaners should not disconnect gas, water, or electrical connections unless they are specifically trained and authorized to do so.

    Bathrooms

    • Clean and disinfect appropriate high-touch surfaces such as handles, switches, and fixture controls.
    • Remove soap residue and mineral buildup from tubs, showers, tile, surrounds, doors, and tracks using finish-safe products.
    • Clean the toilet, including the seat, hinges, exterior, base, and nearby floor area.
    • Clean the vanity, sink, faucet, mirror, empty storage, and accessible plumbing cabinet surfaces.
    • Wipe exhaust covers, ledges, doors, trim, baseboards, and wall plates.
    • Check the room from several angles for hair, dust, streaks, and residue.

    Persistent discoloration, failed caulk, damaged grout, corrosion, or an active leak may need maintenance rather than additional scrubbing. Flagging that distinction early prevents wasted time and protects the finish.

    Bedrooms, living areas, closets, and halls

    • Dust accessible vents, fan exteriors, light fixtures, ledges, door tops, and closet shelving.
    • Wipe doors, frames, handles, switches, wall plates, windowsills, tracks, and baseboards.
    • Remove cobwebs and check corners, closet floors, and the space behind open doors.
    • Spot-clean washable marks only when the method is appropriate for the paint and within scope.
    • Vacuum carpet edges and open areas or clean hard floors with a finish-appropriate process.
    • Complete a final edge check where dust and hair tend to collect.

    If the unit needs a more extensive vacant-home service, review SRS Cleaning’s move-in and move-out cleaning service and confirm the exact unit scope before work begins.

    Build a pass-or-correct quality-control step

    A checklist is only useful when every item has a clear completion standard. “Clean kitchen” is subjective. “Cabinet interiors are empty and free of visible crumbs, dust, and residue” is easier to inspect. Define whether each item passes, needs correction, is excluded, or requires maintenance.

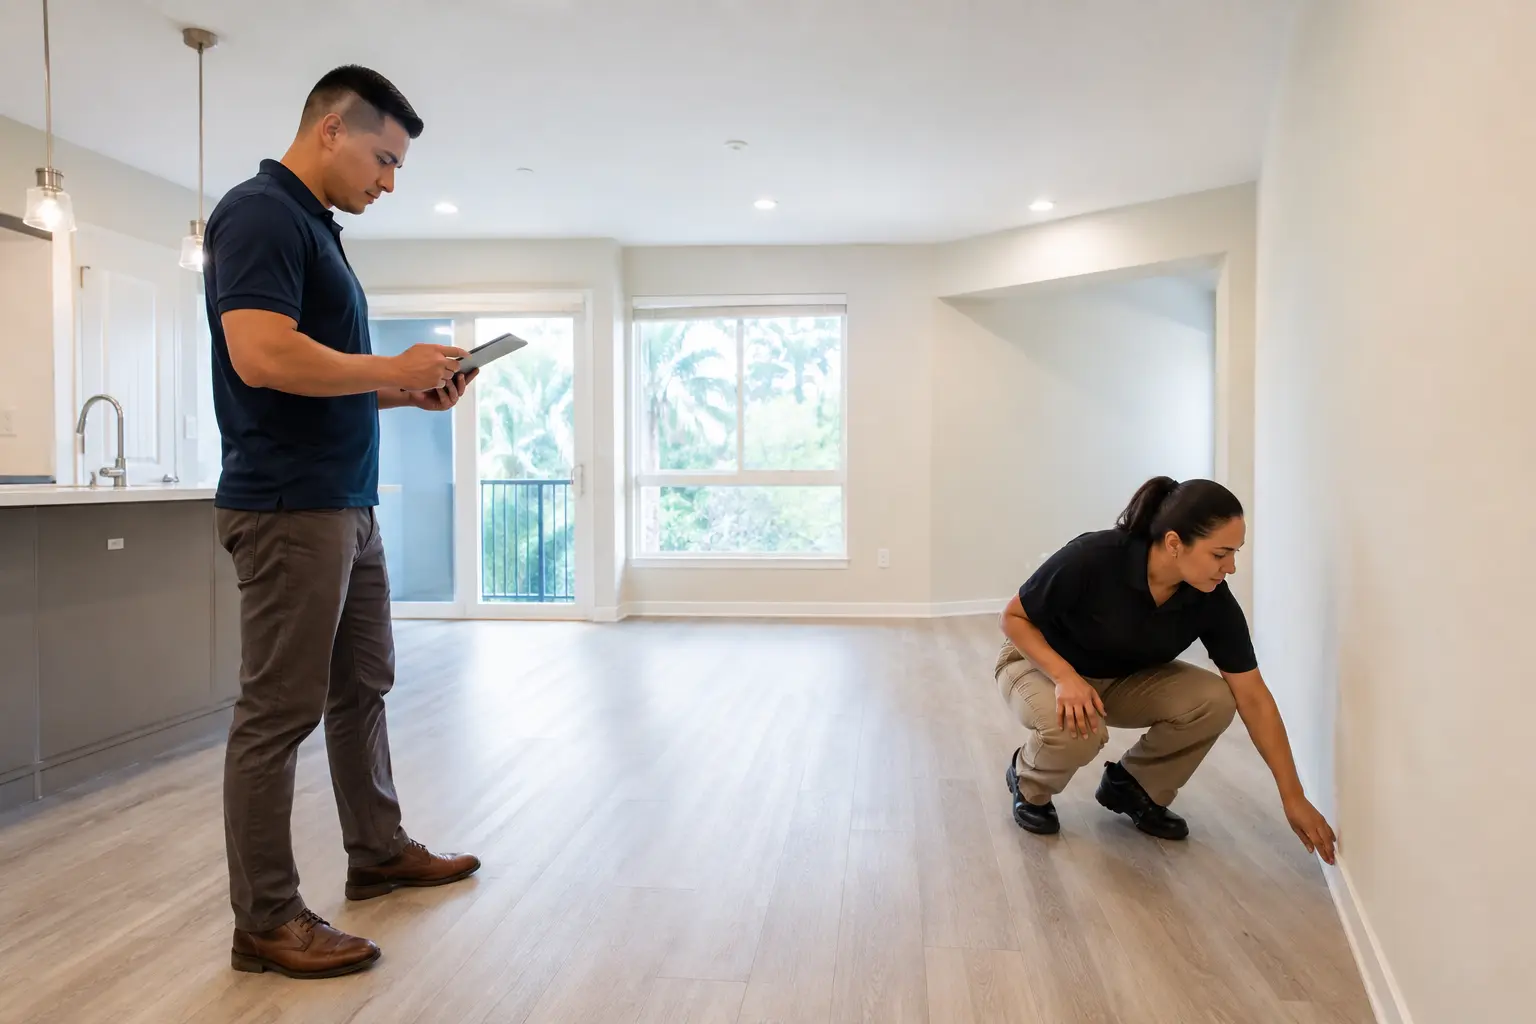
    Property manager and cleaning lead completing a final walkthrough in a clean vacant apartment
    A documented final walkthrough helps the property team separate completed cleaning from maintenance follow-up.

    During the final walk-through:

    1. Enter with clean shoes or protective covers if the flooring requires them.
    2. Turn on available lights and inspect from the doorway before moving through the room.
    3. Open empty cabinets, drawers, closets, appliances, and shower doors included in the scope.
    4. Look across reflective surfaces for streaks and check floor edges at eye level.
    5. Record corrections with a room, item, and photo instead of a vague message.
    6. Confirm corrections and save final condition photos in the property’s approved system.
    7. Secure windows, turn off lights and water, remove supplies, and follow the approved key-return process.

    A consistent inspection method is especially important across multiple units or team members. SRS Cleaning’s guide to apartment cleaning priorities that matter most can help managers decide which details deserve the most attention during the handoff.

    How to shorten unit downtime without cutting cleaning quality

    Faster readiness usually comes from removing uncertainty, not rushing the final clean. Give each vendor a defined start condition, scope, access method, and completion signal. A shared turn board or property-management workflow can show which step is ready and which is blocked.

    • Use one accountable coordinator. A single contact can approve scope questions and prevent conflicting instructions.
    • Group similar work. When appropriate, scheduling comparable unit types together can simplify supplies, access, and inspection.
    • Share exclusions in advance. Identify repairs, permanent stains, worn finishes, and owner-responsibility items before the cleaning team arrives.
    • Protect completed work. If vendors must re-enter, define pathways and require debris removal.
    • Reserve time for correction. A realistic handoff window is more useful than declaring the unit ready before inspection.

    Turn times depend on unit size, condition, scope, utilities, access, staffing, and the amount of repair work. Avoid promising a universal number of hours. Instead, provide complete unit details so the cleaning team can set a realistic plan.

    What to send when requesting a turnover-cleaning quote

    A complete request reduces back-and-forth and helps the cleaner price the actual work rather than a generic apartment. Include:

    • Property city and unit type, including approximate size and bedroom/bath count.
    • Current condition and whether belongings or construction debris remain.
    • Requested rooms, appliance interiors, windows or tracks, cabinets, floors, and add-on priorities.
    • Surface or appliance details that may affect cleaning methods.
    • Access procedure, parking or loading instructions, and on-site contact.
    • Earliest authorized start, target inspection window, and any vendor dependencies.
    • Photo, documentation, invoicing, or purchase-order requirements.

    SRS Cleaning serves communities across its Orange County service area. Confirm availability and scope for a specific property rather than linking work to an unpublished city page.

    Apartment turnover cleaning checklist FAQ

    What is apartment turnover cleaning?

    It is a vacant-unit cleaning service performed between occupants. Depending on the agreed scope, it can include accessible surfaces, empty cabinets and drawers, appliance interiors, bathrooms, baseboards, and floors. Repairs, painting, hauling, and restoration are separate unless specifically included by the responsible provider.

    Should maintenance or cleaning happen first?

    Most dust-producing repairs, painting, and flooring work should be complete before the final clean. Inspection and urgent maintenance come first; final floor care generally comes near the end. If work must overlap, document the handoff and plan a touch-up.

    How long does apartment turnover cleaning take?

    There is no reliable one-size-fits-all duration. Unit size, condition, requested detail, appliance interiors, flooring, access, utilities, and the number of cleaners all affect timing. Photos and a complete scope help produce a more useful estimate.

    How should managers document the final clean?

    Use the property’s approved inspection system to record room-by-room pass, correction, exclusion, or maintenance status. Dated photos, a named reviewer, and a clear correction deadline make the handoff easier to verify.

    Can one checklist work for every unit?

    Use one master standard for consistency, but adapt it for floor plan, finishes, appliances, occupancy condition, and approved scope. The goal is a repeatable process without treating unlike units as identical.

    Prepare the next Orange County unit with a clearer plan

    A reliable apartment turnover cleaning checklist connects the people doing the work with the person approving the result. Start with documentation, finish repairs before the final clean, inspect against specific standards, and record the handoff. That process supports smoother scheduling and a more consistent resident-ready experience.

    If your property team needs help cleaning a vacant apartment, request a cleaning quote from SRS Cleaning. Share the unit details, condition, scope, and target inspection window so the team can confirm an appropriate plan.

  • Apartment Move-Out Cleaning Checklist for Renters

    Apartment Move-Out Cleaning Checklist for Renters

    Moving is demanding enough without discovering a greasy oven, dusty baseboards, or a forgotten cabinet an hour before key return. This apartment move out cleaning checklist gives Orange County renters a practical order of work, room-by-room priorities, and a final inspection routine so the last clean feels organized instead of overwhelming.

    The goal is not to make an older apartment look brand-new. It is to remove your belongings, trash, dust, residue, and avoidable buildup; follow your lease or property manager’s written instructions; and document the condition you leave behind. Cleaning cannot guarantee a full security-deposit return, but a careful plan can help you avoid missed tasks and make the handoff easier.

    Clean empty Orange County apartment for an apartment move out cleaning checklist
    A clean, empty apartment is easier to inspect before you return the keys.

    Apartment Move Out Cleaning Checklist: Quick Answer

    Empty the unit first, compare the lease and move-out instructions, then clean from high surfaces to low and from dry tasks to wet tasks. Work through the kitchen, bathrooms, living areas, bedrooms, closets, entry, and any included patio or laundry area. Finish with floors, a slow final walkthrough, dated photos, and key or access-item return.

    For more planning help, use the move-out cleaning guide to organize the handoff and compare move-in cleaning versus move-out cleaning if you are coordinating both homes.

    • Before cleaning: remove belongings, food, trash, and adhesive items you are permitted to remove.
    • Highest-effort areas: kitchen appliances, grease, bathroom buildup, cabinets, baseboards, and floor edges.
    • Final proof: photograph every room after cleaning and save your communications and receipts.
    Area Ready for final review when
    Kitchen Food and trash are gone; required appliances, cabinets, counters, sink, and floor are clean.
    Bathrooms Fixtures, shower or tub, toilet, vanity, mirrors, storage, and floor are free of avoidable residue.
    Living areas and bedrooms Closets are empty; dust, debris, floor edges, baseboards, and touchpoints have been addressed.
    Handoff The unit is empty, dry, photographed, and checked against the lease and written instructions.

    Start With the Lease and an Empty Apartment

    Your lease, move-in condition report, and property manager’s written checklist should guide the job. Look for requirements involving appliance interiors, cabinet interiors, windows, carpet care, patios, storage spaces, or professionally completed services. Ask questions early when an instruction is unclear; do not assume that every apartment community uses the same standard.

    Next, remove everything that is leaving with you. Check upper shelves, drawers, medicine cabinets, the refrigerator, balcony storage, and the space behind doors. A professional move-out cleaning can also work more efficiently in an empty property, and you can see dust and marks that furniture or boxes previously covered. Arrange donation, disposal, and bulky-item pickup separately rather than leaving unwanted possessions for the cleaning appointment.

    Set aside only a small last-out kit: microfiber cloths, a vacuum, mop, appropriate surface cleaners, gloves, trash bags, paper towels, and a step stool if it can be used safely. Follow every product label, ventilate the apartment, test unfamiliar products in a discreet area, and never mix cleaning chemicals. If you want professional help, request a house-cleaning quote before the last-day rush.

    Apartment move-out cleaning supplies beside a blank checklist and apartment keys
    Keep the final cleaning supplies accessible after the rest of the apartment is packed.

    Use the Right Cleaning Order

    A good sequence prevents you from cleaning the same surface twice. Begin with dry work such as cobweb removal, dusting, vacuuming, and collecting debris. Start at ceiling height, move down walls and fixtures, then finish at baseboards and floors. Clean rooms farthest from the exit first so you do not walk across a freshly mopped area.

    1. Remove remaining belongings, food, labels, and trash.
    2. Dust ceiling fans, vents, light fixtures, ledges, and upper cabinets.
    3. Clean appliance interiors and cabinet or drawer interiors included in your scope.
    4. Wash counters, sinks, bathroom fixtures, doors, trim, and touchpoints.
    5. Vacuum carpet and floor edges, then mop appropriate hard floors.
    6. Inspect in daylight, correct misses, photograph the finished unit, and lock up.

    If time is tight, do not spread effort evenly. Prioritize items specifically named in the lease, visible residue, food-contact areas, bathrooms, appliance interiors, cabinets, and floors. Cosmetic repair, hauling, painting, pest treatment, and carpet repair are different jobs; arrange the right provider rather than trying to solve them with a cleaning product.

    Room-by-Room Apartment Move Out Cleaning Checklist

    Kitchen

    The kitchen usually needs the most time because grease, crumbs, and food residue collect in many small areas. Empty the refrigerator and freezer, discard food, and clean accessible shelves, drawers, seals, and exterior surfaces if those tasks are required. Clean the microwave inside and out. For the oven, range hood, dishwasher, or refrigerator interior, confirm what your agreement requires and what any professional service includes.

    • Wipe counters, backsplash, cabinet fronts, handles, and empty shelves or drawers.
    • Remove crumbs and residue from the stovetop, burner area, and appliance edges.
    • Clean and rinse the sink; polish the faucet with a product safe for its finish.
    • Wipe switches, outlet covers, doors, frames, baseboards, and reachable ledges.
    • Vacuum along cabinets and appliance gaps, then mop the floor without over-wetting it.
    • Remove all food, liners, trash, and recycling.

    Do not scrape a delicate cooktop or use an abrasive product on a finish unless the manufacturer allows it. Heavy grease or mineral buildup may need dwell time, repeated gentle cleaning, or a task-specific product—not greater force.

    Bathrooms

    Work from the mirror and upper surfaces down to the floor. Clean the vanity, sink, faucet, shower or tub, toilet, cabinet exterior, and accessible empty storage. Address soap residue and hard-water spots with products approved for the tile, stone, glass, grout, or metal in your apartment.

    • Clean the toilet bowl, seat, lid, tank exterior, base, and surrounding floor.
    • Wipe mirrors, counters, fixtures, towel bars, switches, and door handles.
    • Remove hair and residue from the shower, tub, drain cover, and corners.
    • Check behind the door, along baseboards, and around the vanity toe-kick.
    • Remove personal products, empty trash, vacuum, and mop last.

    Bedrooms, Living Areas, Closets, and Entry

    Dust ceiling fans, fixtures, vents, blinds, sills, shelves, door tops, and baseboards where accessible. Wipe smudges from switches, handles, closet shelving, and other high-touch surfaces using a finish-safe method. Vacuum carpet slowly in overlapping passes and use an edge tool around walls and closets. Sweep or vacuum hard floors before mopping with the correct amount of moisture.

    Check balcony doors, tracks, entry corners, and the area where a sofa or bed stood. Remove only wall hooks or adhesive products that the lease says you may remove. Patch, paint, or repair only with permission and a proper color or method; an improvised repair can create more work than the original mark.

    Professional cleaner wiping apartment baseboards during a move-out clean
    Empty rooms reveal baseboards, floor edges, and corners that furniture can hide.

    Laundry, Patio, Garage, or Storage Areas

    If these spaces are part of your rental, empty them completely and follow the property’s instructions. Remove lint from accessible laundry surfaces, wipe shelving, sweep storage floors, and pick up debris from the patio or garage. Do not pressure-wash, move installed appliances, or use water near electrical equipment unless the property has approved the method.

    Protect the Handoff With Inspection and Photos

    Plan time for a final walkthrough after surfaces have dried and the apartment is empty. Open every cabinet and closet, look behind doors, inspect appliance interiors included in your checklist, and view floors from several angles. Use your phone flashlight for dark corners. Confirm that trash, food, cleaning supplies, remotes, parking permits, mailbox keys, and access devices are handled according to the property’s directions.

    California Courts explains that a landlord may deduct for cleaning only to return a rental to the level of cleanliness it had when the tenant moved in, and that tenants can ask for a pre-move-out inspection. Review the current California security-deposit guidance and your own lease; this article is practical cleaning information, not legal advice.

    Take clear, dated photos or video of each room, inside included appliances, cabinets, floors, fixtures, and any existing wear. Save the move-in condition report, inspection notes, service receipt, and written messages. Documentation does not replace cleaning, but it creates a useful record of what you returned.

    DIY or Professional Move-Out Cleaning?

    A do-it-yourself clean may fit a small, regularly maintained apartment when you have enough time, the right supplies, and no significant buildup. Professional help can make sense when the unit is larger, your move overlaps with work or travel, you have a short handoff window, or detailed kitchens and bathrooms would consume the time needed for packing and logistics.

    If you hire help, share the apartment size, condition, access details, parking rules, key deadline, and the property’s checklist before the appointment. Ask which appliance interiors, cabinets, windows, blinds, walls, patios, or other tasks are included. SRS Cleaning’s move-in and move-out service is designed for transitions, and its Locations page is the safest place to confirm current Orange County coverage.

    A Simple 48-Hour Move-Out Plan

    Two Days Before Key Return

    Finish packing, remove donations and bulky items, confirm elevator or parking access, and place the cleaning kit where movers will not take it. Photograph any pre-existing condition you want documented. Clean appliance and cabinet interiors that will not be used again.

    One Day Before Key Return

    Complete the kitchen, bathrooms, closets, dusting, trim, and touchpoints. Vacuum throughout, then mop hard floors from the farthest room toward the exit. Let surfaces dry and ventilate the unit safely.

    On Handoff Day

    Do one slow inspection, correct small misses, remove the last trash bag and supplies, and take final photos. Follow the written process for keys, remotes, permits, and forwarding information. Keep copies of the handoff confirmation and any cleaning receipt.

    Frequently Asked Questions

    How clean should an apartment be when moving out?

    Follow the lease and written move-out instructions, with the move-in condition as an important reference point. Remove personal property and trash, address residue and buildup, and clean the rooms and items identified by the property. Normal wear and cleaning needs are not the same as damage.

    Should I clean before or after the movers leave?

    Complete most detailed cleaning after furniture and boxes are gone. You can clean unused cabinets and appliances earlier, but empty rooms allow better access to floor edges, baseboards, closets, and hidden dust.

    Does professional cleaning guarantee my security deposit?

    No. A deposit can involve rent, damage, cleaning, documentation, lease terms, and applicable law. Professional cleaning can reduce missed cleaning tasks, but no responsible cleaning company should promise a particular deposit outcome.

    When should I book apartment move-out cleaning?

    Book as early as your moving dates allow, especially near month-end or a weekend. Schedule after the unit is empty and before the walkthrough or key-return deadline, leaving enough time to review the completed work.

    Leave the Apartment Ready for Its Next Chapter

    A strong apartment move out cleaning checklist turns a vague final chore into a clear sequence: confirm expectations, empty the space, clean top to bottom, inspect carefully, and document the handoff. If your Orange County move is already consuming every available hour, request a fast house-cleaning quote from SRS Cleaning and share your apartment details, deadline, and property checklist.

  • New House Cleaning Checklist Before You Move In

    New House Cleaning Checklist Before You Move In

    Moving into a new home should feel exciting, but opening the door to dusty shelves, sticky cabinets, or a bathroom that still feels like someone else’s can quickly add stress. A practical cleaning a new house checklist helps you use the short window before furniture and boxes block the areas that are easiest to reach while the home is empty.

    The goal is not to scrub randomly until you run out of time. It is to clean in the right order, protect each surface, and make the rooms you need first ready before moving day. Use this Orange County guide to decide what to clean, when to do it, and when professional move-in cleaning can take a major task off your schedule. If the property is being prepared before photos or showings instead, use this pre-listing cleaning checklist for presentation-focused details.

    Professional cleaner wiping a kitchen island in a bright Orange County home before move-in
    A professional move-in cleaning helps prepare an empty home before boxes are unpacked.

    Why Clean a New House Before Moving In?

    An empty home gives you access you may not have again for years. You can reach closet corners, cabinet interiors, baseboards, wall edges, and the floor beneath future furniture without shifting heavy belongings. Cleaning before unpacking also prevents you from placing dishes, linens, and clothing onto shelves that still hold dust or residue.

    Even a recently renovated or newly built home can contain fine construction dust. A previously occupied home may look presentable while still having grease around kitchen handles, buildup in bathroom edges, debris inside drawers, or dust on vents and ceiling fans. Completing the work before the moving truck arrives creates a cleaner starting point and reduces the number of chores competing for your attention during the first week.

    Before You Start: Inspect, Plan, and Gather Supplies

    Walk through the home before bringing in cleaning equipment. Photograph damage or maintenance concerns, especially if the property is a rental. Look for active leaks, damaged flooring, loose outlets, pest evidence, mold-like growth, or other issues that should be handled by the appropriate professional. Cleaning should not hide a condition that needs repair.

    Confirm that electricity and water are available. Open blinds for better visibility and provide ventilation when product labels recommend it. Read the care instructions for stone counters, wood flooring, stainless steel, specialty tile, and painted surfaces. Always test an unfamiliar product in a small, inconspicuous area, and never mix cleaning chemicals.

    Basic move-in cleaning supplies

    • Microfiber cloths in separate colors for kitchens, bathrooms, and general surfaces
    • A vacuum with crevice and brush attachments
    • A broom, dustpan, and floor-appropriate mop
    • Non-scratch sponges and a small detail brush
    • Gloves, trash bags, a bucket, and paper towels
    • Glass cleaner and surface-specific cleaning products
    • A step stool used according to its safety instructions
    Move-in cleaning supplies arranged on the floor of an empty home
    Gather surface-safe products and basic tools before starting your move-in cleaning checklist.

    The Best Order for Cleaning a New House

    Work from high to low and from dry tasks to wet tasks. Dusting ceiling fans after mopping only sends debris back onto a finished floor. Likewise, cleaning floors before contractors or movers finish walking through the property usually means doing the job twice.

    1. Remove trash and leftover materials. Clear packing scraps, shelf liner, abandoned items, and obvious debris.
    2. Dry dust from the top down. Start with ceiling corners, fixtures, fan blades, vents, shelves, door frames, and baseboards.
    3. Clean storage areas. Wipe closets, cabinets, drawers, and pantry shelves before belongings go inside.
    4. Deep clean kitchens and bathrooms. Give cleaning products the dwell time stated on their labels rather than wiping immediately.
    5. Clean glass and detail high-touch areas. Include mirrors, interior window glass where accessible, switches, handles, and knobs.
    6. Vacuum and mop last. Begin at the farthest point and work toward the exit so you do not walk across finished floors.

    Room-by-Room Cleaning a New House Checklist

    Kitchen

    Complete the kitchen before unpacking food, cookware, and dishes. Remove crumbs and dust from cabinet corners with a vacuum attachment, then wipe the interiors and allow them to dry. Clean cabinet fronts, pulls, pantry shelves, countertops, backsplash, sink, faucet, and the exterior of installed appliances.

    If appliances were included with the home, inspect the refrigerator shelves and seals, oven, stovetop, range hood, microwave, and dishwasher filter. Follow each manufacturer’s instructions. Avoid assuming one all-purpose product is safe for natural stone, unfinished wood, or specialty finishes. Finish by cleaning the floor after the upper surfaces are complete.

    Bathrooms

    Bathrooms are often the first rooms needed on moving day, so make at least one bathroom fully usable early. Dust the exhaust grille and light fixtures, wipe cabinet interiors, and clean mirrors. Then address the vanity, sink, faucet, tub, shower walls, tracks, fixtures, toilet, baseboards, and floor.

    Pay attention to corners, the area behind the toilet, cabinet handles, and buildup around fixtures. Use products designed for the surface and follow label directions for ventilation, contact time, and rinsing. Replace worn toilet seats or shower liners if that is part of your move-in plan, but leave plumbing repairs to a qualified professional.

    Bedrooms and closets

    Dust ceiling fans, vents, window sills, blinds, closet shelving, rods, door frames, and baseboards. Vacuum closet corners before placing shoes or storage bins inside. Clean hard floors with the appropriate method, or vacuum carpet slowly in overlapping passes. If carpet needs specialized treatment, arrange it before beds and dressers arrive.

    Living areas, hallways, and stairs

    Work around the room from top to bottom. Dust fixtures, fan blades, vents, ledges, doors, trim, and baseboards. Wipe high-touch areas such as switches, railings, handles, and thermostat covers without saturating electrical components. Clean interior glass and accessible tracks, then finish floors after all other work is complete.

    Laundry room and utility areas

    Wipe shelves, cabinet interiors, appliance exteriors, and the area around hookups. Check that the dryer vent connection appears intact before use and arrange professional service if anything looks damaged or obstructed. Clean the utility sink, remove lint and dust, and mop the floor. Do not move heavy appliances without the right equipment and assistance.

    Entry, garage, patio, and overlooked details

    Clean the inside of the entry door, handles, thresholds, and nearby glass. Sweep the garage and remove loose debris, but avoid disturbing unknown powders, chemicals, pest material, or construction waste. Wipe accessible patio-door tracks and make sure entrances are clear for movers.

    Before calling the checklist complete, look at the tops of doors, closet corners, return-air grilles, cabinet toe kicks, the space beside appliances, and the edges where floors meet baseboards. These are common places for dust to remain in an otherwise clean-looking home.

    Professional cleaner vacuuming baseboards in an empty room before move-in
    An empty home makes baseboards, corners, and floor edges easier to clean thoroughly.

    What to Clean Again After the Movers Leave

    A strong pre-move clean does most of the work, but moving traffic can bring in dirt and cardboard dust. After the last delivery, remove packing debris, wipe newly handled switches and door handles, vacuum traffic paths, and spot-mop hard floors. Clean the counters used for drinks or takeout and make one bathroom fresh again.

    This second pass should be quick because cabinets, appliances, bathrooms, and hard-to-reach areas were already detailed. Keep a small cleaning kit separate from the moving truck so it is easy to find.

    DIY or Professional Move-In Cleaning?

    DIY cleaning can work well when the home is small, already in good condition, and you have access several days before the move. Divide the property into zones, estimate the time honestly, and finish one room before starting another. If friends or family help, assign specific rooms to avoid duplicated effort.

    Professional help may make more sense when the timeline is tight, the home is large, buildup is significant, or your attention is already split among closing, utilities, packing, children, pets, and movers. A cleaning team can focus on the property while you handle the logistics only you can manage. Review the scope in advance so expectations are clear. For more detail, see what may be covered by a deep cleaning service and learn how to prepare for house cleaners.

    Final Walkthrough Before You Unpack

    • Cabinets, drawers, closets, and pantry shelves are clean and dry.
    • The kitchen and at least one bathroom are ready to use.
    • Ceiling fans, vents, trim, baseboards, and high-touch areas have been addressed.
    • Floors are vacuumed or mopped with the correct method.
    • No cleaning products, damp cloths, or trash were left behind.
    • Maintenance concerns discovered during cleaning were documented.
    • Cleaning supplies needed after moving are easy to locate.

    Frequently Asked Questions

    How long does it take to clean a new house before moving in?

    The time depends on the home’s size, condition, number of bathrooms, appliances, flooring, and whether cabinets and closets need interior cleaning. An empty home is easier to access, but detailed kitchen and bathroom work can still take several hours. Inspect first and avoid building your plan around an unrealistically short window.

    Should you clean before or after moving furniture in?

    Complete the detailed cleaning before furniture arrives whenever possible. Then do a shorter floor and high-touch-surface pass after the movers finish. This combination provides access to hidden areas without expecting floors to remain untouched during the move.

    What should be cleaned first in a new house?

    After removing debris, start with high dry-dusting tasks and storage interiors. Clean kitchens and bathrooms next, then glass and high-touch areas. Vacuum and mop floors last.

    Do you need a deep clean if the home looks clean?

    Not every property needs the same scope. Inspect cabinet interiors, appliances, bathroom edges, vents, baseboards, closets, and floors. A targeted clean may be enough when those areas are already in good condition; more detailed work is useful when dust, residue, or buildup remains.

    Start Your Orange County Move With a Cleaner Home

    A thoughtful cleaning a new house checklist gives you a simple advantage: you can unpack into rooms that already feel comfortable and ready for your belongings. If you would rather spend your pre-move time coordinating the move, SRS Cleaning provides professional move-in cleaning for homeowners across Orange County service areas.

    Request a house cleaning quote or call (714) 439-8500 to discuss your home, timeline, and cleaning priorities.

  • House Cleaning Deep Cleaning Checklist for Every Room

    House Cleaning Deep Cleaning Checklist for Every Room

    A home can look tidy while still carrying the buildup that makes it feel less comfortable: soap film on shower doors, grease above the range, dust along baseboards, and fingerprints on the places everyone touches. This house cleaning deep cleaning checklist helps you work through those details without turning a free weekend into an exhausting all-day project.

    Deep cleaning is not about making a home look perfect. It is a periodic reset that addresses the work regular cleaning does not always cover. For busy Orange County households, the best approach is to focus on the areas that affect daily comfort first, then decide which remaining tasks are worth handling yourself.

    Start With a Realistic Plan

    A deep clean goes faster when you clean from high to low and dry to wet. Dust ceiling fans, vents, shelves, and blinds before vacuuming floors. Apply bathroom and kitchen cleaners early so they can sit while you handle another task. Then wipe surfaces, scrub where needed, and finish with the floors.

    Before you begin, clear clutter from counters, nightstands, and floors. Cleaning around piles of mail, laundry, and toys adds time without producing the fresh, open result most people want. A basket for misplaced items is useful, but avoid stopping to organize every drawer unless that is part of your goal.

    You do not need a cabinet full of specialty products. A vacuum with attachments, microfiber cloths, a mop, a scrub brush, a sponge, a glass cleaner, an all-purpose cleaner, and a bathroom cleaner cover most needs. Always check product labels, especially on natural stone, stainless steel, wood, and delicate finishes. Stronger products can solve a problem quickly, but the wrong one can leave dull spots or damage a surface.

    House Cleaning Deep Cleaning Checklist: Whole-Home Tasks

    These jobs make the biggest difference across the house and are easy to overlook during a typical weekly clean:

    • Dust ceiling fans, light fixtures, air vents, door frames, blinds, window sills, and baseboards.
    • Wipe doors, doorknobs, cabinet pulls, light switches, outlet covers, and other high-touch surfaces.
    • Vacuum upholstered furniture, under cushions, along furniture edges, and beneath beds where accessible.
    • Clean interior windows and mirrors, paying attention to smudges near handles and pet nose prints.
    • Vacuum rugs thoroughly, including edges and corners, then mop hard floors with the right product for the material.
    • Pull out lightweight furniture and appliances when it is safe to do so, then remove dust, crumbs, and debris underneath.

    This is also a good time to replace or wash reusable cleaning cloths, launder throw blankets, and change bed linens. If you have pets, use the vacuum attachment along upholstery and baseboards before mopping. That extra pass prevents loose hair from spreading around damp floors.

    Kitchen Deep Cleaning Checklist

    The kitchen needs more than a quick counter wipe because grease and food residue build up in places that are not immediately visible. Start at the top, including the tops of cabinets and the outside of the range hood. If the hood filter is greasy, follow the manufacturer’s directions for removal and cleaning.

    Clean the microwave inside and out, including the handle and control panel. Wipe the refrigerator doors, handles, shelves, and drawers, removing expired food as you go. The inside of the refrigerator does not need an aggressive cleaner, and a damp cloth with a mild food-safe product is often enough.

    Give special attention to the sink, faucet base, garbage disposal splash guard, and backsplash. Scrub the cooktop and the area behind the knobs, then wipe cabinet fronts and drawer pulls. Finish by cleaning the dishwasher filter if your model allows it and sweeping or vacuuming beneath movable appliances.

    Grease, baked-on spills, and oven interiors may require more time than a standard deep clean. If the oven has a self-clean feature, use it only according to the manufacturer’s instructions and allow for ventilation. For many households, this is one of the tasks that makes professional deep cleaning especially worthwhile.

    Bathroom Deep Cleaning Checklist

    Bathrooms reward focused effort. Begin by applying cleaner to the shower, tub, toilet bowl, and sink so it can work while you dust the vent cover, light fixture, and upper corners. Then clean mirrors and wipe the vanity, faucets, handles, and cabinet fronts.

    Scrub shower walls, grout lines, the tub, and glass doors. Soap scum often needs a little dwell time and a nonabrasive scrubber. Hard-water deposits are common in Southern California, but harsh or acidic products are not appropriate for every tile, stone, or fixture. When in doubt, test a small hidden area first.

    Do not skip the less visible points: the toilet base, the area behind the toilet, the wastebasket, and the floor edges. Replace towels, wipe product bottles before returning them to the counter, and mop last. A clean bathroom feels noticeably calmer when the surfaces are clear as well as sanitized.

    Bedrooms and Living Areas

    In bedrooms, strip the beds and wash linens while you clean. Dust nightstands, lamps, headboards, picture frames, and window treatments. Vacuum mattresses if desired, then vacuum under the bed and along wall edges before putting on fresh sheets.

    Living rooms and family rooms tend to collect fingerprints, snack crumbs, pet hair, and dust around electronics. Use a dry microfiber cloth on television screens and follow the manufacturer’s guidance for monitors and remotes. Vacuum sofas and chairs carefully, including beneath cushions, and wipe coffee tables, end tables, and frequently handled décor.

    For home offices, clear the desk before wiping it down. Dust around cables, clean the chair base, empty the trash, and sanitize high-touch items such as keyboards, phones, and drawer handles. Avoid spraying cleaner directly onto electronics.

    Laundry Room, Entryway, and Often-Missed Spots

    The small utility spaces matter because they influence how quickly dirt travels through the rest of the home. Wipe the washing machine exterior, clean the detergent drawer if applicable, and remove lint from the dryer filter after every load. Periodically, clean around and behind the machines if they can be moved safely.

    At the entryway, clean the inside of the front door, wipe handles and switch plates, shake out mats, and vacuum the area thoroughly. It is one of the first places guests notice and one of the main routes for outdoor dust and sand.

    A few overlooked tasks can make a deep clean feel complete: wipe trash cans inside and out, dust plant leaves, clean pet bowls and feeding mats, sanitize reusable water bottles, and vacuum closet floors. You may not need to do all of these every time. The right frequency depends on pets, children, allergies, cooking habits, and how often people are home.

    When to Schedule Professional Deep Cleaning

    A DIY deep clean works well when you can spread tasks across several days and the home is generally maintained. Professional help makes more sense before guests arrive, after a busy season, when allergies are acting up, or when the kitchen and bathrooms need more attention than your schedule allows.

    It is also a practical choice for move-ins, move-outs, rental turnovers, and pre-sale preparation. Those situations have a deadline, and details such as appliance interiors, cabinet shelves, baseboards, and floor edges can affect how ready a property feels. A licensed, insured team with background-checked cleaners provides reassurance when you need the work handled consistently and on schedule.

    SRS Cleaning Services helps homeowners, renters, and property professionals create that fresh-start feeling without giving up their weekend. Whether you tackle this checklist one room at a time or schedule help for the full reset, the goal is simple: a cleaner home that gives you more room to relax.

  • Entire House Cleaning Checklist That Saves Time

    Entire House Cleaning Checklist That Saves Time

    A home rarely feels messy because of one dramatic problem. More often, it is the small things that pile up: fingerprints on the fridge, crumbs under the table, laundry waiting in a chair, and a bathroom counter that never quite gets cleared. A practical entire house cleaning checklist gives those jobs a place, so cleaning feels manageable instead of endless.

    The goal is not to make every room look staged. It is to create a home that feels comfortable, cared for, and easier to live in. Use this checklist for a weekly reset, a deeper seasonal clean, or as a starting point before a move, guests, or a busy week ahead.

    Start With a Simple Plan

    Before bringing out supplies, decide what kind of clean your home needs. A maintenance clean focuses on visible dirt, floors, bathrooms, and high-touch surfaces. A deep clean reaches the spots that are easy to postpone, such as baseboards, cabinet fronts, light fixtures, and behind furniture.

    Trying to deep clean every room in one afternoon is where many plans fall apart. If time is limited, start with the kitchen, bathrooms, and main living areas. Those spaces affect how the whole house feels. Bedrooms and detail work can follow when you have more time.

    Work from high to low in each room. Dust ceilings, vents, and shelves before wiping furniture, then save vacuuming or mopping for last. This prevents you from cleaning the same surface twice. Carry one caddy with your basics: microfiber cloths, a multipurpose cleaner appropriate for your surfaces, glass cleaner, a bathroom cleaner, a scrub brush, a vacuum, and a mop.

    Entire House Cleaning Checklist: Every Room

    Entryway and hallways

    Your entry sets the tone when you walk in the door. It also collects outdoor dust, shoes, bags, and mail faster than almost any other space.

    • Put away shoes, coats, bags, and loose items.
    • Wipe the front door, handles, light switches, and nearby trim.
    • Dust console tables, frames, vents, and ledges.
    • Shake out or vacuum mats and rugs.
    • Vacuum or sweep the floor, paying attention to corners.
    • Mop hard flooring as needed.

    If the entryway is constantly cluttered, the cleaning issue may actually be a storage issue. A basket for shoes or a small tray for keys can make the next reset much quicker.

    Living room and family room

    Living spaces should feel easy to settle into, not like another project waiting for you. Begin by returning items to their proper rooms, then straighten blankets and fluff cushions before cleaning surfaces.

    • Dust furniture, shelves, lamps, window sills, and décor.
    • Wipe coffee tables, side tables, remotes, and frequently touched switches.
    • Spot-clean upholstery according to the manufacturer’s care instructions.
    • Clean glass doors, mirrors, and television screens with the right cloth and product.
    • Vacuum rugs, upholstered furniture, and beneath movable cushions.
    • Vacuum or mop floors, including under furniture where accessible.

    For homes with pets, run a lint roller or upholstery vacuum over sofas and chairs weekly. Pet hair is easier to manage when it is removed regularly rather than allowed to build up in fabric.

    Kitchen

    The kitchen deserves focused attention because it is used throughout the day. Start by clearing counters and loading or emptying the dishwasher. Once surfaces are open, you can clean more thoroughly and see what actually needs attention.

    • Wipe countertops, backsplash, cabinet handles, and appliance exteriors.
    • Clean the sink, faucet, drain area, and garbage disposal splash guard.
    • Wipe the stovetop and control knobs after they have cooled.
    • Clean inside the microwave and wipe the refrigerator handles and exterior.
    • Empty crumbs from the toaster and wipe small appliances.
    • Take out trash and recycling, then wipe the bins if needed.
    • Sweep carefully under the table, along baseboards, and around the refrigerator.
    • Mop the floor, beginning at the farthest point and working toward the exit.

    A weekly clean does not always require emptying the refrigerator or scrubbing the oven interior. Those are better monthly or seasonal tasks unless there is a spill, odor, or upcoming move. Addressing fresh grease and food splatters promptly, however, makes the deeper work much easier.

    Bathrooms

    Bathrooms can look untidy quickly, but a consistent routine keeps them from becoming a major job. Let your cleaner sit on the tub, shower, and toilet surfaces for the recommended time while you wipe counters and mirrors.

    • Remove towels, bath mats, empty bottles, and personal items from surfaces.
    • Clean and disinfect the toilet, including the seat, lid, flush handle, and exterior.
    • Scrub the shower, tub, fixtures, and shower door or curtain area.
    • Wipe the vanity, sink, faucet, mirror, cabinet fronts, and light switches.
    • Empty trash and replace the liner if needed.
    • Vacuum hair and dust from corners, then mop the floor.
    • Put out fresh towels and restock toilet paper and soap.

    Use products suited to the material you are cleaning. Natural stone, for example, can be damaged by acidic cleaners. If hard-water buildup is common in your Orange County home, regular attention to faucets and shower glass is usually easier than waiting for heavy mineral deposits to form.

    Bedrooms

    A clean bedroom supports a calmer end to the day. You do not need to organize every drawer during a weekly clean. Focus first on laundry, surfaces, bedding, and floors.

    • Make the bed with fresh sheets when it is laundry day.
    • Put clothing away, place dirty items in the hamper, and clear nightstands.
    • Dust headboards, dressers, lamps, blinds, and window sills.
    • Wipe nightstands, drawer pulls, switches, and door handles.
    • Empty small trash cans and remove cups or dishes.
    • Vacuum rugs, carpet, and under the bed where possible.
    • Mop hard floors if applicable.

    For children’s rooms, a quick toy pickup before cleaning is usually enough for routine maintenance. Save detailed toy sorting for a separate session. Combining decluttering, organizing, and cleaning into one task can turn a 20-minute room reset into an exhausting afternoon.

    Laundry room, home office, and utility areas

    These rooms are often small, but they hold dust, paper clutter, and overlooked spills. Clean them regularly enough that they remain useful rather than becoming storage zones.

    • Wipe washer and dryer exteriors, shelves, and work surfaces.
    • Clear lint from the dryer filter after every load and clean the surrounding area.
    • Dust desks, monitors, lamps, and accessible cords in the home office.
    • Sort loose papers, recycle what is no longer needed, and return supplies to storage.
    • Wipe handles, switches, and cabinet fronts.
    • Vacuum or sweep floors, then mop as appropriate.

    Do the Details Monthly or Seasonally

    An entire house cleaning checklist works best when it separates routine care from occasional tasks. Trying to do every detail every week creates pressure without adding much benefit. Choose a few deeper tasks each month, or schedule them before holidays, a move, or a special event.

    • Dust ceiling fans, vents, and light fixtures, then use the material-specific steps in this guide to cleaning blinds without damaging the finish.
    • Clean baseboards with a dry-first method, then wipe doors, door frames, and compatible wall marks.
    • Clean inside the refrigerator, pantry, oven, and dishwasher filter.
    • Vacuum mattresses and rotate them if recommended by the manufacturer.
    • Wash shower curtains, bath mats, throw blankets, and pillow covers.
    • Move lighter furniture to vacuum or mop beneath it.
    • Clean interior windows and sliding door tracks.
    • Check under sinks and around toilets for leaks or moisture concerns.

    Some jobs are best left to a professional, particularly when time is short or the home needs a full reset. Move-in and move-out cleaning, post-renovation dust, pre-sale preparation, and long-delayed deep cleaning can involve more labor than most households can comfortably fit into a weekend.

    Keep the Checklist Realistic

    The best schedule is the one you can maintain. A family with young children, pets, or frequent visitors may need kitchen and bathroom touch-ups several times a week. A single professional who travels often may prefer a more thorough clean every other week. There is no one right frequency.

    Consider dividing work by time rather than by perfection. Spend 15 minutes each evening resetting the kitchen and living room, then choose one room for a more thorough weekly clean. This approach keeps the home functional without giving up an entire day off.

    When the list becomes another source of stress, dependable help can be a practical choice. SRS Cleaning Services provides recurring and one-time cleaning for Orange County homes, with clear communication and the peace of mind that comes from a professionally managed visit.

    A clean home does not need to happen all at once. Start with the room that will make tomorrow easier, complete the next few tasks with care, and let a simple routine create the calm you want to come home to.