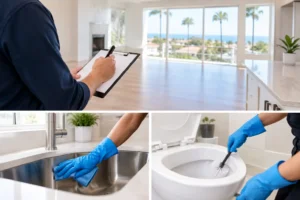
A stained oven door, a greasy range hood, or dust hiding along baseboards can turn the final days of a lease into a stressful scramble. Moveout deposit cleaning is the detailed cleaning renters do before returning the keys, with the goal of leaving the home in the condition required by the lease and documenting its condition clearly. It cannot guarantee a deposit return, since deposits can involve wear, repairs, lease terms, and a landlord’s inspection, but it can help you avoid leaving preventable cleaning issues behind.
Start With Your Lease and Move-In Records
Before buying supplies or setting aside a cleaning day, review your lease, move-in inspection form, and any photos you took when you first moved in. Look for language about carpet care, appliances, blinds, pet-related cleaning, wall marks, and required professional services.
Your responsibility is usually to remove the dirt, residue, and mess that built up during your tenancy. Normal wear is different. A slightly faded curtain, aged caulk, or a worn traffic path may not be something cleaning can fix. Do not try to disguise damage with a rushed paint touch-up, adhesive, or harsh product. A mismatched repair can create a more noticeable issue during inspection.
Take current photos before you clean, then take another set after the home is empty and finished. Photograph rooms from wide angles, along with close-ups of appliances, sinks, floors, cabinets, and any pre-existing damage. Keep copies of your communication and receipts for any services you arrange.
What Moveout Deposit Cleaning Should Cover
A useful approach is to clean from the highest surfaces down and from the least-used rooms toward the kitchen and bathrooms. Finish one room fully before moving on. This keeps you from re-dusting areas or overlooking details when boxes, moving supplies, and furniture are still in the way.
Kitchen: Focus on Grease and Food Residue
The kitchen often takes the longest because residue can be both visible and hidden. Empty every cabinet and drawer, then vacuum or wipe out crumbs before cleaning the interiors. Wipe cabinet fronts, handles, backsplash, counters, sink, faucet, and the space around appliances.
Clean the oven according to the manufacturer’s instructions. If the oven has a self-cleaning feature, use it only if the manufacturer permits it and you have enough time to ventilate and allow the appliance to cool completely. Grease on the cooktop, burner grates, range hood, and hood filter may need extra attention. Avoid using abrasive pads or harsh powders on delicate finishes, glass cooktops, stainless steel, or coated surfaces.
Pull out freestanding appliances only when it is safe to do so. The narrow floor area beside and beneath a refrigerator or stove is easy to miss, but it is often checked. Clean the refrigerator after it is emptied and unplugged only if the appliance instructions allow it. Dry it thoroughly so odors and moisture are not trapped inside.
Bathrooms: Address Mineral Buildup Carefully
Bathrooms need more than a quick wipe. Clean the toilet inside and out, including the base, seat hinges, and surrounding floor. Wipe mirrors, vanity drawers, cabinet fronts, light switches, towel bars, shower walls, tub surfaces, faucets, and drains.
Hard-water spots are common in many Orange County rentals, especially around shower doors and faucets. Use a cleaner suitable for the specific surface and follow the product label. Natural stone, painted surfaces, specialty coatings, and some fixture finishes can be damaged by acidic or abrasive cleaners. Never mix cleaning products, especially bleach with vinegar, ammonia, or other cleaners.
If caulk is stained, cracked, or pulling away, cleaning may not solve the problem. Treat that as a maintenance question for the property manager rather than scraping or applying a quick cover-up without permission.
Bedrooms and Living Areas: Check the Edges
Once furniture is out, the details become much easier to see. Dust ceiling fan blades, vents, blinds, window sills, baseboards, door frames, closet shelves, and light fixtures as appropriate. Wipe switches and door handles, then vacuum carefully along walls and in closet corners.
For marks on painted walls, start gently with a soft microfiber cloth and a small amount of surface-safe cleaner. Test an inconspicuous area first. Aggressive scrubbing can leave a shiny patch, remove paint, or create an obvious difference in texture.
Clean windows only if they are part of your lease requirements and can be reached safely. Do not lean out of upper-story windows or use methods that could damage screens, tracks, tint, or glass coatings.
Floors, Carpets, and Outdoor Areas
Vacuum hard floors before mopping so loose grit does not scratch the surface. Use the right amount of moisture for the flooring type. Excess water can damage wood, laminate, and some vinyl plank floors, while the wrong cleaner can leave a cloudy film.
Carpets deserve a close inspection in daylight. Vacuum slowly in multiple directions, check edges and closets, and spot-treat only with a product approved for the carpet. Test spot products in a hidden area first. If your lease requires professional carpet cleaning, follow its specific instructions and retain the receipt.
If your rental includes a balcony, patio, garage, or entry area, remove personal belongings and sweep out loose debris. Follow building rules before rinsing surfaces or using any cleaning product outdoors.
A Practical Final Walk-Through
The best moveout cleaning is not just thorough. It is easy to inspect. After the home is empty, walk through it as if you are seeing it for the first time. Turn on lights, open cabinets, stand at each doorway, and look at surfaces from different angles.
Pay special attention to the areas people often miss:
- Cabinet tops, drawer interiors, and shelves
- The floor behind toilets and beside appliances
- Inside the microwave, dishwasher, and refrigerator
- Blinds, window tracks, and sliding-door tracks
- Closet floors, baseboards, and door frames
- Trash bins, mailbox keys, garage remotes, and any belongings left behind
Finish by taking out trash, replacing any burnt-out bulbs only if permitted by your lease, and checking that all personal items are removed. A nearly empty cabinet or one forgotten charger can complicate an otherwise clean turnover.
When DIY Cleaning Is Enough and When to Call for Help
You can often handle moveout cleaning yourself when the home has been regularly maintained, you have a full day or more after moving out, and the work is primarily routine dust, kitchen residue, bathroom buildup, and floor cleaning.
Professional help can make sense when your move is on a tight timeline, the home is larger than you can reasonably finish alone, or the kitchen and bathrooms need concentrated detail work. It can also be useful when you are coordinating a rental turnover from out of town or need a clear cleaning scope before the appointment.
Cleaning has limits. Deep cleaning can remove buildup and improve presentation, but it does not repair broken blinds, damaged flooring, holes in walls, persistent odor sources, or appliance problems. If you see an issue that looks like damage or a maintenance concern, document it and contact the property manager rather than assuming cleaning will resolve it.
Make the Last Day Less Stressful
Do not leave the entire job for moving day. Pack a small cleaning kit separately, schedule time after furniture is removed, and give yourself daylight for the final inspection. If you hire help, clear the home as much as possible first and communicate any lease requirements, areas of concern, parking details, and deadline. A confirmed scope helps everyone focus on the work that matters most.
SRS Cleaning Services helps renters and property managers across Orange County prepare homes for the next step with respectful care and clear communication. If you would rather spend your last day handling keys, records, and the move itself, request a quote for move-out cleaning and let us help make the home feel ready to hand over.